Lights for Detolf

Collector Freaks Forum

Help Support Collector Freaks Forum:

This site may earn a commission from merchant affiliate links, including eBay, Amazon, and others.
Clean display!
You used the LED ribbon method described by Pixelpiper? If so, how did you assembled the setup?

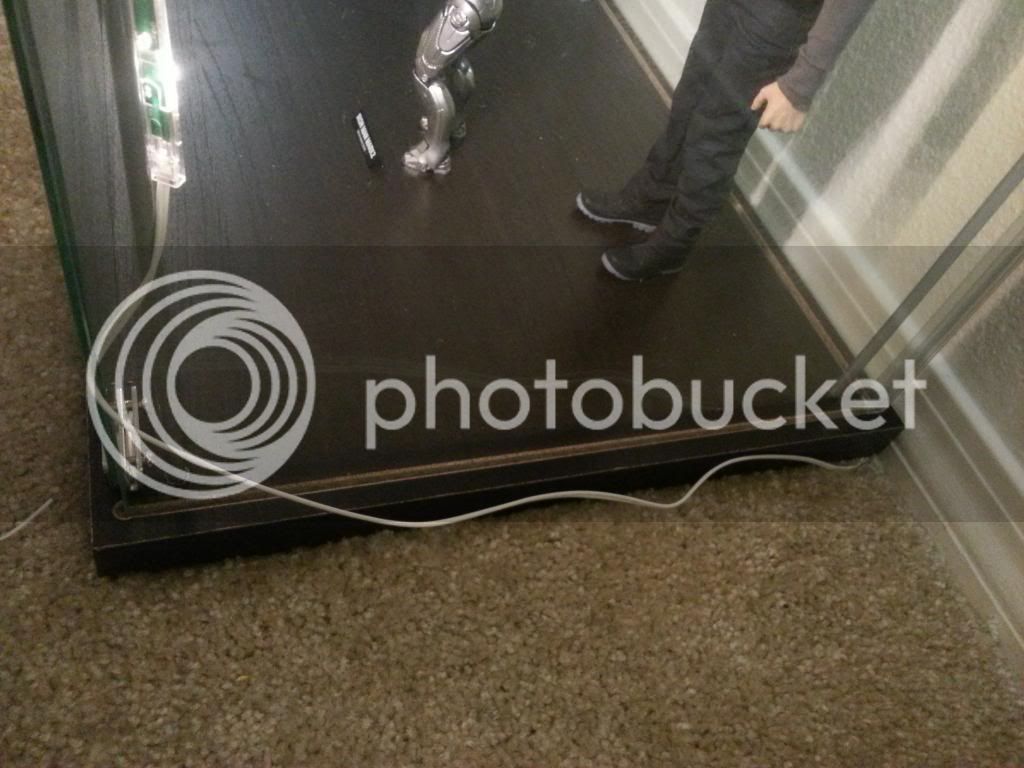
I basically ran the wires from the back metal poles from bottom up. I also drilled a hole at the bottom of the detolf to for power supply. See below, you can sort of see how I wired it up.


b6aj.jpg
[/URL]
 
I'm just making some diagrams now for LED ribbon lighting which I hope are useful for future reference. Really basic illustrations, but show a few concepts that you can take to the next level with some imagination.

EDIT: I was going to upload the images (PNG) to the board, but the board software is configured to completely mangle any uploaded images to the point where they're useless, so that's not going to work. I'll see if I can throw them up on my photo bucket account as I don't want them cluttering my Flickr photo stream as they're not photos/scans.
 
Last edited:
Re: IKEA Detolf + Lighting

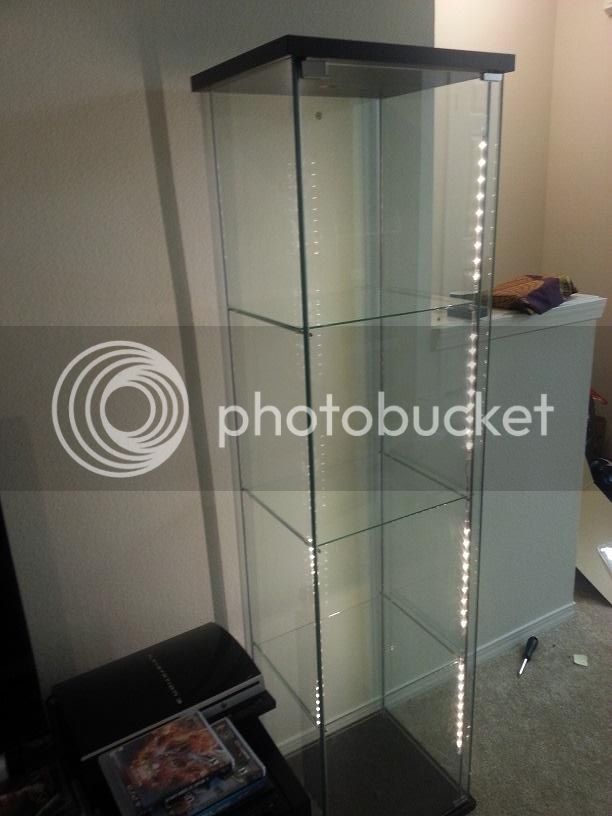
I picked up an IKEA Detolf last night and I am very happy with it.

For lighting, I used the "LED 4-piece light strip set"
They come with double face tape pieces so they're easy to set up.

IKEA Detolf cabinet:
https://www.ikea.com/us/en/catalog/products/10119206/#/10119206

LED Lights:
https://www.ikea.com/us/en/catalog/products/20119418/


8322a811-efe9-44ce-8087-5853f2bb078e.jpg

I moved your post into the main Detolf lighting thread. Thanks for sharing, it looks really good.

:hi5:
 
Re: IKEA Detolf + Lighting

I picked up an IKEA Detolf last night and I am very happy with it.

For lighting, I used the "LED 4-piece light strip set"
They come with double face tape pieces so they're easy to set up.

IKEA Detolf cabinet:
https://www.ikea.com/us/en/catalog/products/10119206/#/10119206

LED Lights:
https://www.ikea.com/us/en/catalog/products/20119418/

Could you take more pictures of your set up? Your wires look pretty well hidden. I need to go back into my case and organize the wires better but I've been lazy.
 
Here's a shot of one of my "wireless" LED installs on the front edge of a glass shelf on the Detolf. The bare copper wire end is where the power comes from the Detolf's rail.


And as you can see, even though I've created a small lip to carry and conceal the LED strip segment, you can still somewhat see the glowing edges because the cabinet is raised up pretty high. I'll probably have to add edging similar to the big cabinet which is pictured below. There's also an annoying reflection off the back of the cabinet since it's glass, so I'll likely cover the back in fabric soon.


This is my Kenner vintage shelf inside my big glass cabinet. You can see that I've now covered the edge of the two glass shelves which hides the LED strips from every angle in the room, including sitting at my desk. The material used is a pre-glued edging strip that you use an clothes iron to affix - it's intended to finish the edge of laminated particle board - it sticks amazingly well to the glass.


Awesome reply pixelpiper! This should also be up on the first page of this thread and all the threads talking about lightning! :clap
Very helpfull/usefull

Is there anyway of connecting the wires to the strips without soldering? If so, how?
And how do I connect the wire to the 12vdc power supply?


Also, the "daisy-chained" connection is the assembling method used by aau10?
Like this:

aau10 said:

Again, awesome diagrams! Thanks!
 
Re: IKEA Detolf + Lighting

Could you take more pictures of your set up? Your wires look pretty well hidden. I need to go back into my case and organize the wires better but I've been lazy.


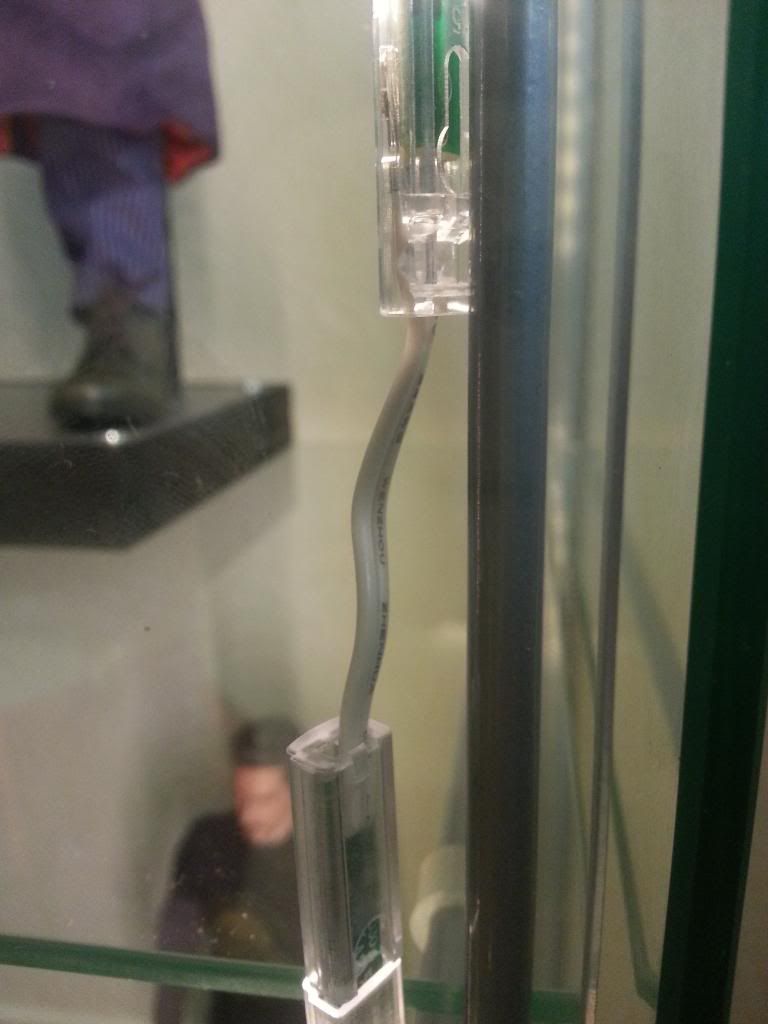
Actually, there are not much wires to hide.


20130904_192450.jpg

As you can see, the lights connect together with very short wires.


20130904_192419.jpg
 
Is there anyway of connecting the wires to the strips without soldering? If so, how?

The various vendors also sell clips for joining segments of LED ribbon, plus wire+clip leads which you can clip to the strip and then the wires you can wire-nut to other wires.

And how do I connect the wire to the 12vdc power supply?

Wire nuts, solder, twist together and tape, clip for ribbon with a DC jack on it if your supply has a DC jack, etc...

Also, the "daisy-chained" connection is the assembling method used by aau10?

Yes it is. The wire connections on his example go up, forward on one side, across with LED, back on the other side, repeat.
 
Wow just came across this and if I am not mistaken this set is a huge deception and rip off
https://www.ebay.com/itm/5M-3528-SM...649471?pt=US_Car_Lighting&hash=item232e4cefff
the LEDs are indeed RGB but the are not multicolor LEDs but actually individually placed red, green and blue LEDs!!! Can't even ask the seller a question and he is conveniently absent while his product is being promoted through eBay email. Oh wow and shipping is rip off too!
So make sure to read and check all pictures and test buy from a seller first
The one I have shopped so far seems fine
https://stores.ebay.ca/Hkesupplier
 
Last edited:
Btw pixel. Since you did the drawings and guides to LEDs I recommend you just start a LED specific thread for all to see and to reference to in the future. This certainly deserves its own thread as its a resource any collector could use


:borg "Resistance is Futile"
 
Nice one mate! :clap

Is that a "normal" Joker figure or a specially made figure to be posed just like the scene in the movie? 'Cause if it's a "normal" Joker figure that was a great idea, since the lunatic face/smile is almost exactly like the one he does in the movie and the hands too!

Btw, when I reply to a post I get a message saying that the reply will only be visible after being moderated. I don't find any information about that on the FAQ section.
Is it normal and will it change as I become more active in the forum?

That is simply the DX-11 with a custom head from AndyHibbs. Just had to play around with him a little bit to get that pose. Hanging him inside of an enclosed box was the hard part.
 
I did a test of soldering for the first time and had no issues. I see the hardest part being measuring the wire correctly for the connections.

Thank for all your help pixel!!:duff
 
I've pre-tinned the tip of the soldering iron per the instructions. Do I need to coat the wires with solder? I put a small dab of solder on the light first then heated it back up when i placed the wire on it . The connection holds and works. I was then going to cover the connection with heat shrink tubing.
 
Back
Top