You are using an out of date browser. It may not display this or other websites correctly.
You should upgrade or use an alternative browser.
You should upgrade or use an alternative browser.
SSC Jason Voorhees Sixth Scale Figure
- Thread starter BurningRage
- Start date

Help Support Collector Freaks Forum:
This site may earn a commission from merchant affiliate
links, including eBay, Amazon, and others.
Big Dee Pr
Freaked Out
I took a stab at building a dock. I think it came out not great, but okay. I made my narrower (5") for shelf space, else it would have been wider for a proper look.
View attachment 343245
View attachment 343246
View attachment 343247
View attachment 343248
I hate that I am not one bit handy lol... cool **** brother...
REDxSHADOWx90
Freaked Out
I just recieved mine, and I have the dreaded foot issue. Like some of you, it fell off taking him out of the box. I can get it to snap back on, but as soon as I adjust it, it pops back off. Right now, he's just kinda resting on it. lol Is there a fix (if I can't get help from SS)?
Also, there is a pretty good neck gap from the top of his neck to his head. He only looks right if you look at him straight on. Is this normal?View attachment 342180
My sculpt seats very loosely on the neck peg so it goes really flush. I have seen in an earlier post in this thread where a collector removed the neck peg and put sticky-tac inside the sculpt and it got rid of any neck gap.
- Joined
- May 2, 2017
- Messages
- 2,116
- Reaction score
- 351
My sculpt seats very loosely on the neck peg so it goes really flush. I have seen in an earlier post in this thread where a collector removed the neck peg and put sticky-tac inside the sculpt and it got rid of any neck gap.
Thanks for the tip! From other recommendations, I used a few q-tip ends and stuffed them around his neck opening, and it filled it out pretty good.
And thanks for the complements on the dock guys. It's super easy though. I went to Hobby Lobby for the wood, and used a $4 necklace from Walmart for the chain. An xacto, some paint and about an hour of your time, and you've got a dock. I'll be more than glad to walk anyone through it if you want.
galactiboy
OT Preferist
Please post some of the process... I've considered trying to make similar floor boards or a dock like that.
You did some excellent work on it
You did some excellent work on it

JacktheRipper
Super Freak
- Joined
- Jan 25, 2008
- Messages
- 5,152
- Reaction score
- 1,525
I think that dock came out fantastic. I know space was the reason for the size, but it needs to be larger. It just looks under scale.

$14.99
DC Comics, 12-Inch Superman Action Figure, Collectible Kids Toys for Boys and Girls
Bopster USA Inc
- Joined
- May 2, 2017
- Messages
- 2,116
- Reaction score
- 351
Please post some of the process... I've considered trying to make similar floor boards or a dock like that.
You did some excellent work on it
No problem. I kinda just grabbed stuff as I worked, but I'll do my best. Plus I’m at work, so I have to go off of memory. lol
Things you'll need-
1/2" dowel rod (you can go a bit thicker, but this is what I used-
https://www.hobbylobby.com/Crafts-H...ished-Wood/1/2"-Wood-Dowel-Value-Pack/p/24446
For the wood planks (slats), I just cut up some balsa wood I had laying around, but you can get something like this and cut it up-
https://www.hobbylobby.com/Crafts-H...ood/Basswood-Sheets---24"-x-8"-x-1/8"/p/93655
And for the bracing I found a thicker 3' length of balsa at the store, but I cant find it online. but it's basically whats in this-
https://www.hobbylobby.com/Crafts-H...d/Balsa-Basswood-Strip-Economy-Bag/p/80741966
For the chain I found a necklace at Walmart similar to this-
https://www.walmart.com/ip/DC-Comics-Superman-Oval-Shaker-Necklace/48174418
For weathering I just mixed paints, but you can use something like this-
https://www.ebay.com/itm/Tamiya-87081-Weathering-Stick-Mud-Free-Shipping-/401064476412
Xacto (or something to cut the wood with), a wood stain (I had some at the house, but you can get a small can at Lowes for a few bucks), Balsa glue (or wood glue..I just used CA glue) paint (I used Tamiya acrylics).
1. Figure out what size you want to make the dock. 8”x8” is about perfect, but I made my 5”x7” to save shelf room.
2. Cut the bracing the depth you want the dock (mine was 7”). I used a band saw, to make cuts easier.
3. Cut enough planks to run the length of your bracing, allowing for some spacing between them. Mine were cut ½” x 5”. These don’t have to be perfect. Symmetry takes away from a “real” look.
4. Take a dowel rod and score/cut it on both ends of 1 plank.
5. Cut the dowel rod pieces. I “think” my front 2 were about 5” long, and the back 2 were just over an inch.
6. Now that everything is cut, stain all the pieces. Again, you’re not looking to be uniform here. Go light and heavy on different pieces.
7. After the stain dries, it’s time to assemble. Using your glue of choice, set the 2 braces even and parallel to each other (the plank you cut the semi-circle into goes on 2nd from the front), and start gluing down the planks (a little glue goes a long way). Be sure to keep some spacing between them, and a slightly crooked one every now and then is all the better. I started with about 1/8” overhang on the first plank, and ended that way as well.
8. Flip it over, and glue the 2 short dowel rods to the inside of the bracing, up against the planks.
9. For the front 2, you’re going to want to level out the dock to the right height that was set by the rear 2, and glue them to the outside of the bracing. Again, it’s okay if they are slightly crooked.
10. Now comes the detailing. I took a pencil and made a slight indention with a twisting motion in the planks over top of the bracing to mimic nails.
11. Next I took apart the ends of the necklace off, and separated a link in the middle to have 2 pieces (I did it uneven, so one was longer than the other). I then painted it a gunmetal silver to get it to look like a galvanized chain.
12. I then wrapped the chains around the bottom of the dowel rods, up and around the top of the deck, attaching them with glue.
13. For final detailing I mixed some paint together till I got a flat dark mud tone. I went heavy with the pain around the base of all 4 dowels, fading as I went up. Sloppy is good. I then added some mud tones here and there over the dock and notched the front dowel to hold an axe or machete.
And bam! You’re done!
- Joined
- Sep 6, 2016
- Messages
- 194
- Reaction score
- 3
Custom 1/6 Scale F13 part 3 "Dock Kill" diorama (non lighted version) detolf fitted by Cains Crypt
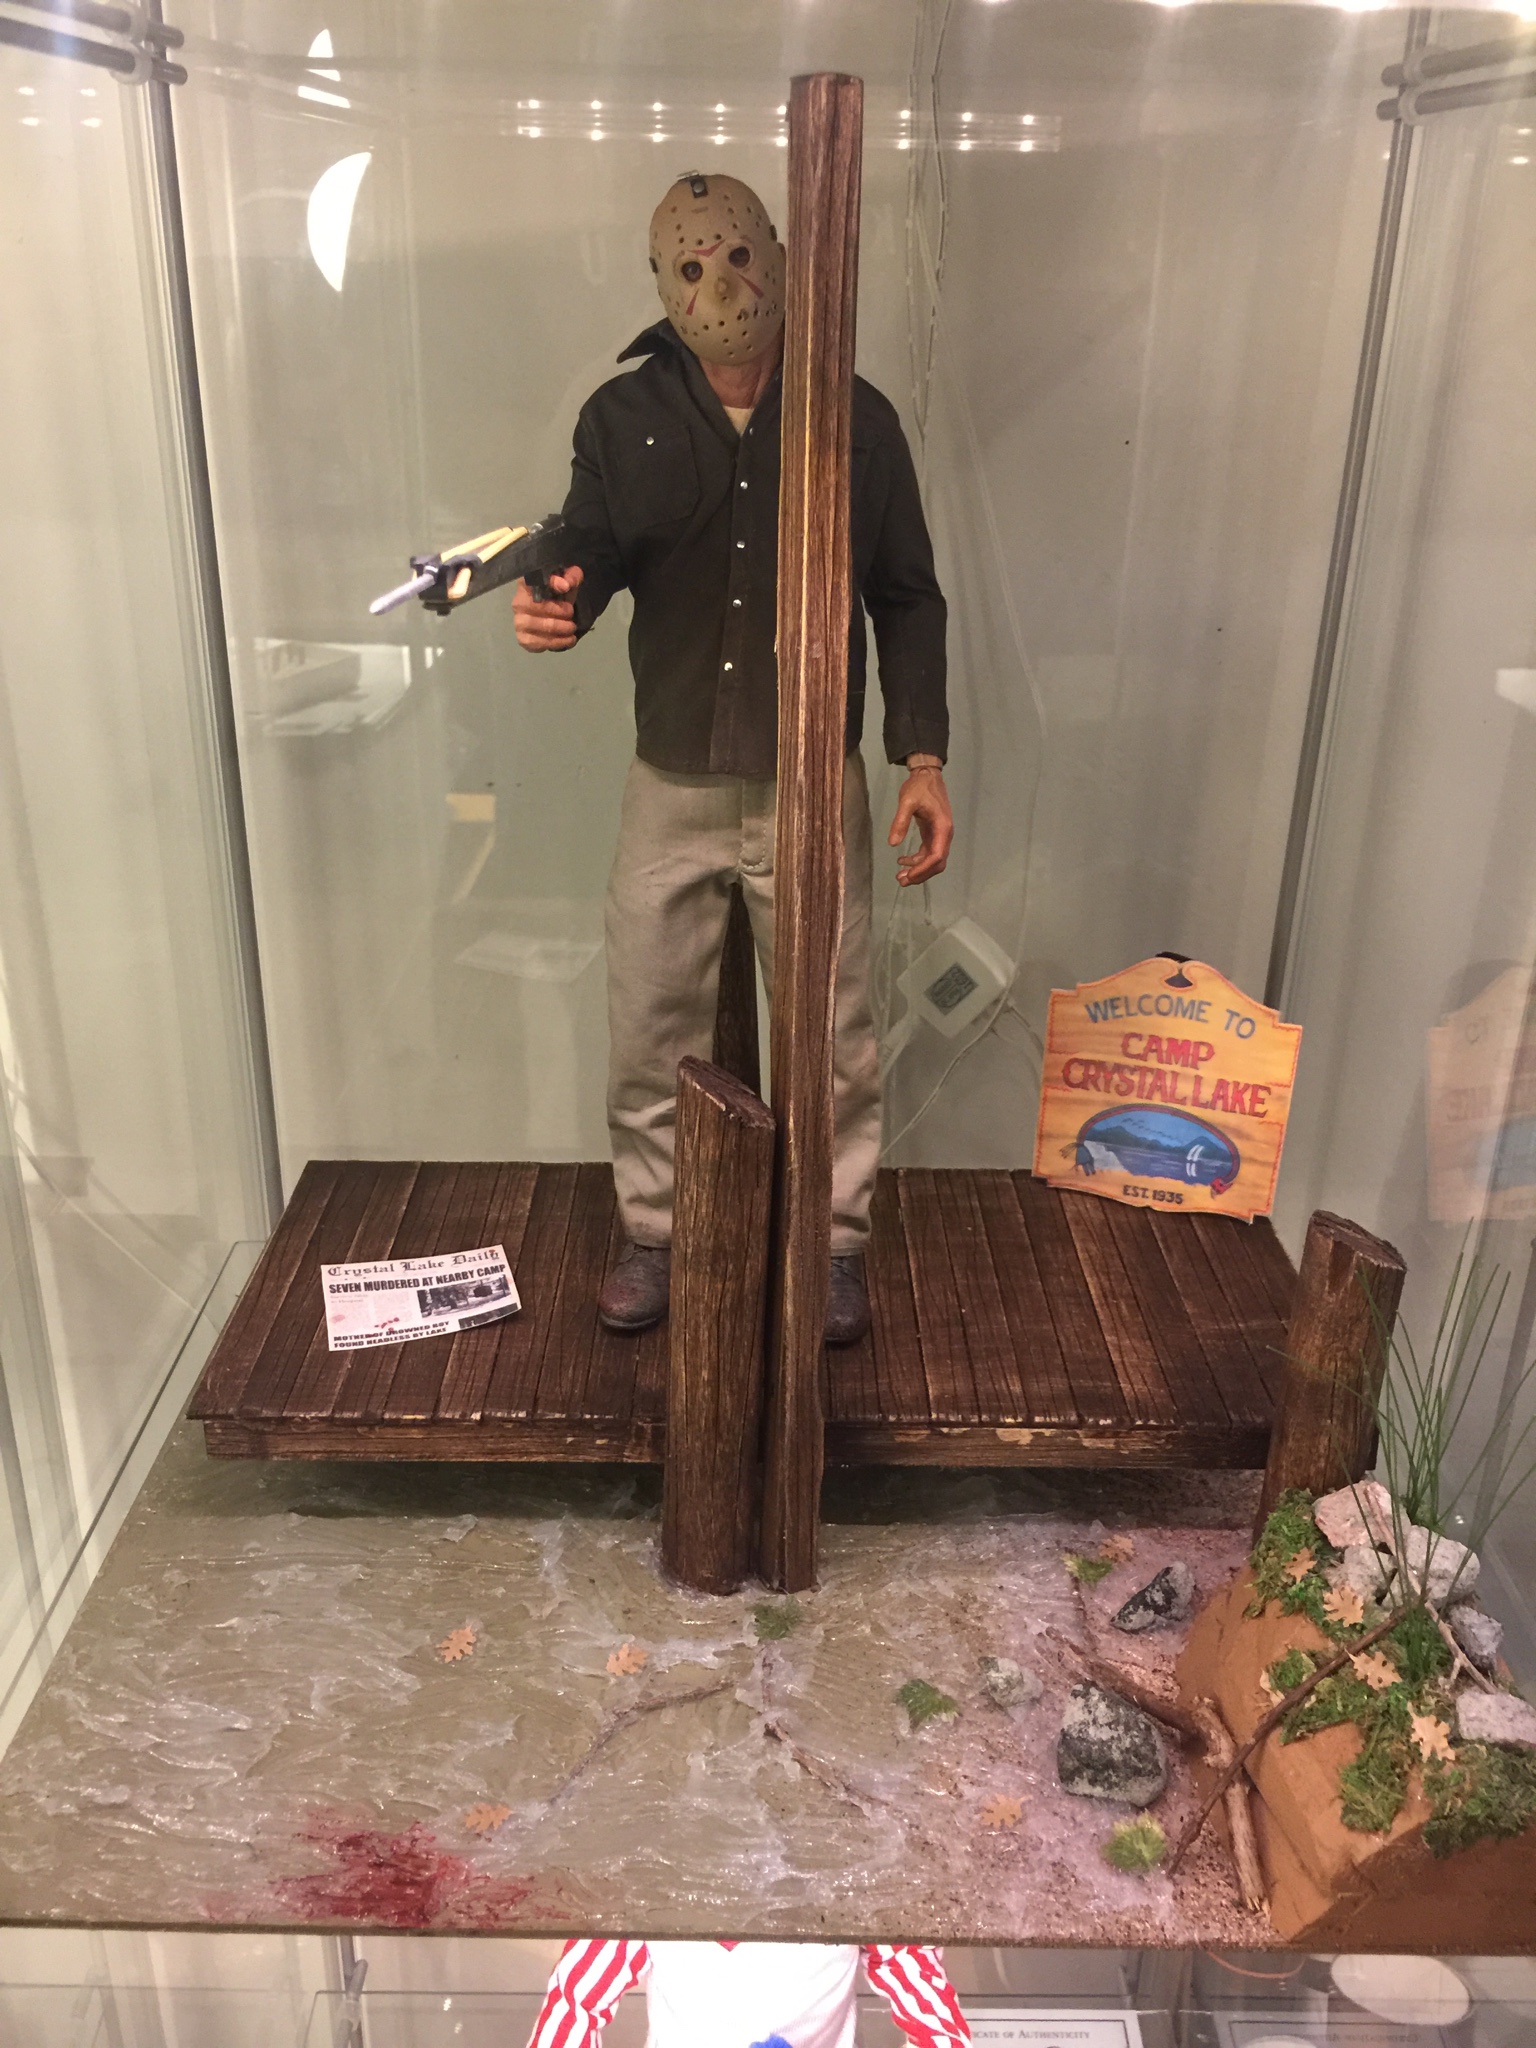


Sent from my iPhone using Tapatalk


Sent from my iPhone using Tapatalk
juicemaster310
Super Freak
Custom 1/6 Scale F13 part 3 "Dock Kill" diorama (non lighted version) detolf fitted by Cains Crypt


Sent from my iPhone using Tapatalk
That is a beautiful piece of art. Looks amazing brother.
galactiboy
OT Preferist
Thanks for the info... I've been toying with making a wooden floor for my Evil Dead figures; but I think a dock would be another fun project to try!
Done!
Nice tutorial, thanks! Someone rep this man!
Done!
- Joined
- Sep 6, 2016
- Messages
- 194
- Reaction score
- 3
That is a beautiful piece of art. Looks amazing brother.
Thank you
Sent from my iPhone using Tapatalk
powers1666
Freakalicious
Hey everyone, i know this is certainly off topic but please lwt me know what you think of my custom 7" jason from the 2009 reboot from neca. Now i know most people hated this movie but at least tell me if you think my paint and resculpting is any good or looks like that jason to you. Thank you in advance. Here is the link: https://www.flickr.com/photos/150665107@N08/?
- Joined
- Sep 6, 2016
- Messages
- 194
- Reaction score
- 3
Mask Re-shaped, gap fixed between head and neck/shoulders, buttons painted on shirt, body padded upper back/shoulders and abdomen, fully weathered to mimic how he looked near the end ( barn scene) flesh wound added to left hand and above right knee.
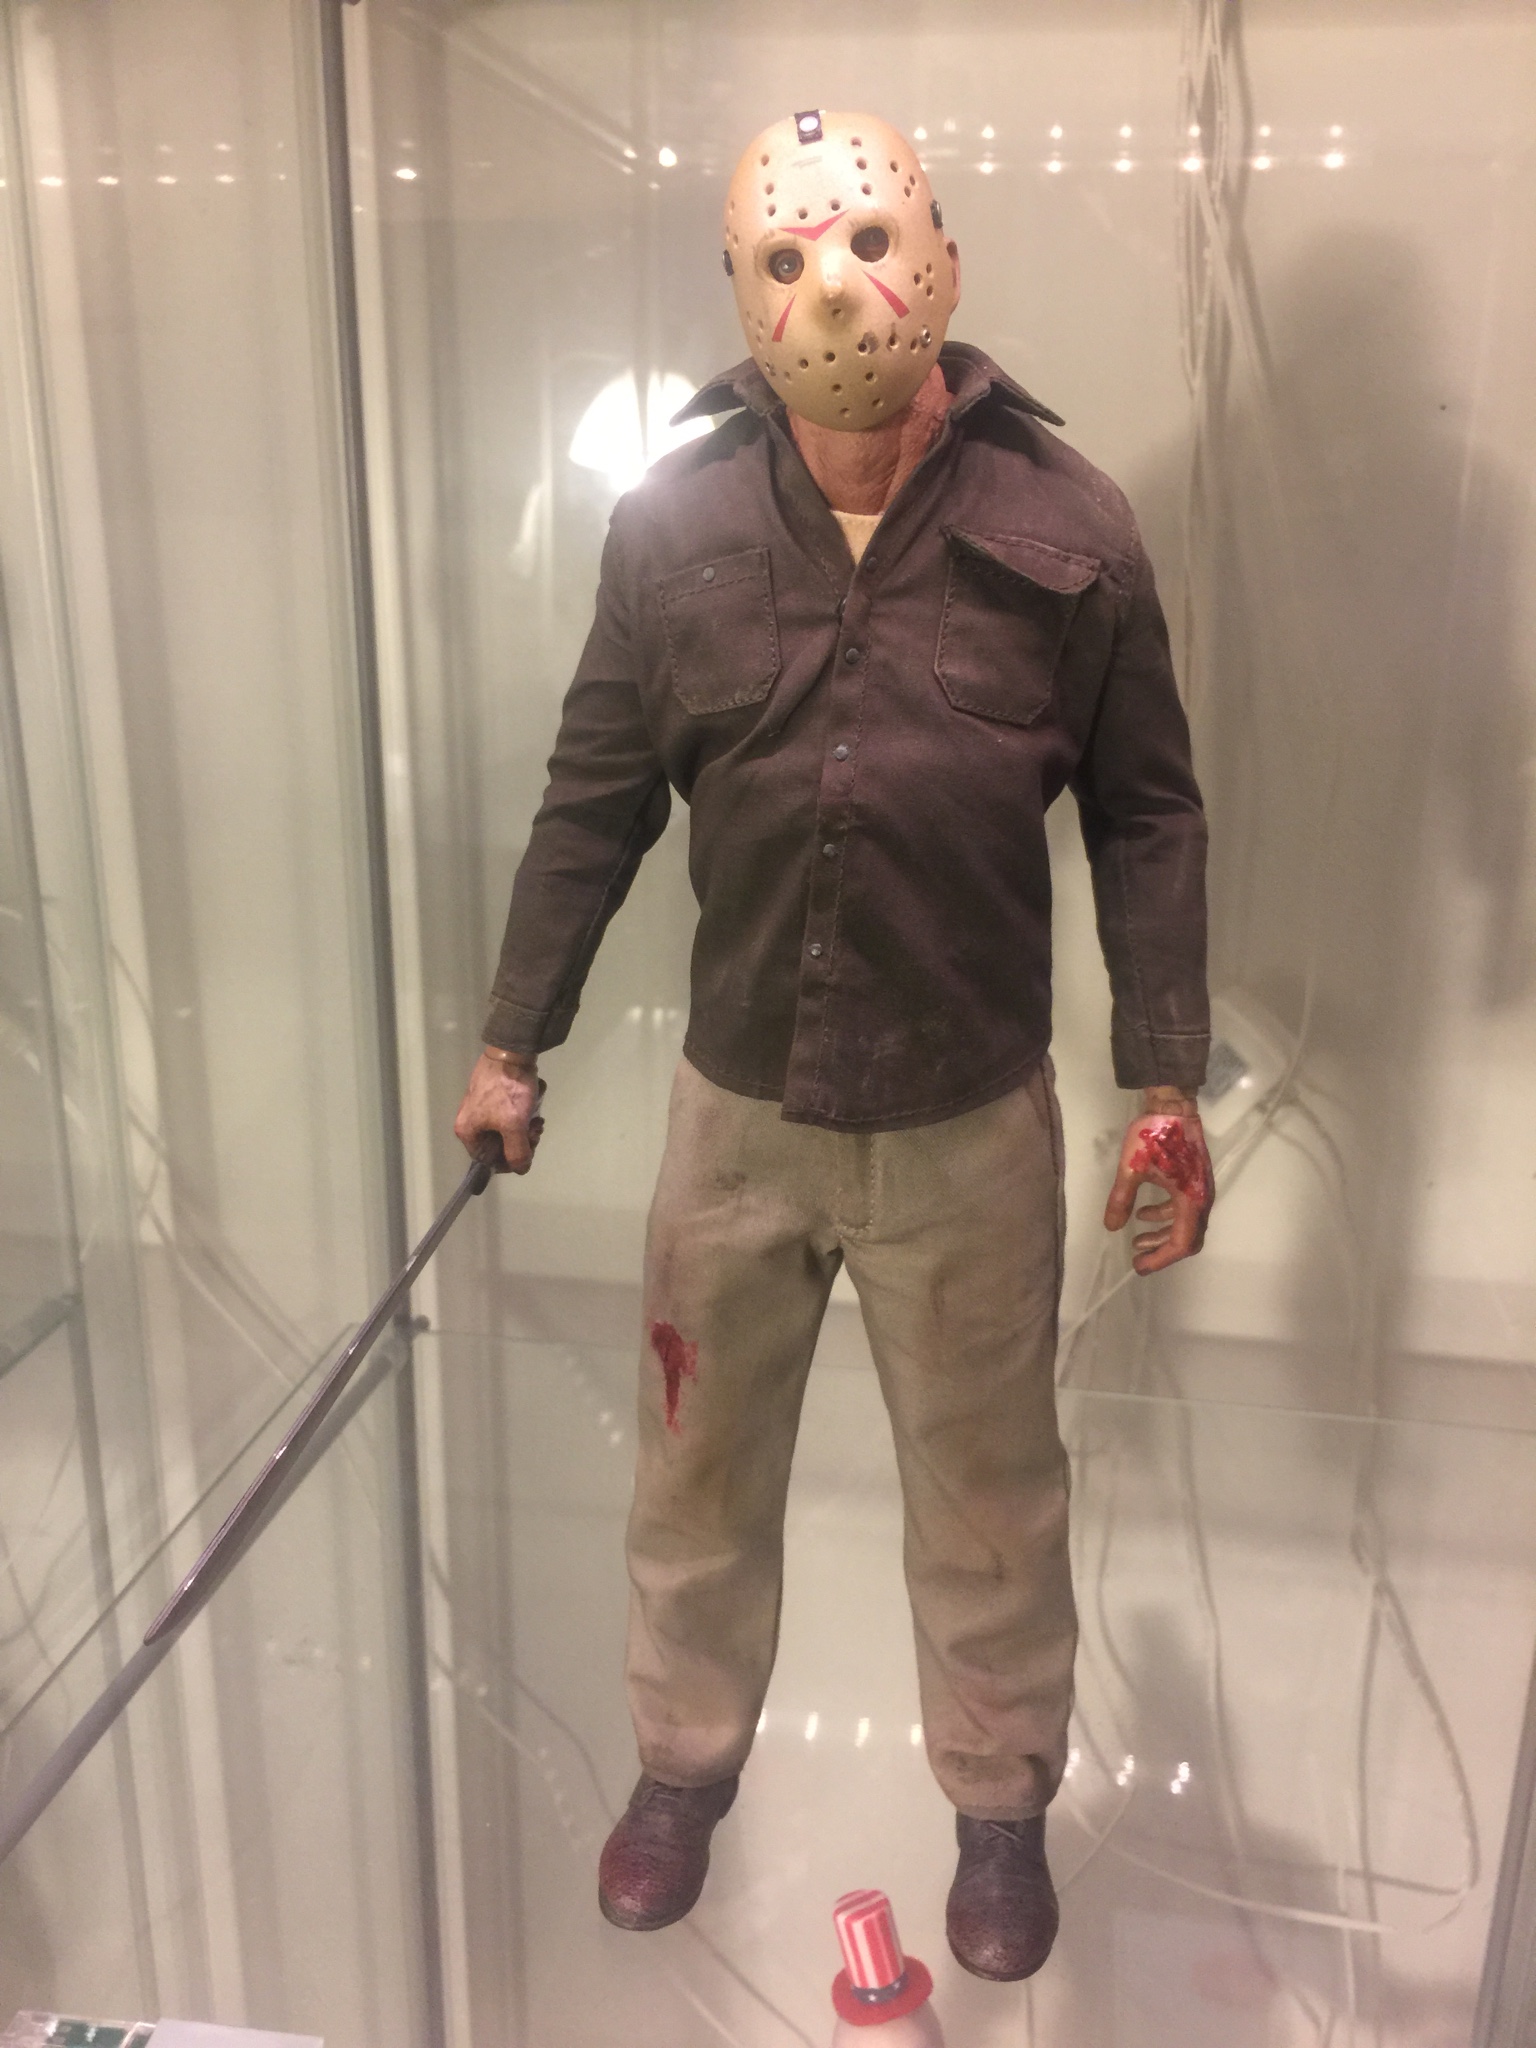
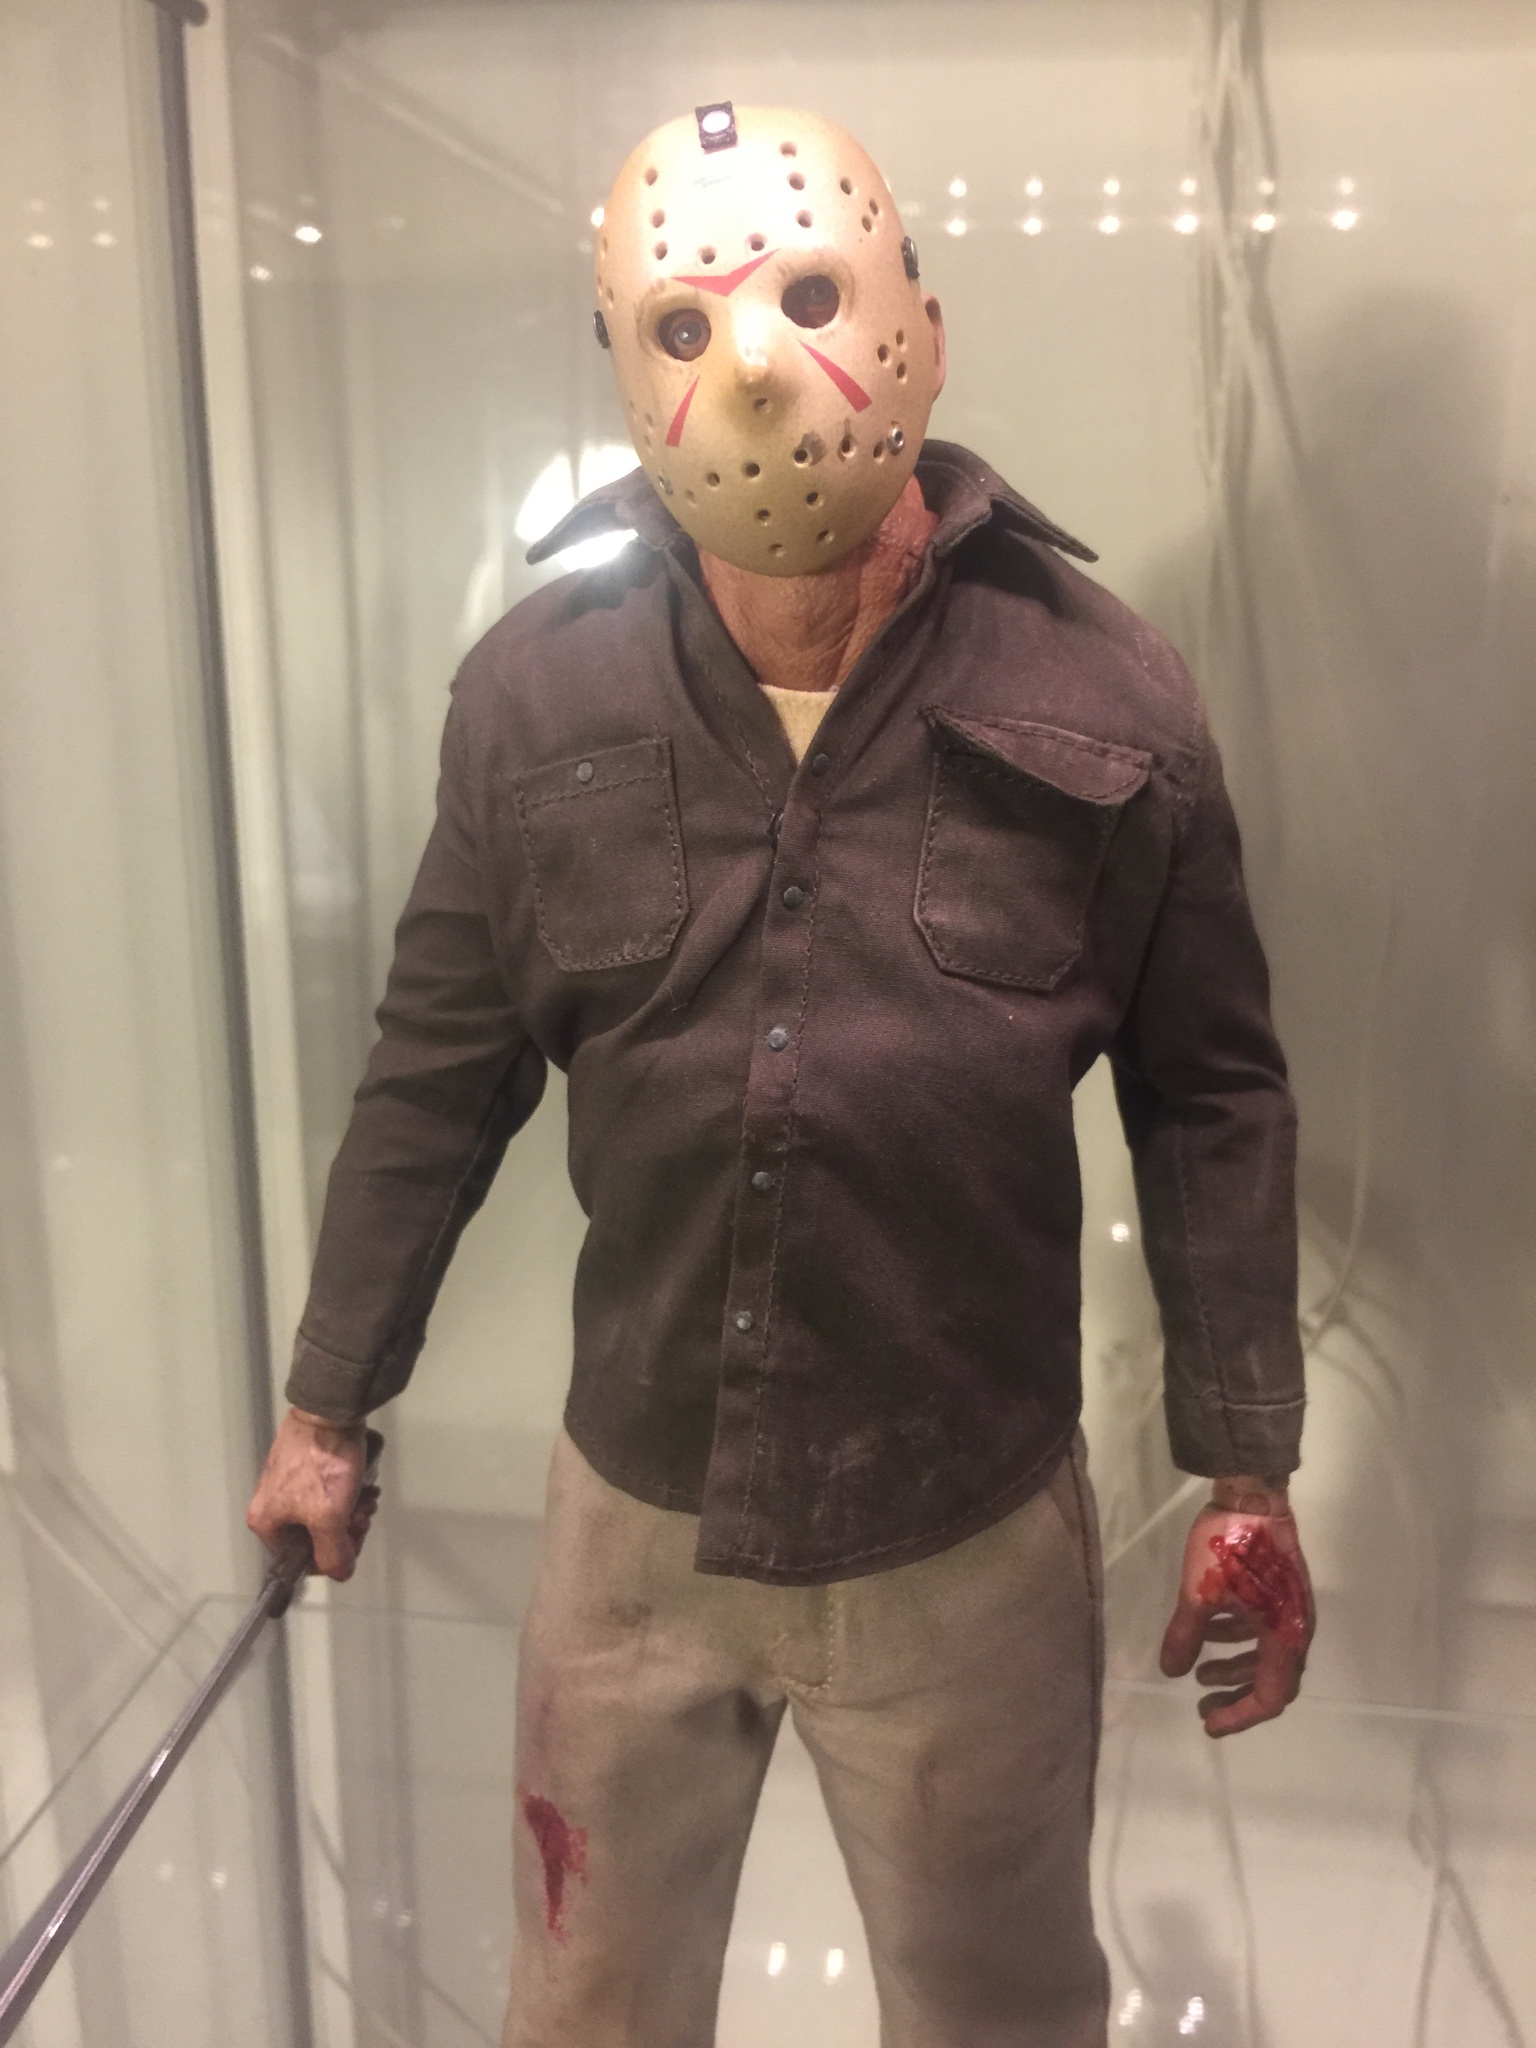


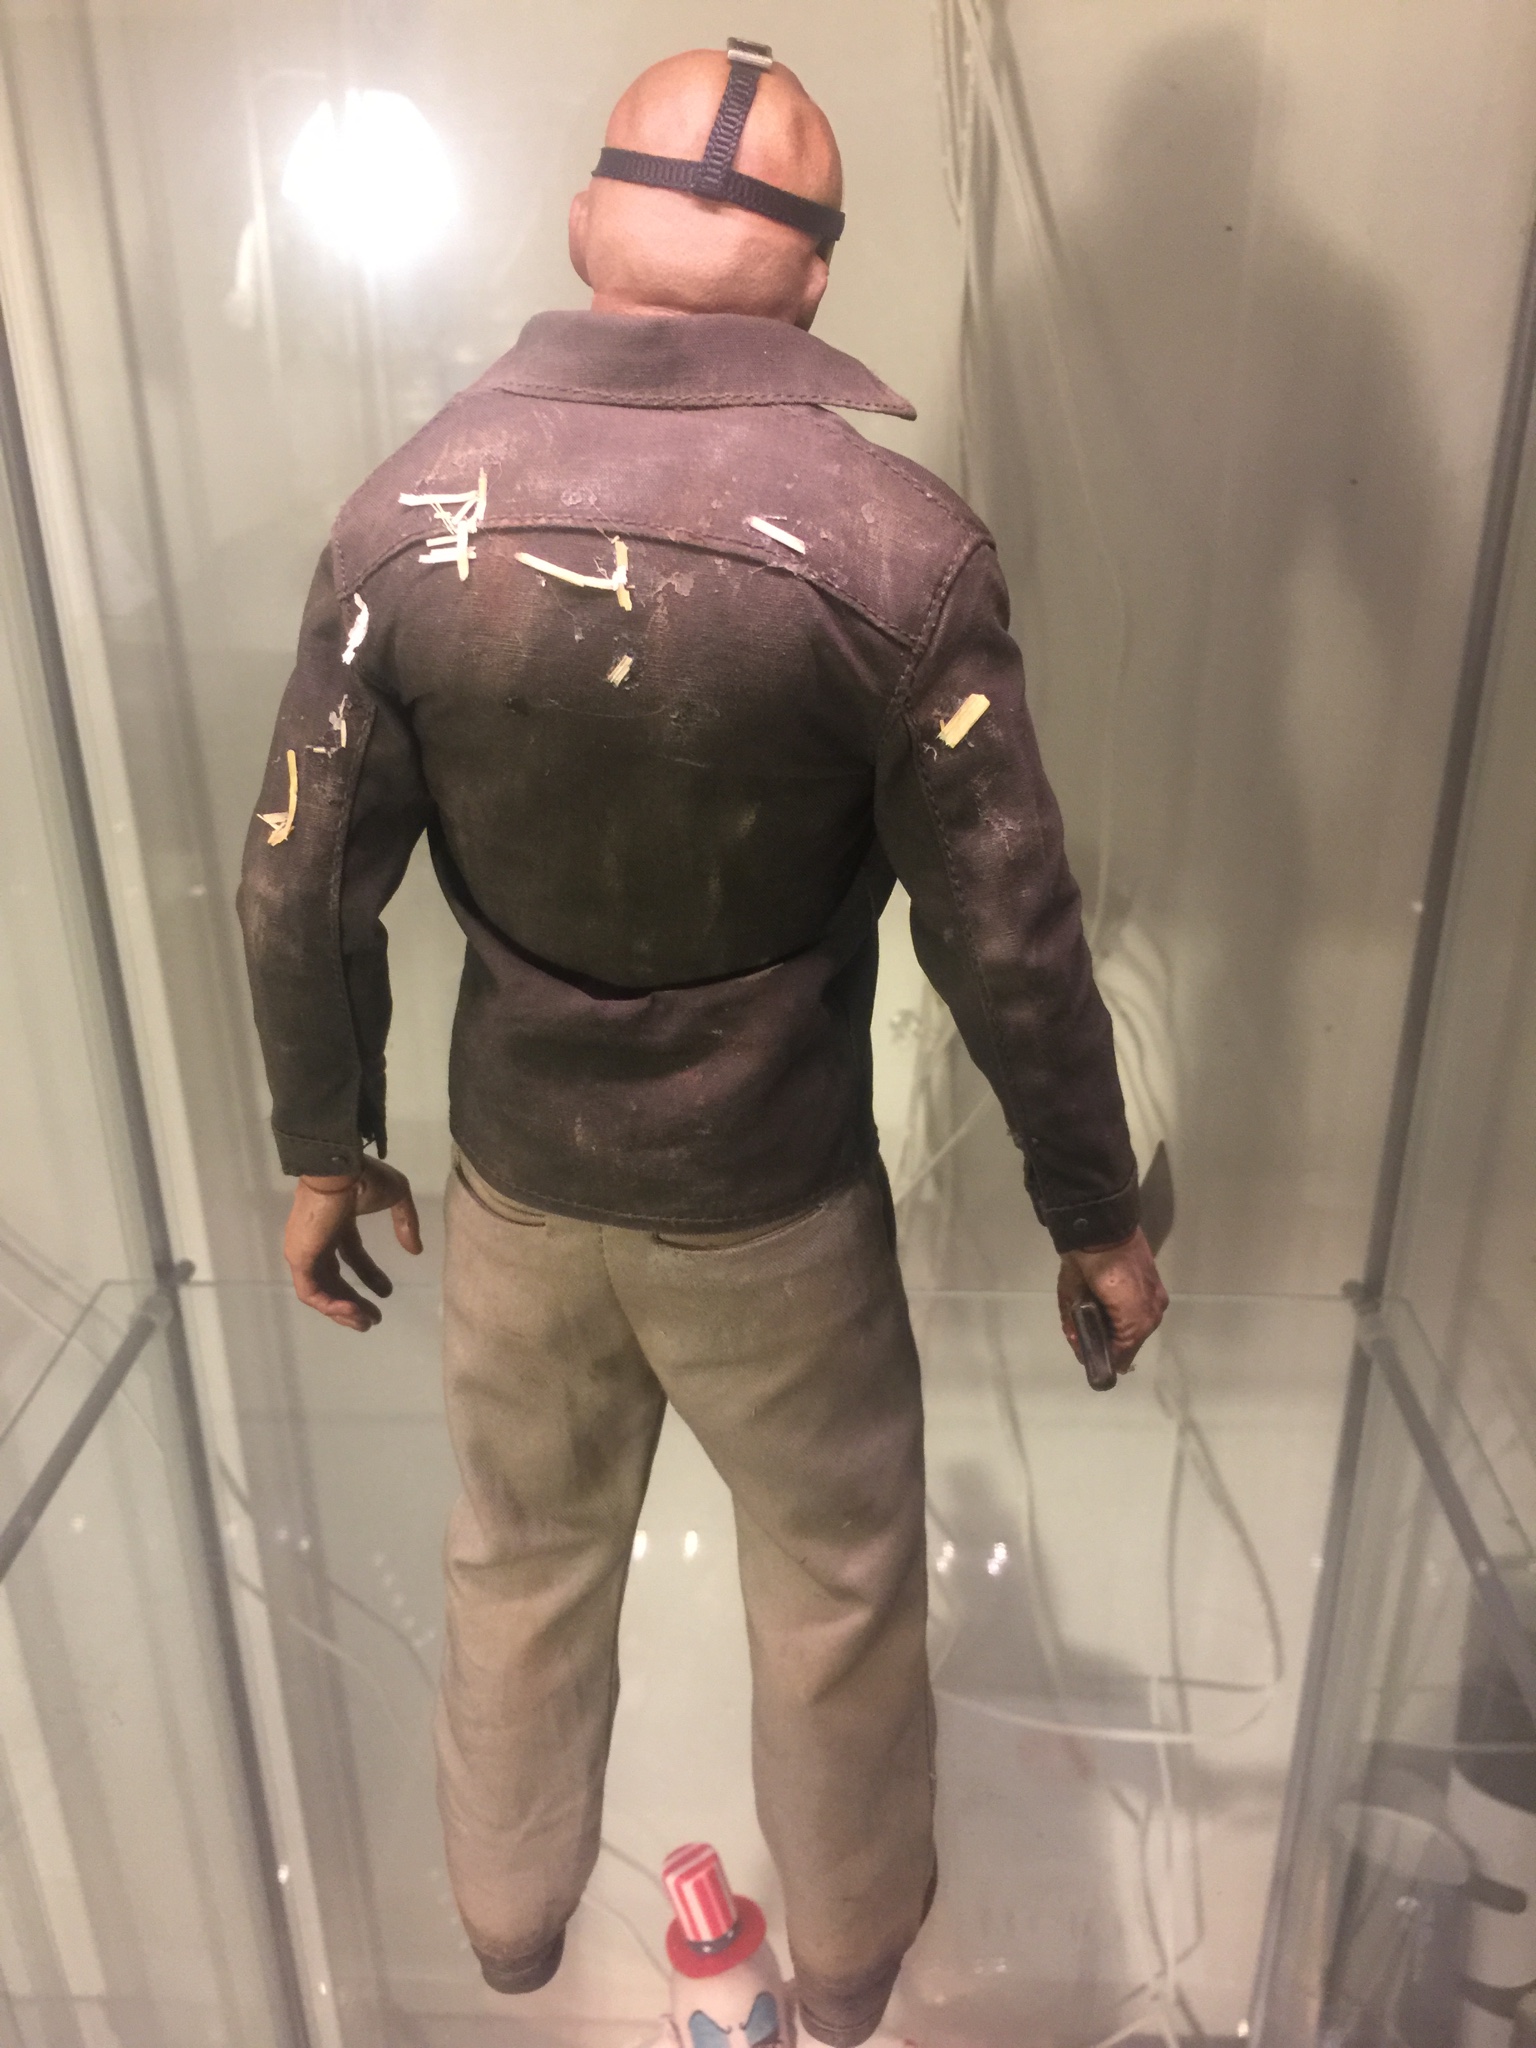
Sent from my iPhone using Tapatalk


Sent from my iPhone using Tapatalk
spoophmaniac
Freaked Out
Nice work KillerCustoms82 

galactiboy
OT Preferist
Looks good... I really need to paint my buttons; keep forgetting to do that 

juicemaster310
Super Freak
Hey guys, what color do you use to paint the buttons? And do you guys use acrylic paint?
Thanks in advance.
Thanks in advance.
spartyon88
Freaked Out
https://imgur.com/gallery/fMx7r
Finally got a scaled machette! re shaped/re-painted mask with galacticboy decals. Base is a WIP.
Finally got a scaled machette! re shaped/re-painted mask with galacticboy decals. Base is a WIP.
- Joined
- Sep 6, 2016
- Messages
- 194
- Reaction score
- 3
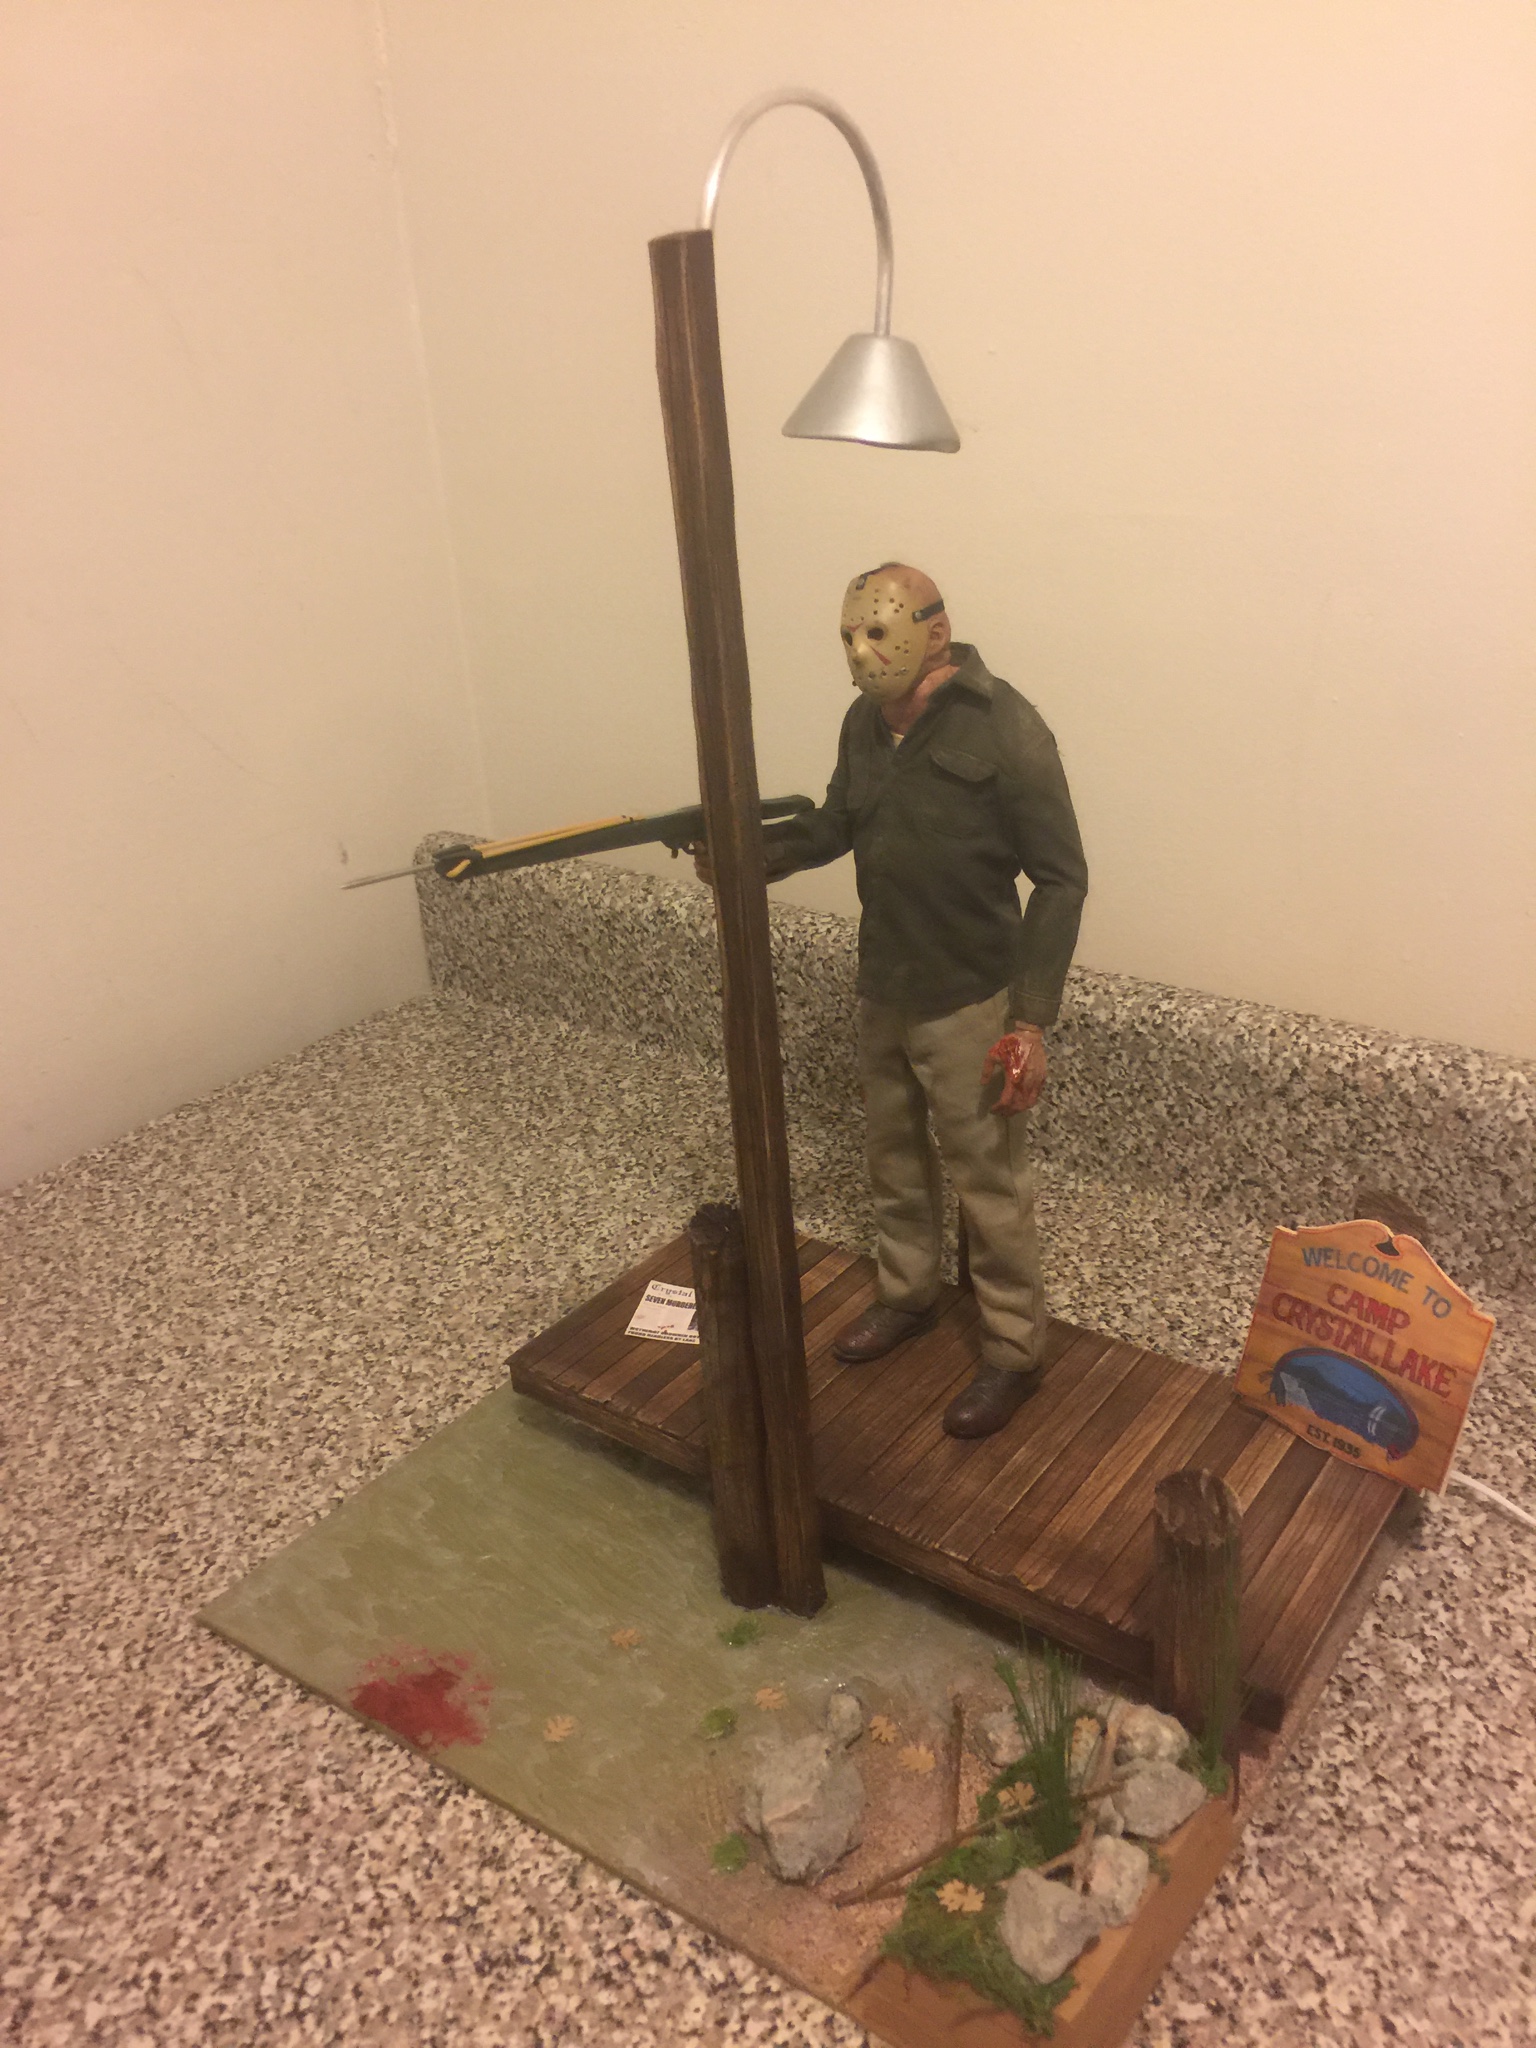
Commissioned Custom 1/6 Scale Friday The 13th Part 3 "Dock Kill" diorama (Lighted version) not detolf fitted but can be used if you have spacers for your shelves. With certificate of authenticity signed and dated.



Patriot666
Super Freak
Wow that's amazing. Great job!
Similar threads
- Replies
- 0
- Views
- 125
- Replies
- 0
- Views
- 163
- Replies
- 0
- Views
- 112
- Replies
- 0
- Views
- 200


