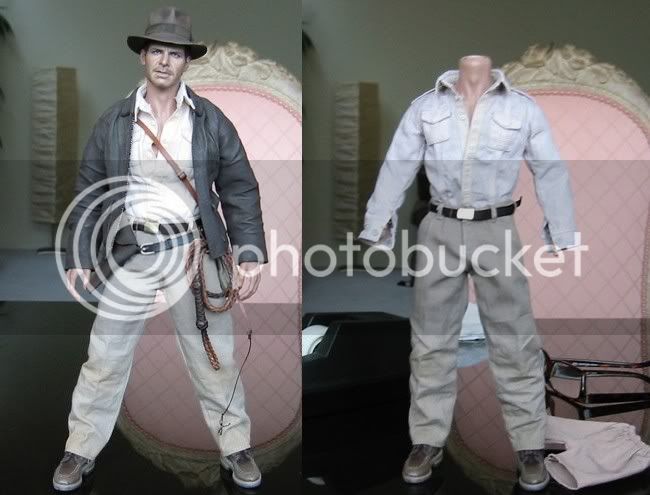
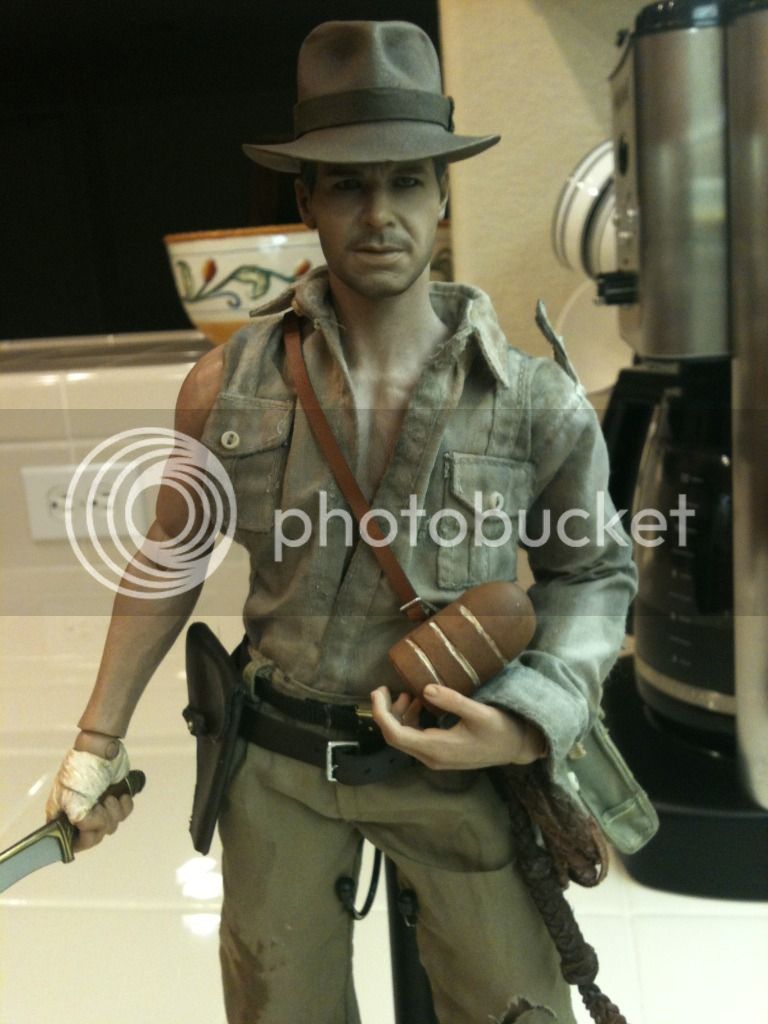
1/6 Indy Customizations: Image Thread

Collector Freaks Forum

Help Support Collector Freaks Forum:

This site may earn a commission from merchant affiliate links, including eBay, Amazon, and others.
Looking for a little feedback. Does the shirt look too big?
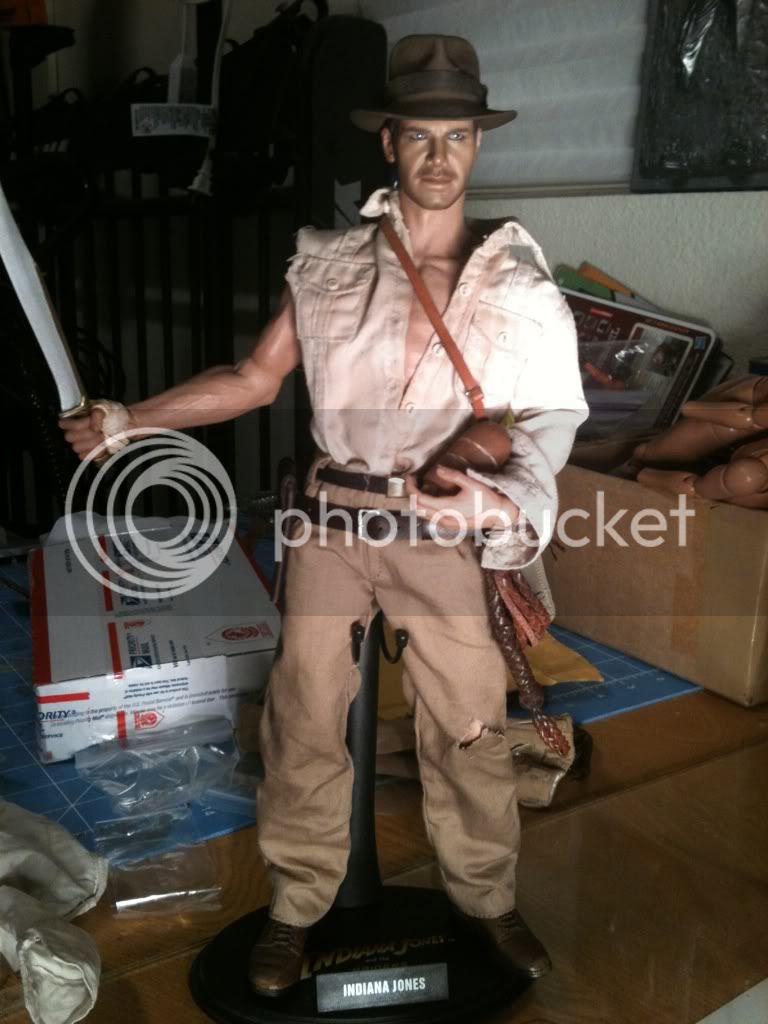
02d7df8e.jpg

Yes, I found that if you actually slice a section out of the left hand side of the shirt it hangs more like the movie version. It's easy to make a clean cut with a scalpel and glue it back together (sounds weird but it works perfectly). If you look at this pic you can see where I cut through the pocket. Glue flaps and stitching down first, also if you put a little super/crazy glue on the fabric it seals the seam, matte varnish does the same thing, so you can avoid fraying.
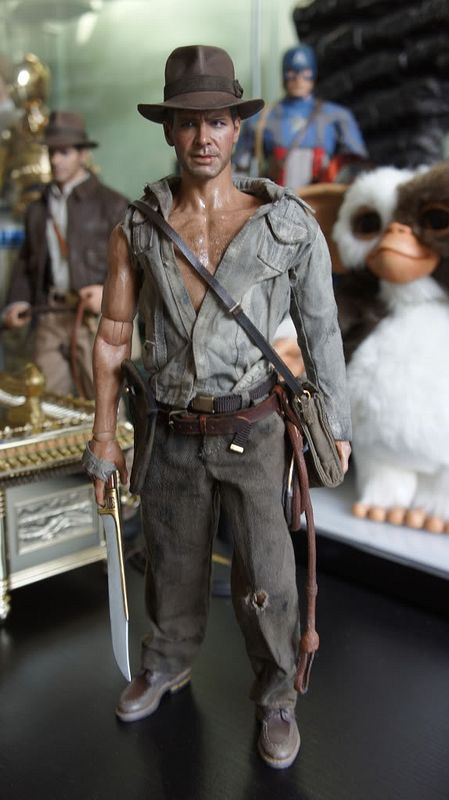
DSC05799-1.jpg
 
Last edited:
Yes, I found that if you actually slice a section out of the left hand side of the shirt it hangs more like the movie version. It's easy to make a clean cut with a scalpel and glue it back together (sounds weird but it works perfectly). If you look at this pic you can see where I cut through the pocket. Glue flaps and stitching down first, also if you put a little super/crazy glue on the fabric it seals the seam, matte varnish does the same thing, so you can avoid fraying.

DSC05799-1.jpg

So Rory, what shirt is that? HT? I can try working with this shirt a bit more or try a KOTCS shirt that I have in my bin. I also noticed that you went pretty dark with the weathering. WOuld you mind giving me some tips on the steps you took on the shirt and pants??
 
So Rory, what shirt is that? HT? I can try working with this shirt a bit more or try a KOTCS shirt that I have in my bin. I also noticed that you went pretty dark with the weathering. WOuld you mind giving me some tips on the steps you took on the shirt and pants??

No worries mate, that is all HT stuff on Indy. yeah, I went pretty dark, I wanted to get that kinda wet look he had towards the end.

I dyed the pants and shirt with acrylic washes. If you mix up black acrylic with a lot of water, simply dip them in, then squeeze out the excess, it's quite irregular and gives quite a good weathered look. Once the acrylic dries it's waterproof so you can repeat the process.
With the shirt, I mixed up a grey color first, white/black/tiny bit of blue.. then dipped the shirt and dried it to a more accurate screen grey. Then I weathered it with washes. I found it looks much better without the buttons. I glued down the collar and shirt pockets. Do all this before you dye it. For sweat mix brown/black with acrylic varnish.

That's it really, hope it helps.

:hi5:
 
I dyed my HT shirt with Rit pearl gray. Just a quick dip. But then the pants seemed almost the same color so I dipped them in too. Here's the before and after (left).

postdyedclothes1-15-12.jpg
 
to get a TOD shirt right soak it heavily in hairspray and then form it to shape on the body... bunch up the shoulder on the torn sleeve side.. once dry the shirt will be dry and hold the shape you created... if you jack it up just soak it in water and start over with no damage to fix...
 
I gave mine a tea bath, then used some brown washes around the normal sweat areas, but I never considered using black. I'll strip the whole figure down and give it some black washes and go from there...

So Mike, hairspray? This doesn't make the figure all sticky? Should I just let it dry on some spare buck so I don't get the rubber on the HT body all tacky?
 
I dyed my HT shirt with Rit pearl gray. Just a quick dip. But then the pants seemed almost the same color so I dipped them in too. Here's the before and after (left).

postdyedclothes1-15-12.jpg

Looking good man! :clap

I was noticing on the screenshots on theraider.net that Indy's 'white' safari shirt looked a little 'light-gray'. I tried a tea-bath with my Sideshow shirt a while back and it made it more tan/light brown. This sounds like a better way to go. :hi5:
 
Mine is ready thnx to you...hope to get my mfisher set soon..will post pics then

No worries mate, that is all HT stuff on Indy. yeah, I went pretty dark, I wanted to get that kinda wet look he had towards the end.

I dyed the pants and shirt with acrylic washes. If you mix up black acrylic with a lot of water, simply dip them in, then squeeze out the excess, it's quite irregular and gives quite a good weathered look. Once the acrylic dries it's waterproof so you can repeat the process.
With the shirt, I mixed up a grey color first, white/black/tiny bit of blue.. then dipped the shirt and dried it to a more accurate screen grey. Then I weathered it with washes. I found it looks much better without the buttons. I glued down the collar and shirt pockets. Do all this before you dye it. For sweat mix brown/black with acrylic varnish.

That's it really, hope it helps.

:hi5:
 
Thanks, Fett!

I'm really way behind on my customizations. Work's been kicking my ass lately. Only just got Sparrow out of his box. I need like a week off and no distractions to reall catch.
 
Thanks, Fett!

I'm really way behind on my customizations. Work's been kicking my ass lately. Only just got Sparrow out of his box. I need like a week off and no distractions to reall catch.

HAHA, no kidding. I've been working on perfecting my 1/6 custom Ghostbusters guys for well over 2 years and haven't made much progress. :slap

Well, I have the Spenser sculpts with JOhnny now for paint-ups, so hopefully that will kick me into high-gear on those.

As for Indy, I have like 5 variations on the go but am waiting for the WGP sculpts to get finalized before really trying to make them perfect. I'm planning on a 'hero' version standing proudly with the idol pedestal (that will use my one and only Kato jacket), a smiling 'Raven Bar' version, a 'WTH' Streets of Cairo version, a 'maproom' version' and a 'Well of Souls' version...Plus a TLC and the KOTCS version. Man, that's a LOT of Indy's! :panic:

Ah well, one of these days I'll be able to share pics of something. But yeah, I really need more NON-work/life distractions to really work on all of this stuff. :peace
 
I'm planning on a 'hero' version standing proudly with the idol pedestal (that will use my one and only Kato jacket), a smiling 'Raven Bar' version, a 'WTH' Streets of Cairo version, a 'maproom' version' and a 'Well of Souls' version...Plus a TLC and the KOTCS version. Man, that's a LOT of Indy's! :panic:

Oh man....

I'm particularly curious about the WoS version. Dusty and beat up? I'd like to make that one myself. But by the time I perfect him I'll probably chicken out about getting him 'dirty'.

Hats off to rorywan for daring to go where few men dare -- an absolutely filthy Indiana Jones.
 
Oh man....

I'm particularly curious about the WoS version. Dusty and beat up? I'd like to make that one myself. But by the time I perfect him I'll probably chicken out about getting him 'dirty'.

Hats off to rorywan for daring to go where few men dare -- an absolutely filthy Indiana Jones.

There's a lot of truth to that, but I'm really looking forward to making the WOS Indy filthy dirty, so hopefully I won't chicken out when I get there! :lol

And agreed about rorywan's Indy, it's magnificently 'rough & tumble' Indy. :clap
 
I have a questions for all you customizing, Indy loving freaks:

How would I go about bashing together the best customized Indy possible? I already have the perfect headsculpt so that's not an issue. Also, let's not bring up Kato's clothes into this since they are unavailable.

Is the HT figure good enough sans the head or are people using other articles from different figures for their bashes. I would like to read through this thread but I just don't have the time at the moment. Any help would be appreciated.:)
 
Best kitted out Indy custom (IMO) is :
HT clothing (shirt, pants, boots).. although just a little bit of tweaking is necessary on these shirt by using a very diluted dye bath of Rot pearl grey.. as for the jacket.. the Sovereign jacket is a very nice addition.. just hard to get in hand.. with minimal work the HT jacket is really nice too though... if you add one of my leather straps to the HT bag they look much better.. or a reworked Did brand sidebag.... the web belt by Did with a repaint on the webbing to make it the correct brown.. (easy fix).. and although it seems biased for me to say it, adding one of my gun belt kits and whips does make a substantial improvement on the overall appearance... I still make them but you can also find them from time to time from members that sell them off as well...
 
Hey mike, do you have a pic of the belt? Saw multiple web belts..don't know wich one. Furthermore do you have pic of your leather strip for the bag? Didn't know,you had them :)
 
Awesome work, Flosi. Much improved. And kudos to everyone else here. I definitely don't have the brass to do the heavy mods you guys are doing.

One of the things that has been bothering me is the way collar on the jacket does not stay down. I'm keeping an eye out on ebay to get an extra one that I can stitch down.
 
:clap:clap

Huge improvement mate!

Great work.

Thanks for the help, Rory! And everyone else who gave me some feedback, Mike Fisher, etc.

I have to dull down the color of the wrap on the right hand now. It should be about the same color as the shirt, right?

Awesome work, Flosi. Much improved. And kudos to everyone else here. I definitely don't have the brass to do the heavy mods you guys are doing.

One of the things that has been bothering me is the way collar on the jacket does not stay down. I'm keeping an eye out on ebay to get an extra one that I can stitch down.
Thank you my friend! :duff To be honest what I have into the TOD Indy isn't all that much. I had the extra body from swapping out my HT Indy with an Enzio body. I added a shirt, pants, gun belt and shoes that I had in my parts bin and picked up an extra head, hat, bag and web belt from TA. So I put in less than 100 since I decided to do the project.

As for keeping the collar down without doing any damage try some double sided hem tape. Just snip a little bit and put it under the collar and you should be good.
 
Last edited:
Back
Top