Hot Toys Bruce Wayne/Batman (2011 Toy Con Ex) review + pics

Collector Freaks Forum

Help Support Collector Freaks Forum:

This site may earn a commission from merchant affiliate links, including eBay, Amazon, and others.
I tried the roll down method and the acetone method and both failed.. In fact acetone was leaking out of some areas of the bottom. It's probably jacked now..

Slicing the sole off seems like the better way. What glue type works to glue it back?

I'll be dremeling an old tt figures foot to fit into the boot.

Wow, not sure what the "acetone method" is, but it sounds terrible.

You're going to want to slice the rubber of the boot where it meets the rim of the hard plastic sole, around the heel.

You don't have to slice all the way around the foot - less than 1/3 should do it, in fact. Slice enough (do it slowly!) so that you can pull the top of the boot over the toes and expose the busted socket plastic, like a hood.

You're going to want to dremel away all the shattered plastic of the socket - and maybe even a bit more - to make room for your replacement socket. You do NOT need to dremel a TT foot or use the entire TT foot. Just pull the socket out from a naked TT foot (heat it up and use pliers - they're usually attached via a strong, but not impossibly strong, glue).

This will make the job a lot easier, as you just need to dremel a spot in the boot big enough for this socket piece to fit there (rather than the whole foot). Make sure the socket piece fits snugly, then superglue it into place. Remember also that you want to try and get the socket as close to the height of the original socket as you can (so that way the heights of your broken and unbroken boots match and your figure doesn't have one leg that's a wee bit longer than the other).

I use the gel-like superglue that comes in tiny little tubes. I don't think the brand really matters. Glue in the socket and hold it there until it sets. After a little while (maybe an hour), you should be fine letting the top of the boot slip back over and into place. Then you can apply a thin line of superglue around the rim (where you cut the boot rubber) and press with your finger to secure the boot rubber back into place. Use a towel to quickly remove any glue that gets squeezed out from the boot by this process.
 
:lol I especially like this one,


1-51.jpg


Yeah, it's weird.

They probably come up because they were in threads you posted in.

Yeah, that one is mine. :lol
 
awesome, thanks for the clarification.
The acetone method was described earlier in the thread.. using cotton ***** to help loosen the glue holding the foot inside the boot. the problem is i had no idea what it actually looked like inside the boot.. so I did more harm than good. This was on my left boot.

my right boot was broken as well, but had no acetone used on it.. Ive kept them side by side for close to 2 months to see if there were any rubber issues but they both look the same.

Wow, not sure what the "acetone method" is, but it sounds terrible.

You're going to want to slice the rubber of the boot where it meets the rim of the hard plastic sole, around the heel.

You don't have to slice all the way around the foot - less than 1/3 should do it, in fact. Slice enough (do it slowly!) so that you can pull the top of the boot over the toes and expose the busted socket plastic, like a hood.

You're going to want to dremel away all the shattered plastic of the socket - and maybe even a bit more - to make room for your replacement socket. You do NOT need to dremel a TT foot or use the entire TT foot. Just pull the socket out from a naked TT foot (heat it up and use pliers - they're usually attached via a strong, but not impossibly strong, glue).

This will make the job a lot easier, as you just need to dremel a spot in the boot big enough for this socket piece to fit there (rather than the whole foot). Make sure the socket piece fits snugly, then superglue it into place. Remember also that you want to try and get the socket as close to the height of the original socket as you can (so that way the heights of your broken and unbroken boots match and your figure doesn't have one leg that's a wee bit longer than the other).

I use the gel-like superglue that comes in tiny little tubes. I don't think the brand really matters. Glue in the socket and hold it there until it sets. After a little while (maybe an hour), you should be fine letting the top of the boot slip back over and into place. Then you can apply a thin line of superglue around the rim (where you cut the boot rubber) and press with your finger to secure the boot rubber back into place. Use a towel to quickly remove any glue that gets squeezed out from the boot by this process.
 
Wow, really? Whoever wrote that has no idea what they're talking about. There is no "foot" inside the boot. The "foot" is part of the boot.
 
Wow, really? Whoever wrote that has no idea what they're talking about. There is no "foot" inside the boot. The "foot" is part of the boot.

I think he describing the boot as foot, I know what he means, I have done this method myself, there is some kind of plastic foot shaped thing glued into the sole of the boot, but it doesn't look anything like a hot toys tru type foot. Either way this method works, well it did for me any way. But I did it to both boots at the same time so the height would be the same and I expected the other to go anyway so thought it would be best.
 
Any tips on putting the cape clips in? I can't seem to get them to go in and I don't want to apply too much pressure and break them.
 
Any tips on putting the cape clips in? I can't seem to get them to go in and I don't want to apply too much pressure and break them.

They are a nightmare - my advice is put the clips in without the HT cape - much easier. Then use a custom cape / make one. The HT cape is awful anyway and once you get them in with the HT cape it will be a pain to get them out.
 
Ok, thanks!

Couple days ago I ordered a Begins cape from lforigno, so hopefully he'll look much better with that.
 
Ok, thanks!

Couple days ago I ordered a Begins cape from lforigno, so hopefully he'll look much better with that.

No worries - I'd wait for the new cape. Don't risk putting on the HT cape for the sake of a few days wait. The clips are delicate and it wont be worth damaging them.
 
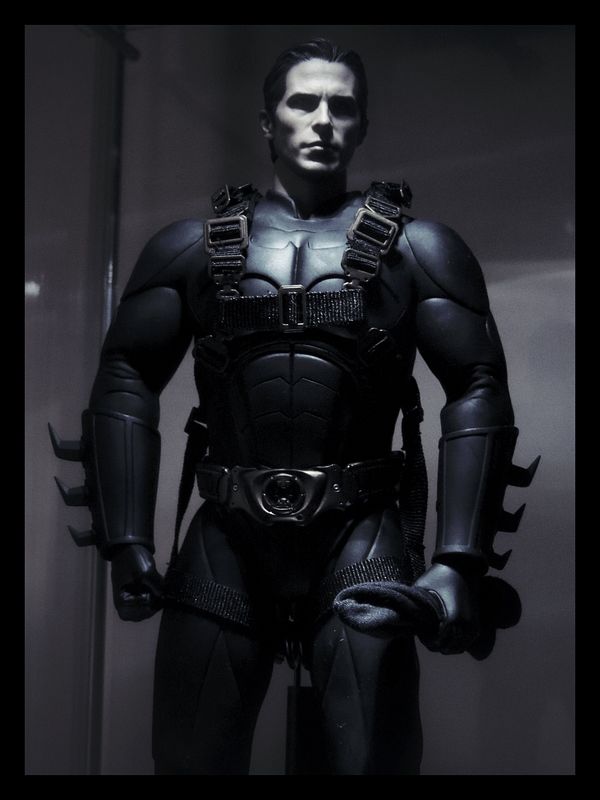
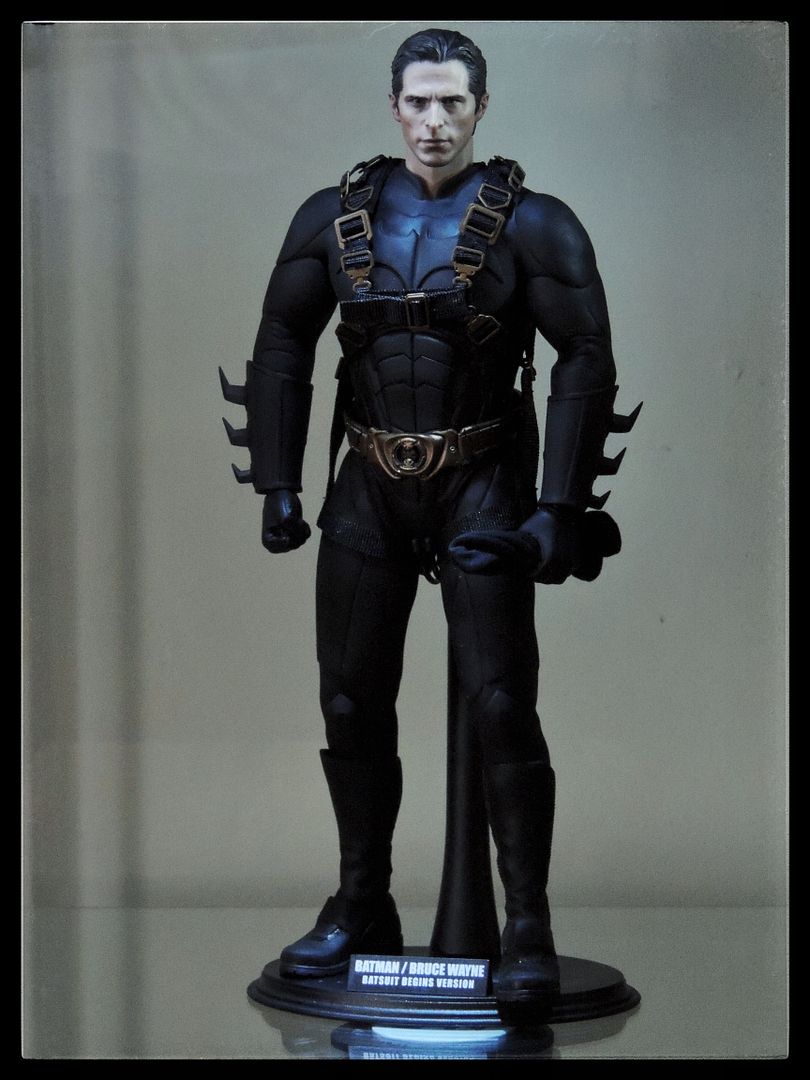
For some reason I love something about this sculpt more than the one from DX 12.
Great shots paramoremcr88:clap

He is a lot younger in the BB sculpt :lol

Yeah its a shame HT rushed this one out for the Toy fair Ex. I think that accounts for the QC issues, They could of made a diffinitive BB figure but they came up short again. :gah:
 
They are a nightmare - my advice is put the clips in without the HT cape - much easier. Then use a custom cape / make one. The HT cape is awful anyway and once you get them in with the HT cape it will be a pain to get them out.

What were the problems with the stock cape?
 
What were the problems with the stock cape?

IMO, there is nothing "wrong" with the stock cape (much the same case for all the HT Batman figures). The key is that the custom capes are better in the way they hang or drape on the figures. I think it boils down to the stock capes being thicker than the custom. The customs look more natural when compared to the stock ones with far less futzing.
 
Great pics paramoremcr88.

Makes me wish I had him in my collection but I will hold out in case they remake him or give him the DX treatment.
 
Great pics paramoremcr88.

Makes me wish I had him in my collection but I will hold out in case they remake him or give him the DX treatment.

Thanks Sidious! :hi5:

I'm really pleased to have picked this one up, especially as it was brand new, still sealed in the shipper.

No doubt it'll be remade though! :lol
 
Back
Top