Making your HT Pred 1 Perfect!

Collector Freaks Forum

Help Support Collector Freaks Forum:

This site may earn a commission from merchant affiliate links, including eBay, Amazon, and others.
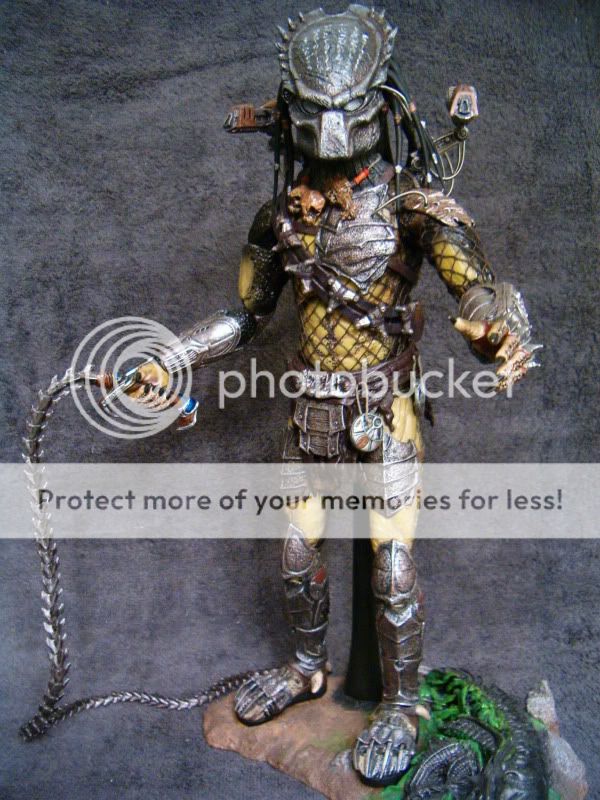
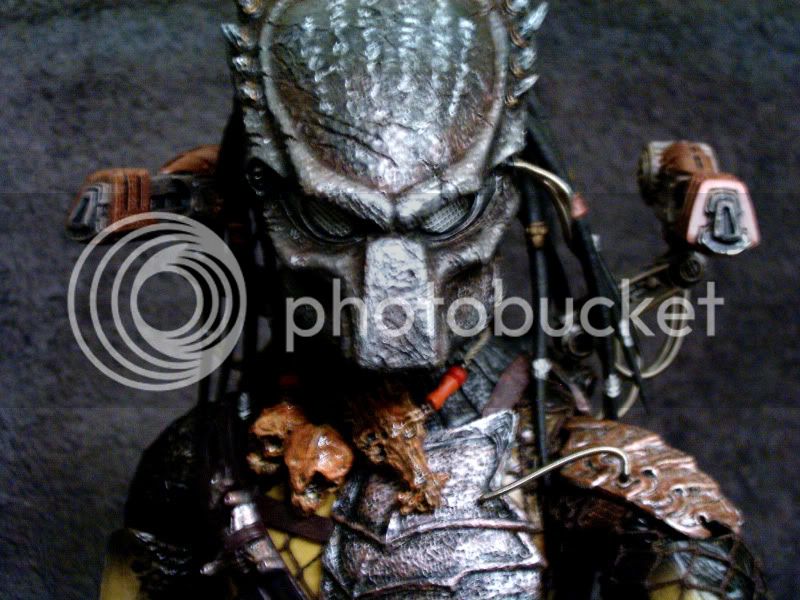
Not sure if most people check the old Wolf thread much, and since I talked about this here, I thought I'd post pics here too of the mod I did to my Cleaner. He's actually a combo of both Wolf releases. I added a second cannon to my Cleaner's armor, painted them both as they should be, and did that great mod of making a ball joint to give the cannon arms totally accurate mobility. And I gave him the regular mask which looks beat up enough for me without being overkill, but gave it a better paint job to highlight the markings like it's supposed to be, and to make it less brown all over. In the ADI book it's pretty straight gunmetal and steal colored.

I know it's not accurate to the movie to have both cannons and the cleaner kit, but it looks so cool. The second cannon really has nowhere to fold down to with the spear moved over for the kit, but I won't be displaying it that way anyway.

Here's some pics.
HPIM4888.jpg


HPIM4887.jpg

Killer job SS...as always!! I love your bio paint up!! Would you share that bio paint up technique?
 
Go over the whole thing with a gunmetal color. Go ahead and let it be a little wet and sloppy. *insert joke here*

Use chrome (I used Testors) or the brightest silver you've got to fill in the engravings on the top of the mask. Use the previous gunmetal and a hint of black to erase overpaint from the chrome. This will give a clear contrast between the the engravings and the rest of the cracks and details on the mask.

Mix silve into your gunmetal and highlight the mask where you want it. Add more silver and highlight again, but only the 'highest points' or sharpest edges and points.

Mix copper with a bit of dark brown and do a dry brush wash (get lots of wet paint on your brush, then dab most of it off on a napkin) into the recessed areas. Don't obscure the original gunmetal color though. Leave at least three shades going to create depth.

That's about it. Futz with the colors as need until you get what you want.

BTW, I didn't touch the lenses or the copper rings around the claws imbedded in the mask.
 
1) Yes, the mask goes over the mouth parts with them on.

2) Wait for it. Wait for it.

Blow Dryer

Thanks! Done and Done. Huge Difference IMO.

This Thing kicks ass now.

How bright is the mask led supposed to be? Mine doesn't seem too bright, maybe I put the batteries in wrong.
 
My P2 elder is the one I added quills to. I cant post any pictures atm but it looks really kickass.
u just got to take your time with it. and i mean really. i messed with it like 2 days (not 48 hours).
just take the head off the figure, take a thick needle or something, heat it up with a candle (suggest u take a napkin or something to hod the needle), make a deep enough hole where u want the quill, tip the quill in SuperAttack or a Super Glue or whateve you have, insert it and give it a minute or 2. thats it.
it seems easy to do, but the most important thing is to plan ahead and look where the quills would look good at and how many of them. good luck.
 
Thanks. What are the quills made of? I'm sorry to be so obtuse. This is my first Pred so I haven't been keeping up with the various threads.
 
Thanks! Done and Done. Huge Difference IMO.

This Thing kicks ass now.

How bright is the mask led supposed to be? Mine doesn't seem too bright, maybe I put the batteries in wrong.

Your welcome. Some people have had issues with their LEDs, so with wiring, some with run down batteries. All I know is that mine was plenty bright. Try checking/replacing the batteries. You may need a rewire if that doesn't work.

How do you add quills?

I use a tiny Dremel bit to drill the holes, but that takes a steady hand, otherwise the bit may dance all over you paint job. I haven't heard of the hot needle trick until now, but that should work too.

Thanks. What are the quills made of?

All the ones I use are from the old AVP Elder figure, the only one to come with them. I horded them from eBay early in anticipation that they would one day make all, or at least most, of the Preds, and I was right. They are just stamped plastic that you cut from the molding 'trees'.
 
Just got my P1 a few days ago, everything looks fine except the skulls on the bandolier are wrong.

There should be a mink, snapping turtle and Gar on there, along with a few others.
 
Silent Surfer Could you give a tutorial for how to do the ball joint canon mod for Wolf ?

It's all about that damn black connector at the base of the cannon. If you heat up the armor, you can easily bend the cannon connection point outward and slide the connector off the rod holding it there. The rod is 'usually' only glued on the outside edge, not both ends.

Once that is off, here comes the hard part. Test bend the other end of the connector where it goes into the end of the cannon. One side will not move at all, but the other side will have some sliding play (very little). Carefully take an X-Acto blade and cut the plastic rod that is holding the stationary side. You won't be able to see it, but you'll know when it is cut by the way the connector moves afterward.

The plastic the cannon is made of will not get soft with heat, so don't bother with the Blow Dryer on this one. Just wiggle and tug until the joiner releases. *insert joke here*

Focusing on the end that just got free, poke or grind out what's left of the rod inside the hoop. Use putty to turn the hoop into a ball with the same circumference the hoop has. I used Quick Steel two part putty found at Home Depot. It comes in a 4-5" blue/gray tube. 1 part is wrapped inside the 2nd part. All you do is pinch off a bit more than you need, and kneed it together to one solid color (the quick steel will start to feel warm when it is thuroughly mixed). Use as much of that as you need to create a ball shape out of the hoop, making sure to get the putty all the way through the hoop so the putty on both sides is basically one continuous piece. Don't worry about being overly neat about it right now, but don't make it bigger than the hoop already is. You can sand it to shape later.

Work quickly with this stuff. They don't call it Quick Steel for nothing. You have about 5 minutes of good working time. Use Vaseline to keep your fingers and tools from sticking to the putty as you shape your balls. *insert joke here* This stuff sets pretty much in 5-10 minutes, but leave it alone for about 20 minutes before sanding so that the surface doesn't scrape off too easily.

Now comes the second hardest part. Getting the ball joints back into the cannon arms. You can grind a very slight curvature into the insertion point of the cannon arms to aid in the process, but it's not necessary. I mentioned before that this plastic doesn't get soft with heat like the armor does, but it will help just a bit to give you some flexibility in the cannon arms. DON'T OVER HEAT IT. ONCE YOU WARP OR BEND THIS KIND OF PLASTIC, YOU'RE SCREWED. IT WILL NOT FLEX BACK WITH MORE HEAT LIKE THE VINYL PLASTIC DOES.

Turning the ball connector you just created so that the original plastic of the hoop is in contact with insertion point of the cannon arm (it will be rotated 90 degrees from its original protruding postion) shove it back in. This may not be easy to do, but there is no other way that I came up with cause I didn't need to. Once it's popped in, you can rotate it back to its normal position and, heating up the armor again, bend out the part with the rod, slide the untampered with end of the connector back onto the rod, hit it with more heat to keep it soft, and push the rod and armor back into its original shape/position, holding it tightly against the connector until it cools. Blowing on it does help speed up the process. If your armor is not currently on your Wolf, run that spot under some cold water to set it fast.

The person I learned this mod from (can't find the link) had used a tiny piece of foam inside the cannon arm where the ball goes to give the ball some friction, but if you made the ball big enough (at least as large around as the original hoop) it will fit so tightly that that isn't necessary. I didn't need it.

Enjoy total, movie accurate poseability.
 
Just got my P1 a few days ago, everything looks fine except the skulls on the bandolier are wrong.

There should be a mink, snapping turtle and Gar on there, along with a few others.

What's a Gar? Most of the skulls on the P1 are reused from the AVP figures.
 
Definitely, but I'm not too sure exactly how it is wired. I don't want to just run two wires up to a big LED on top of the cannon. I may have to semi-imbed the LED into the cannon, sculpt over that somehow while leaving three perfect holes, and drill holes through the cannon for the wires to exit. There just really isn't a good shot of the Elder's cannon to go by. I'd pretty much have to guestimate how it should look.

Anybody got a good shot of it?
any update on this, surfer? this is probably the one mod i'm most anxious to see.
 
I did put the P1 armor onto the Elder, so it's ready to go, but I haven't had time with all my commissions to rip the light out of the extra helmet and put it on the Elder's new cannon. It shouldn't take that long really.

As soon as I get time, I will post the pics right here in this thread for you.
 
Dude, if you have step-by-step pics of all the changes you made to the P1's armor for the P2 elder that would be freaking awesome. I just scored the original predator's armor for the purpose of doing the same thing, minus the lighting.
 
No major changes required. Just pull off the Elders chest strap and put it on the P1's armor. Switch the left arm's shoulder piece, and you're ready to go. It fits as well as the Elders own armor cause it's the same exact sculpt.
 
I was hoping it wouldn't be too involved. The chest straps come off pretty easily, then? Also what do you think is the best way to deal the the tube/pipe thing that goes from the chest to the shoulder? Cut it off and repaint?
Thanks
 
The P2 Elder doesn't have the tube from chest to shoulder, so I just pulled it off. The soft rubber will just rip away. No repainting required. Easiest custom I've done.
 
Back
Top