TonyMeis Superhero custom (FM Batman Battle Damage version)

Collector Freaks Forum

Help Support Collector Freaks Forum:

This site may earn a commission from merchant affiliate links, including eBay, Amazon, and others.
Re: T&C Custom- I'm no expert, never was, never will be...

:1-1:

Thanks for the props. Glad someone appreciated my tutorial, it almost seemed as if no one noticed it.


:goodpost: Head bowed with a shorter neck makes him way meaner looking. The giraffe neck makes him seem kind of wimpy. :D


Nice cape! WHen you say "we" who are you referring to? Is this a joint project?

haha, yea, Crystal and I started this project together, of course there are many more people involve, we'll recognize them one by one through out time.

your tutorial was amazing, sometime it take someone to step it up and lead. It was your guts that inspired me to do this mod. Keep it up, we are here to motivate each other. Thank you once again, and look forward to see more amazing skills you do. Most people on the board just look, and a few of them are willing to take that risk and mod their figure because of the cost of each figure they purchase. We appreciate every figure we get, but not satisfy certain part when we see and we MUST act upon to satisfy our eyes. Big name brand company has a limit on how much they should charge on each figure, and there must be profit made, not everything will come out and satisfy every customers. That's when we come in : )

Oh man, if I had money to spare for another Batman Begins figure, I would have tried something like this. Brilliant work.

haha, I know exactly how you feel. Modification isn't something we do when we first start collecting..... it took us years of sicken tired of being sicken tired of to finally decide to do some crazy mod. Some people like Elvis1976 who is just natural born modifier, LOL, anything touches by him turns into gold, LOL

but we fail our ways to where we are today.... see pictures below
DSC06207.jpg


*sub T* and man you stay up late.

Ski

LOL, when passion took over, sleep and time are over rated. We can go all day and night if we wish to, then again, we do enjoy our meals and exercise at the same time, haha!

Man... there is some serious guts in this thread... the mod looks great but i wouldn't dare try it.

Thanks for sharing!

M.

Thank you Klocket, we are more than happy to share what we have to everyone. We need more modifier in the 1/6 industry, and more people who is open minded to share their thought, skills, and experience to everyone and raise the level of customize world. But when you see enough, some of these mod are actually very simple, thru time of trail and errors of course. When I was young I use to think modify, painting, and customizing figures or models are crazy hard. After a few tries, it became something I must do, haha
 
Last edited:
Re: T&C Customs- I'm no expert, never was, never will be...

here are some picture of the Neck Mod 2 result. I'm much more satisfy :yess:
- re-focus the eyes, make it squint more
- and added stuffing between the back of the inner neck and the cowl. (the key is here)

DSC06654400x300.jpg


DSC06653400x300.jpg


DSC06655300x400.jpg
 
Last edited:
Re: T&C Customs- I'm no expert, never was, never will be...

- re-focus the eyes, make it squint more

Could you post a closer pic of the eyes?


- and added stuffing between the back of the inner neck and the cowl. (the key is here)

You mean to fill the space under where the cowl wings out in back when you bow the head?
 
Re: T&C Customs- I'm no expert, never was, never will be...

Could you post a closer pic of the eyes?


You mean to fill the space under where the cowl wings out in back when you bow the head?

I'll post some closer pictures of the eyes soon.

N as for the stuffing, yes, you are 100% correct! :clap
 
Re: T&C Customs- I'm no expert, never was, never will be...

Awesome work. I love the belt mod and the repainted gauntlets!
 
Re: T&C Customs- I'm no expert, never was, never will be...

@ T&C: Did you include this part of the mod?


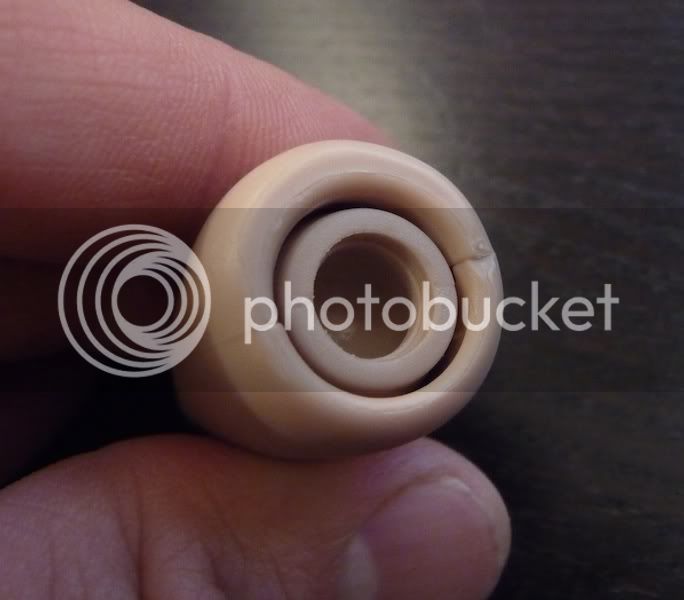
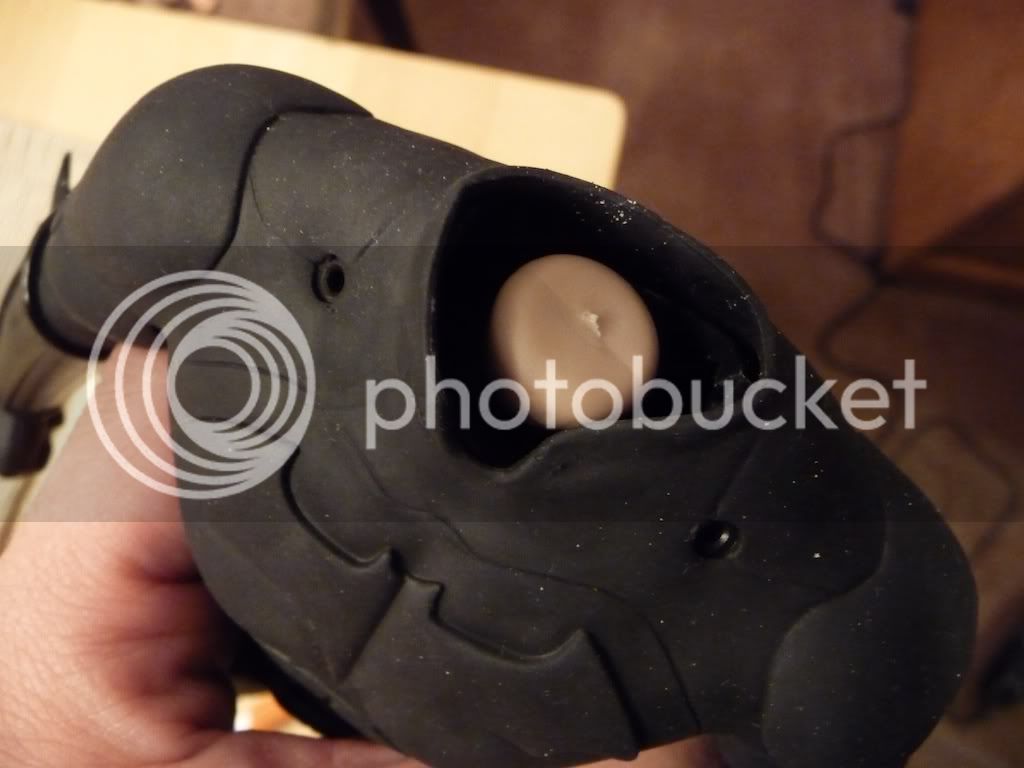
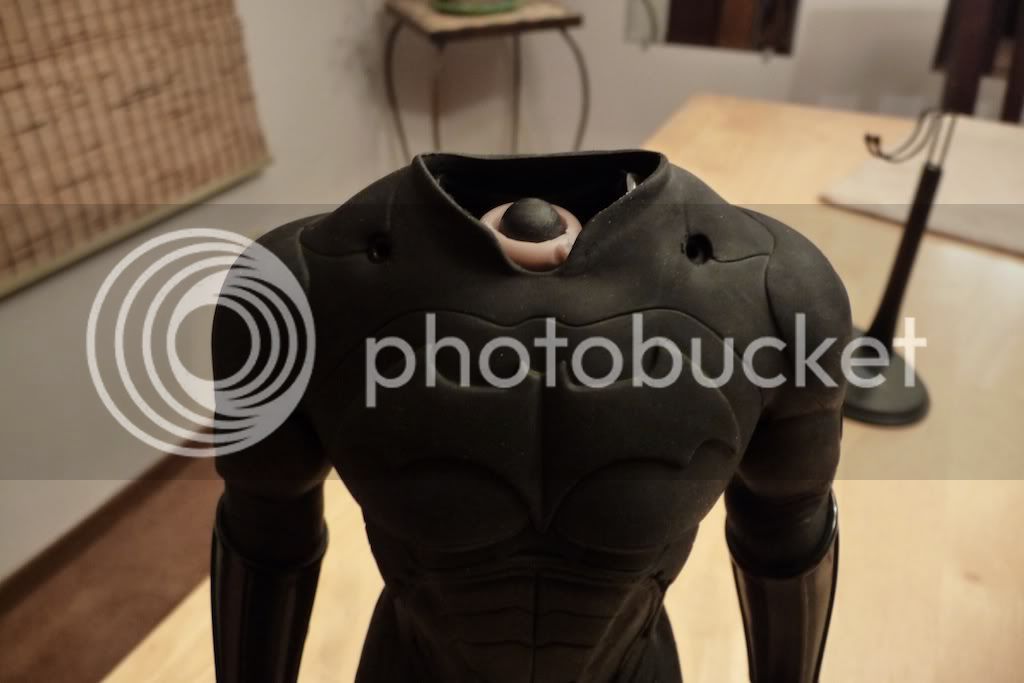
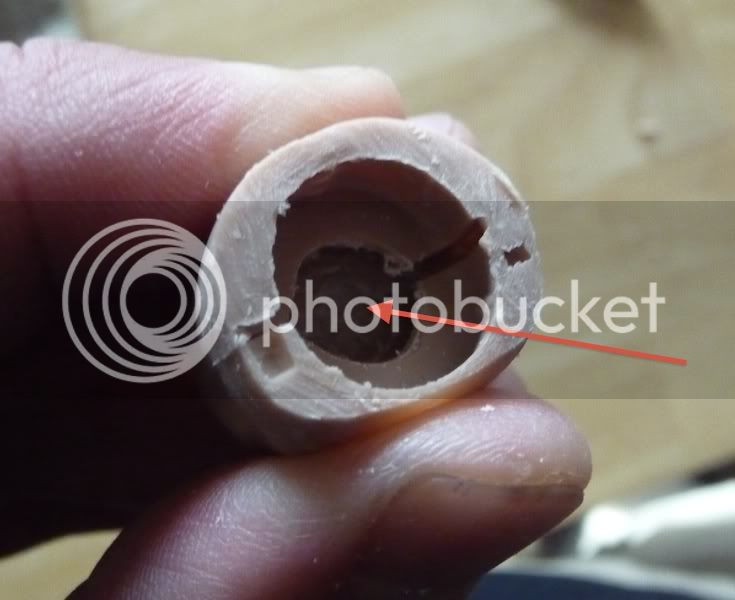
The underside of the neck looks like this:

02_P1160140.jpg

Figure 1.2


In the middle there you can see the little rubber piece that fits over the body/neck ball joint. There are two of these inside the neck, the other is for the head/neck ball joint.

Step 1) Split/pry the neck apart at the seam you can remove these two rubber pieces. You will only be modifying one of them and they are identical.

The basic goal of the internal portion of this neck mod is to get the rubber piece that is for the body/neck ball joint to sit lower. It normally sits here:

03_P1160163.jpg

Figure 1.3


You want it to sit here:

04_P1160200.jpg

Figure 1.4


Step 2) Use an exacto blade to cut the hole through the top of the rubber piece, but be careful to remove only just enough. You want the head to still fit relatively snug on the ball joint. You should have to work to get it off. Once I got the rubber piece pressed down to where it is in Figure 1.4 I had to use a needle nose pliers to get it off. That’s what you want. This is what keeps the head from having up and down play in it once the mod is done.

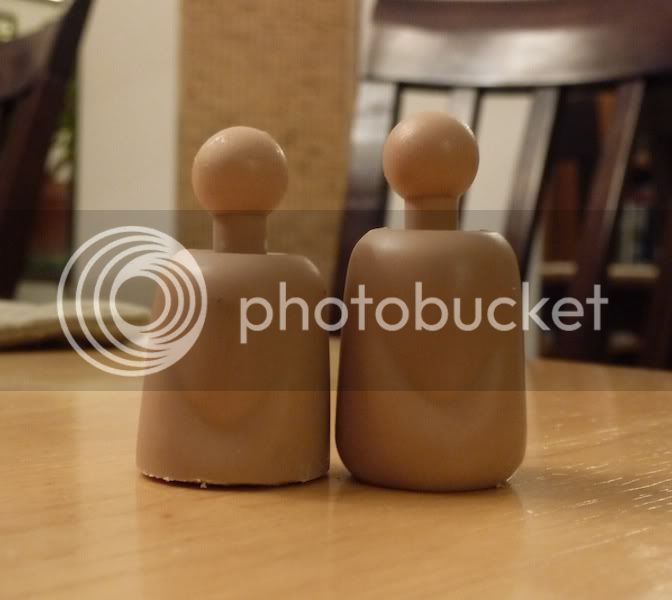
Step 3) The neck itself needs to be ground down on the bottom quite a bit. I forgot to take a comparison picture at the very end (I may have ground it a little shorter than this eventually), but this should give you an idea:

05_P1160157.jpg

Figure 1.5


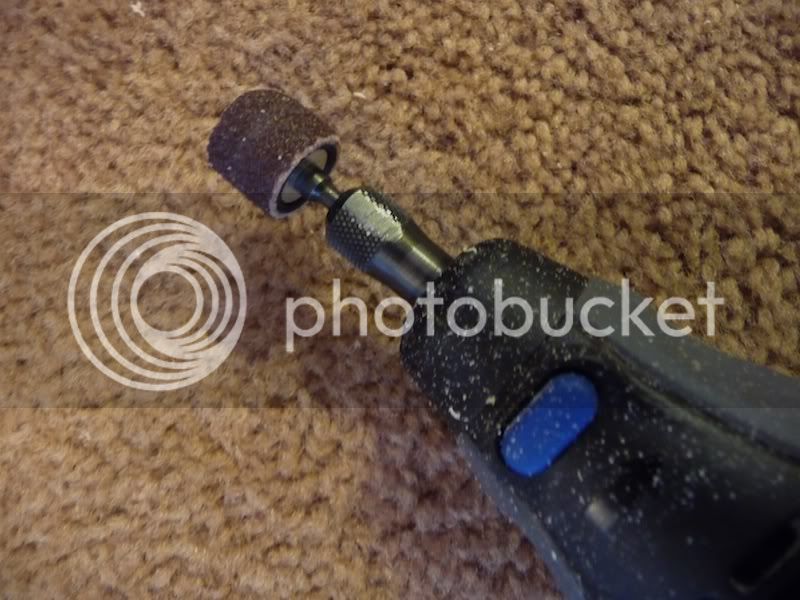
For this step I used the sandpaper tool on the dremel:

06_P1160151.jpg

Figure 1.6


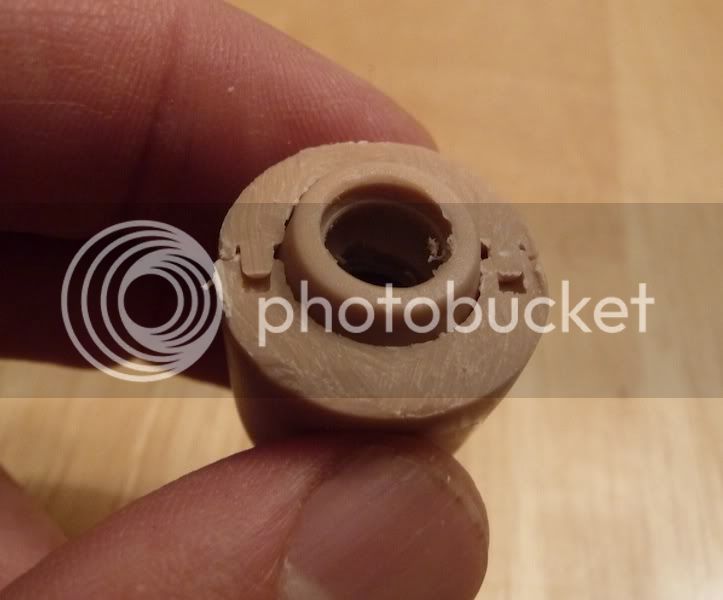
Step 4) You will also need to drill/dremel a hole inside of it to accommodate the body/neck ball joint.

07_P1160214.jpg

Figure 1.7


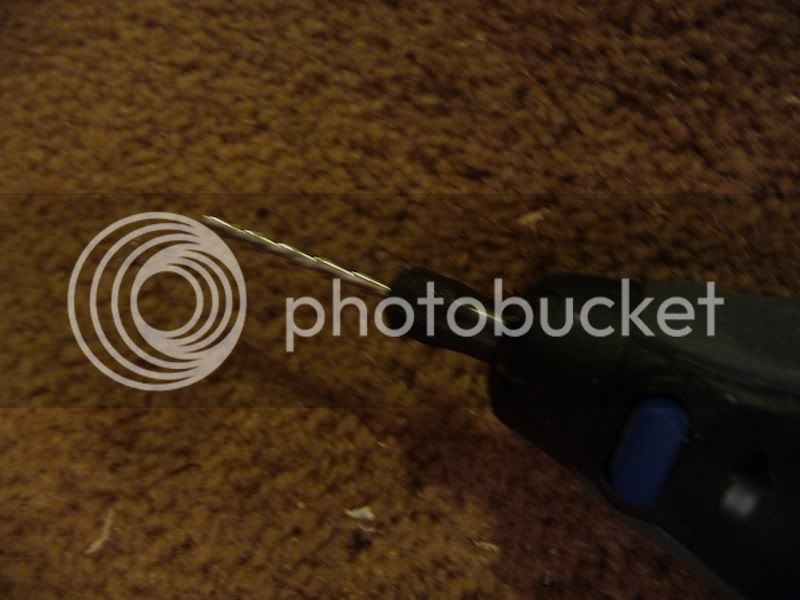
I used this cutting tool to create that hole:

08_P1160160.jpg

Figure 1.8


Step 5) When you put the rubber piece back in you will see the need to grind that shorter as well (I used the same sanding tool), as it will be sticking out like this:

09_P1160196.jpg

Figure 1.9


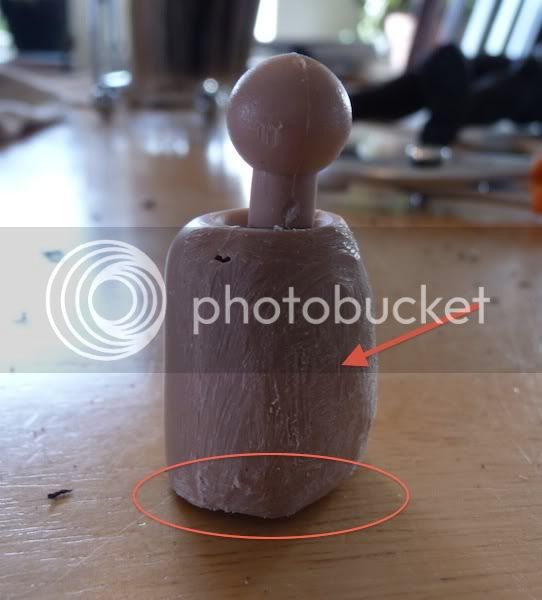
Again, be careful to not grind too much off this part, as this is what articulates with the body/neck ball joint. It tappers in towards the bottom; the goal is to grind off enough for the head to sit as low as was indicated in Figure 1.4 while still letting it taper in enough to hold in place. I should say here that I strongly suspect you could grind it totally flat here since I think it’s the top part of the rubber piece that holds it in place – again, see Figure 1.4. Anyway, I left a little bit of the rubber piece still sticking out so when I stand the neck up the plastic body of the neck is a little raised off the table (circled below):

10_P1160301edit.jpg

Figure 1.10


Step 6) In Figure 1.10 above, the arrow indicates the front (adam’s-apple part) of the neck. You can see that I have ground this down significantly with a dremel tool (Sanding attachment - Figure 1.6). The reason I did this was to allow for greater forward tilt at the head/neck ball joint (otherwise the inside of the cowl is bumping up against the adam’s-apple). Some forward tilt at the body/neck ball joint is lost from shortening it, and this step makes up for that a bit.

Step 7) After all this grinding it is unlikely that the two halves of the neck will ever click back in place so superglue them together along the seams. Make sure that the two rubber pieces and the head/neck ball joint is back in place as in Figure 1.10 before gluing it back together.


Step 2 is particularly important. Without doing that, I don't think the neck length is actually any shorter as that rubber piece would keep it from sitting any lower. You need to cut it as shown in Figure 1.4.
 
Re: T&C Customs- I'm no expert, never was, never will be...

@ T&C: Did you include this part of the mod?


Step 2 is particularly important. Without doing that, I don't think the neck length is actually any shorter as that rubber piece would keep it from sitting any lower. You need to cut it as shown in Figure 1.4.

haha, yup, LOL. I post a link of your tutorial right at my steps. LOL :clap
 
Re: T&C Customs- I'm no expert, never was, never will be...

Awesome work. I love the belt mod and the repainted gauntlets!

Thank you, those two mods are the easiest to do, hot/cold water trick does the deal. you can try it out yourself. fairly easy, can can be reverse modify back to original shape without damaging the plastic and paint.
 
Re: T&C Customs- I'm no expert, never was, never will be...

Could you post a closer pic of the eyes?


You mean to fill the space under where the cowl wings out in back when you bow the head?

here is a picture of the double side sticker I stick between the inner cowl and the neck to stabilize the pose.
DSC06657400x300.jpg


and a closer look of the eyes mod, simple lines on the top of the eyes will make a good enough of a difference. Micro pen 005 will do the trick.
DSC06663400x300.jpg
 
Re: T&C Customs- I'm no expert, never was, never will be...

Mod 3, Cowl Clips

have the cowl bottom shape it to the way you want first.
DSC06658400x300.jpg


I use CA Glue, works very well. Can be purchase from most of the hobby shop locally
DSC06659400x300.jpg


The key is to have the clip glue on but attach in this position, downward. NOTE* (when the cowl go over the cape, you want the clip to be in flat position, so this step is very important)
DSC06660400x300.jpg


the other side to match as well
DSC06662400x300.jpg


Back onto the body
DSC06665400x300.jpg


Front shot
DSC06664400x300.jpg


Now its time to clean the suit with wet microfiber cloth : ) Hope this tutorial help out. And please try this at your own risk.
 
Last edited:
Re: T&C Customs- I'm no expert, never was, never will be...(Batman Begins WIP)

Custom Cape, done by T&C
We have decide to make one cape a bit shorter than average cape. The pattern is the same as the Hot Toys one. We chose NOT to have the cape too long like a black trash bag hanging in the rear. Tho we still have a larger cape in the making, and it has wire inside, allow the cape to open up like the gliding scene.

The cape is silky smooth, but still shows the shine like in the film. The weight and how it drapes down its perfect and still create the natural fold.

thought we show how thin the cape is, and it can nicely go over the side of the cowl like the way it shows in the film.
DSC06669400x300.jpg


DSC06666400x300.jpg


DSC06667300x400.jpg


DSC06668300x400.jpg
 
Last edited:
Re: T&C Customs- I'm no expert, never was, never will be...(Batman Begins WIP)

I love that cape, very tempted to get one.
 
Re: T&C Customs- I'm no expert, never was, never will be...(Batman Begins WIP)

I love that cape, very tempted to get one.

its not on the thread yet, just something we suddenly decide to do to improve our Batman Begins figure. This is more of a custom cape we did on the side, it was simple and clean. But if you want one, email us at [email protected]

https://sideshowcollectors.com/forums/showthread.php?t=104832

As you can see, the outside cape color is shinier and inside is different. Its very close to how it was in the movie.
DSC06671300x400.jpg


DSC06668300x400.jpg


and you can see a sewing line in the inner part of the cape, so we added that in our cape too, on both side.
BatsBegins6-1.jpg
 
Last edited:
Re: T&C Customs- I'm no expert, never was, never will be...(Batman Begins WIP)

Damn that cape is gorgeous! Great work
 
Re: T&C Customs- I'm no expert, never was, never will be...

haha, yup, LOL. I post a link of your tutorial right at my steps. LOL :clap

Woops! Didn't catch that! :slap

The link goes to the wrong page BTW. :peace
 
Re: T&C Customs- I'm no expert, never was, never will be...(Batman Begins WIP)

:hi5:just learned something about my camera, decide to play around real quick....ISO.... there are still a lot to learn......

DSC06719640x360.jpg
 
Back
Top