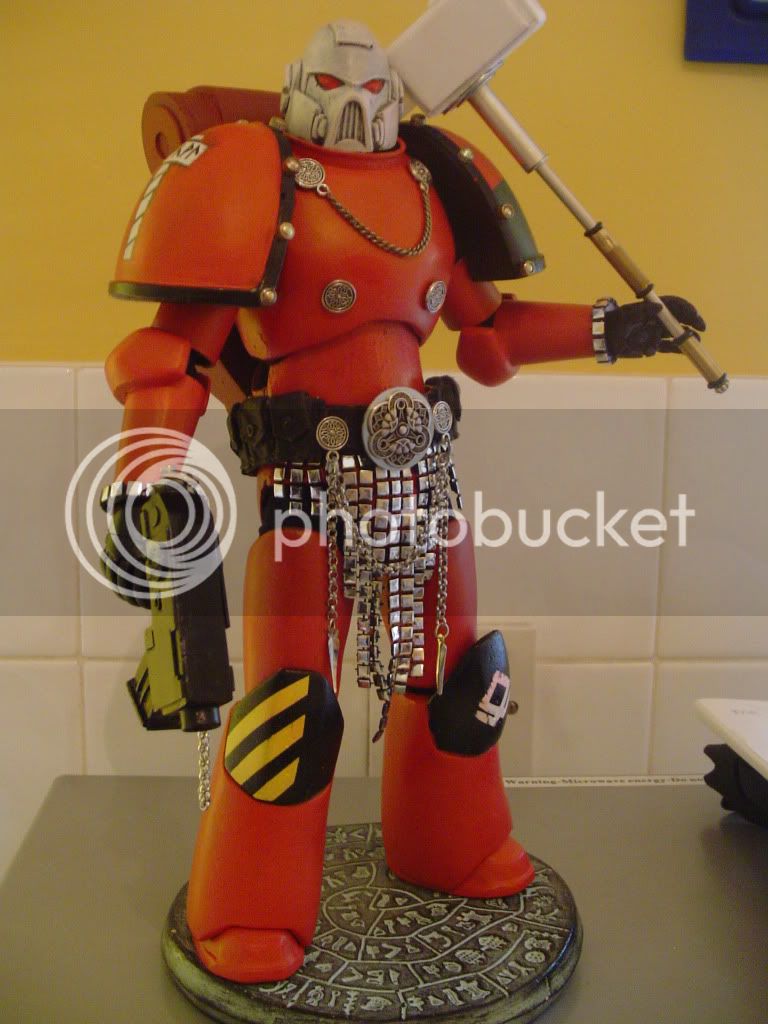
1/6 Space marines.....

Collector Freaks Forum

Help Support Collector Freaks Forum:

This site may earn a commission from merchant affiliate links, including eBay, Amazon, and others.
Hi All

Thanks heaps guys I had a blast doing the marines and wil be getting more from Mark in the future that is for sure. I will post the better pics and recipe very very soon.

thundergod - I totally love the way your marine is turning out mate and I have no doubt that the final figure will be mind blowing.

Wanderer - Once I get another marine mate I will do a picture tutorial for you but in the mean time this is what I do.

1. Once you have the figure painted up give it a little weathering with some normal paints such as dent marks etc.

2. When you have done the weathering with the paints get the colour chalks/pastels you want to use and get some sandpaper and rub the stick over the sandpaper lightly onto some paper or into a container etc.

When you have the amount you need get a medium brush I use a GW CITADEL tank brush dap te brush into the chalk/pastels then lightly brush over the area you are doing.

3. Keep doing this till you are happy with the effect you are after.

NOTE: Just remember when weathering with paints or pastels the best reference you can go by is real life.

For example if you are doing a figure that has been in the desert for a long period of time is going to bloody dirty and sand and dirt is going to get into everything.

Ron
 
Hey Guys

Well as promised here are my usual outdoor pics.

Ron

RECIPE

Armour - The armour, bolt pistol and grenades are again from my good mate and needed very minor sanding. The additional tubes, chest plate/straps, extra bullets and bolts are pieces of 1/6th and 1/35th from the bits box. The small skulls are from some Warhammer and Warhammer 40k parts which have been cut and placed on the armour.

The bone trickets and runes are done from a 1/6th plastic skeleton and the rune stone is a piece of marine foam cut to shape and a symbol cut into it. The fur pelt is a piece of imitation fur from the craft shop which has been washed and drybrushed to get the grey affect.

The purity seals have been done using putty and 1/35th parts with and old hanky cut out for the ribbons.

Power Sword - The sword has been made from a hilt from a 1/6 timeline figure the blade is plasti-card which has been cut and shaped. The skulls are again from Warhammer and Warhammer 40k parts and the bone trickets are from a 1/6th plastic skeleton and the rune stone is a piece of marine foam cut to shape and a symbol cut into it.

Bolt Pistol - The pistol is resin and came with the kit I just added a sling and some small parts from 1/6th and 1/35th parts. And again the bone trickets and rune stone have been done the same as the Power Swords.

Knife & Sheath - The knife's handle is from a 1/6th German Bayonet and the blade and hand guard are made plasti-card. The sheath is made from some old leather.

sw1.jpg


sw2.jpg


sw3.jpg


sw4.jpg


sw6.jpg


sw7.jpg


sw8.jpg
 
Hemble: The wip syndrome strikes again - wasn't sure how I felt about the Space Wolves marine when you first showed it, but when you added the final detailing, it blew me through the wall!! I loooove this dude, he is badass!

Thundergod - i know that insecure feeling you mention, but from what I can see, you're off to a tremendous start, and the details you have planned sound incredible - rock it out, Odinson!
 
Excellent work from everyone!!! Some breathe taking customizations here. It is enjoyable to see the WIP pics, too. Keep them coming please!
 
HI there Ron
a really beautiful piece! I only have one, 1, uno, little criticism..........I think that the strap for the bolter does not fit with the look and feel of your figure. Suggestion. Maybe replace with a piece of chain for the strap? Hope you don't mind me saying that.

:1-1:
Ian.
 
HI there Ron
a really beautiful piece! I only have one, 1, uno, little criticism..........I think that the strap for the bolter does not fit with the look and feel of your figure. Suggestion. Maybe replace with a piece of chain for the strap? Hope you don't mind me saying that.

:1-1:
Ian.

After going back and reviewing the pics, I do have to agree on this point. Everything blends so seamlessly - except for the strap. It is a little too clean and generic for such a beautiful figure. A chain could work, or some weathered-looking leather. Oh, and this is intended as well-meaning constructive feedback...I think a forum like this is a great way for us to share ideas with each other to help our customs reach their full potential! :hi5:
 
After going back and reviewing the pics, I do have to agree on this point. Everything blends so seamlessly - except for the strap. It is a little too clean and generic for such a beautiful figure. A chain could work, or some weathered-looking leather. Oh, and this is intended as well-meaning constructive feedback...I think a forum like this is a great way for us to share ideas with each other to help our customs reach their full potential! :hi5:

I absolutely agree, there are so many fantastic painters, sculptors, scratch-builders and figure makers on Sideshow that it's a place to learn and share

:)
 
Hey Guys

As always I appreciate the feedback guys always great to read what you guys think.

And don't worry guys my 6yr old daughter saw it and said oh my god dad that looks awesome but what the heck is that green thing hanging of it.:eek:

So the strap has been removed and I'm liking the way it looks without the strap so I think I will leave it as it is now.

Ron
 
After a weeks work on my marine , I've decided on a new colour scheme ( I just wasn't satisfied with the metallic finish ) and have gone with a more "traditional " look . Still quite a way to go but I feel I'm back on track .
DSC03669.jpg
 
After a weeks work on my marine , I've decided on a new colour scheme ( I just wasn't satisfied with the metallic finish ) and have gone with a more "traditional " look . Still quite a way to go but I feel I'm back on track .
DSC03669.jpg

Great colour choice thundergod. I think it really opens up the possibilty to play about with weathering it up. Love that belt btw. Very disco!
 
The problem with my previous choice of scheme was the fact that I used a can of car paint , which has a semi gloss finish . This made it very difficult to "matt down" and weather . This , added to the fact that I plan on using a fair bit of "original" detailing , was moving it away from the "Warhammer look" .
 
The problem with my previous choice of scheme was the fact that I used a can of car paint , which has a semi gloss finish . This made it very difficult to "matt down" and weather .

Hmmm...That's an interesting observation. I've bough a can of Humbrol model spray paint which i think will come out glossy. It'll be intresting to see if I suffer with the same issues.
Regards your original paint scheme, I didn't see a great deal wrong with it other than maybe being a shade or two dark? I reckon you could have achieved a fairly decent weathering job had you stuck to it...Great results so far with the change of direction though.
 
Hey Guys

clparker04 - Cheers mate and the skulls are 28mm bits from GW Warhammer Chaos Banners.

thundergod - I'm really liking the new colour scheme and all the detailing you've added, I can't wait to see him complete.

Ron
 
Hmmm...That's an interesting observation. I've bough a can of Humbrol model spray paint which i think will come out glossy. It'll be intresting to see if I suffer with the same issues.
Regards your original paint scheme, I didn't see a great deal wrong with it other than maybe being a shade or two dark? I reckon you could have achieved a fairly decent weathering job had you stuck to it...Great results so far with the change of direction though.

I prime my figs normally with either white, grey or black acrylic car primer spray. Then i use watered down GW paint for the colour. Its a bit more time consuming but its easier all round unless you have a spray gun which i dont.
 
I prime my figs normally with either white, grey or black acrylic car primer spray. Then i use watered down GW paint for the colour. Its a bit more time consuming but its easier all round unless you have a spray gun which i dont.

Yeah agreed. The beauty with this figure is that perfect paint apps re not really needed as weathering is the name of the game.
With that in mind I usually spray the bits with black primer and dry brush the colour over it. Doing it this way creates a nice depth of colour when the black primer still remains in the crevices.
I think I'll probably use the spray for the larger areas like the chest, upper legs and then dry brush the more detailed sections.
Still got so much to do with bits of plasticard, some sanding and filling... Long process this but I want to nail it :)
 
Back
Top