Building your MARINES - CORRECTLY

Collector Freaks Forum

Help Support Collector Freaks Forum:

This site may earn a commission from merchant affiliate links, including eBay, Amazon, and others.
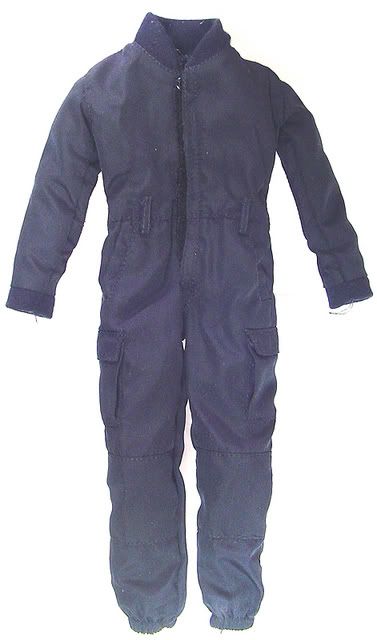
Hi. I just ordered this Gameitoy brand GSG-9 jumpsuit for my custom Bishop from www.war-toys.com.
BishopGameitoyGSG9jumpsuit.jpg


Here's the link to War-Toys website. After you click on the link look at the left side of the page for the "Gameitoy" brand name, click on it. Then click on GSG9. It will take you to a page with all of the GSG-9 accessories they have for sale including the jumpsuit.

https://www.war-toys.com/

It is on sale really cheap for $1.25! I think it looks much more accurate to the one that Bishop wore in the movie. Right now I have a darker one on my Bishop that I don't like as much as the GSG-9 one I ordered from War-Toys. I hope this helps you out!

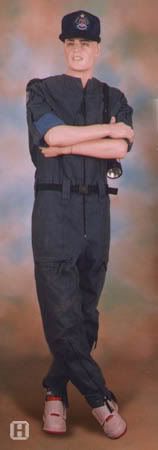
Here's a picture of the actual Bishop jumpsuit used in the movie. It is from Harry Harris's ALIENS website. He never word the hat of course, but he did wear the same U.S.S. Sulaco patch on the hat at the top of his right sleeve.
BishiopALIENSjumpsuit.jpg


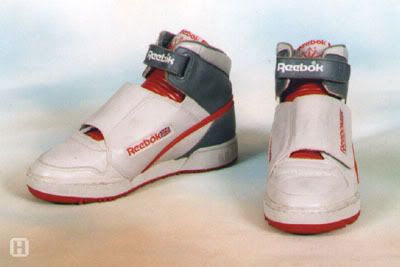
If you want to get even more accurate with your Bishop, try to find a loose pair of the Hot Toys Ripley "Reebok" boots. I got some of those and cut off the tops of them since Bishop wore basically the same shoes that Ripley did, but just the "hi-top" version of them.
BishopALIENSReebokhightopsneaker-1.jpg


This photo of Bishop's shoes comes from Harry Harris's great ALIENS website. His site is a great resource for accurate ALIENS wardrobe reference information and pictures. Check it out at: https://www.harryharris.com/


:D
 
Last edited:
Thanks! I ordered that jumpsuit and also the GIGN jumpsuit below, since they were both cheap and I liked the extra pockets that the GIGN had. I'll see which one works best when I have them in hand.

jumpsuit.jpg
 
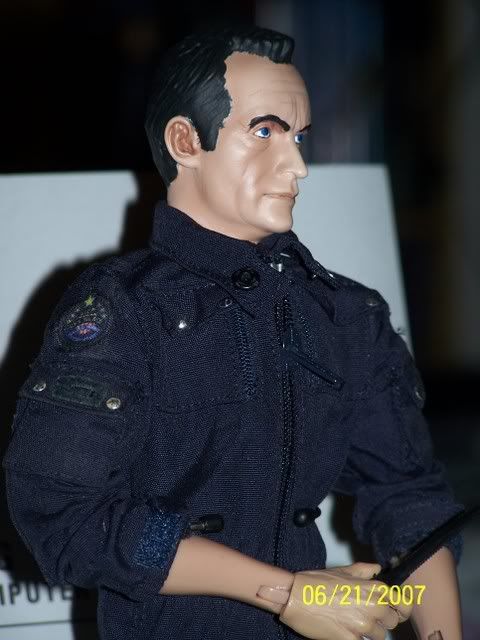
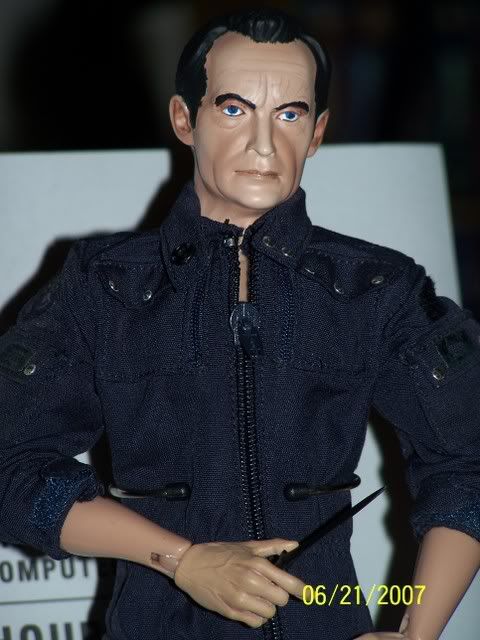
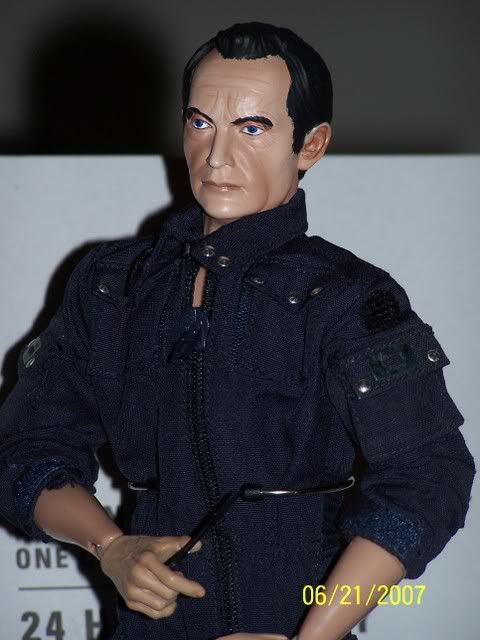
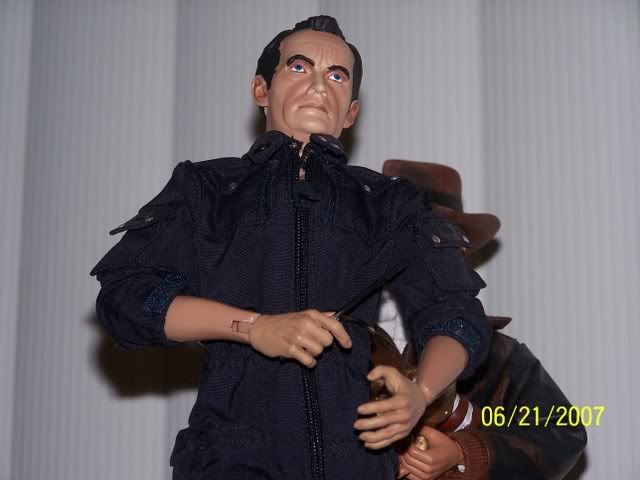
Hey, icruise. I am using that same GIGN jumpsuit now. It is just too dark of a blue color for my taste, and I don't like it having SO many pockets. It's a dark navy blue color, really almost black. The picture of it you show from War-Toys.com makes it look as if it is a lighter blue, but it is much darker in person. Heres's some pictures of my Bishop in it as he is now....until I get in the GSG-9 jumpsuit from War-Toys.com.

BishopwithUSCMpatchknife.jpg


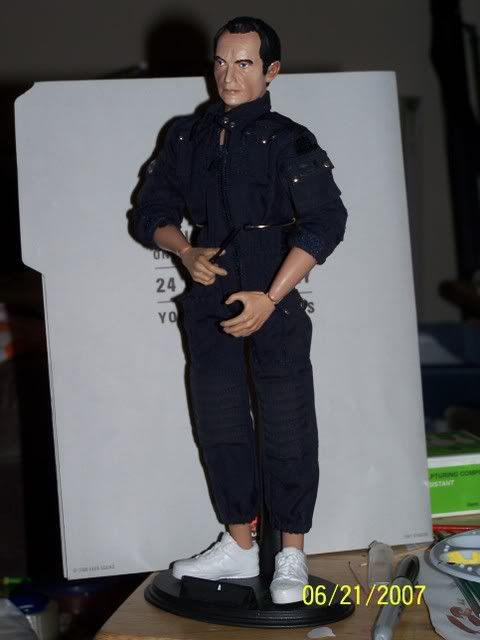
After putting the GIGN jumpsuit on him, I noticed that it is a little short in the legs. But this picture is before I had the Ripley boots on him that I cut down to "hi-top" size. He's shown here with some regular 1/6 scale white tennis shoes. The Ripley ones I have on him now almost reach to the bottom of the pants legs. So I'm hoping that the GSG-9 one will be longer to reach down to the top of Bishop's shoes.

Bishopfullfigureknife.jpg


Bishopwithknife3.jpg


Bishopwithknife4.jpg


Bishoplowangle.jpg


Use your choice of the two jumpsuits you want for your Bishop icruise. But, I'm changing mine into the GSG-9 one when it gets here. I just wanted to show you pictures of my Bishop in the other one, the GIGN jumpsuit.
 
Last edited:
I'm sure you could lighten the color of that GIGN jumpsuit by painting over it with lighter blue. I just hope that the GSG-9 one I'm getting is actually a lighter color of blue than the GIGN one is. I think it is. I think that pjam on this board also used the GSG-9 jumpsuit for his great Bishop custom with rooted hair! That one is awesome! :D
 
Last edited:
Fantatsic work Mike, your custom Bishop looks excellent. Its really got me thinking about making my own Bishop in the new year.

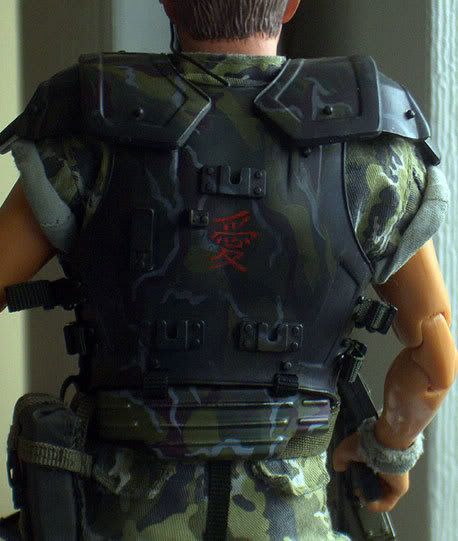
This week I painted the japanese character onto the back of Hicks armor, its not perfect but it turned out ok I think. The decal that I had initialy put on there actually came apart when I washed down the armor prior to applying the black weathering, even though I had sealed it with testors dullcote!!! Therefore I resorted to tracing the outline of the character with pencil then just hand painting over it. The brush strokes really do help give it a more organic appearence.

Sorry for the poor pic, will post better ones once Ive finished all my modifications.

hicks_love_symbol.jpg


Thanks again Mudshark for nailing the correct characters and sharing it with your fellow Aliens freaks.
 
i really need to know what kind of brushes you guys use.i tried painting a tattoo and the finest brushi bought just wouldnt do, ended up using a fine tipped permanent marker:D.
 
Fantatsic work Mike, your custom Bishop looks excellent. Its really got me thinking about making my own Bishop in the new year.

This week I painted the japanese character onto the back of Hicks armor, its not perfect but it turned out ok I think. The decal that I had initialy put on there actually came apart when I washed down the armor prior to applying the black weathering, even though I had sealed it with testors dullcote!!! Therefore I resorted to tracing the outline of the character with pencil then just hand painting over it. The brush strokes really do help give it a more organic appearence.

Sorry for the poor pic, will post better ones once Ive finished all my modifications.

hicks_love_symbol.jpg


Thanks again Mudshark for nailing the correct characters and sharing it with your fellow Aliens freaks.


How'd you do that so nicely???
 
Stendec,

Nice redo on the kanji character! It looks just like it did in the movie now. You've obviously got a very steady hand. It shouldn't be that much harder to apply the "LIFER" lettering in between the two mounting brackets below it. They are closer together on the figure's armour than they are on the full-sized replica from alienscollection.com, but there's enough room for someone with your skills to put it in there. You can always use a sharp-pointed hobby knife blade or a toothpick tip to clean up the edges afterwards, in necessary. If you hand painted that kanji on there like that, then you can definitely paint LIFER on there too! Looking forward to seeing the finished results. :D :cool:
 
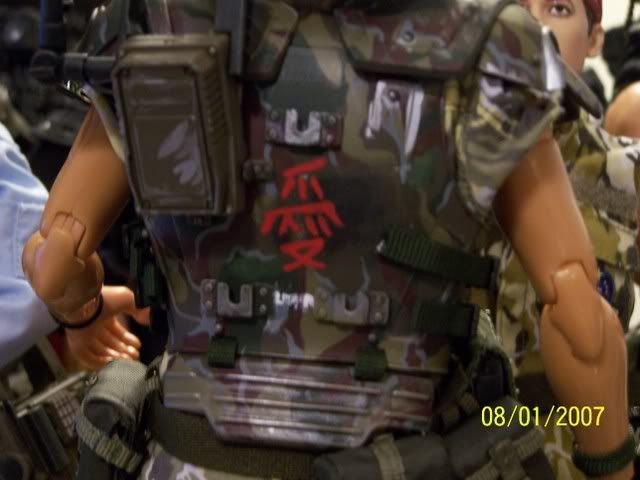
I agree that's some great work! I painted on that symbol on the back of my Hicks armor. It turned out okay, but the white "LIFER" is sloppy-looking, so I may paint over it sometime and try it again.

100_5350.jpg


I'm okay with the symbol in red, sorry if it is not 100% accurate. But, I hope to repaint the "LIFER" word someday soon.
 
Thanks guys. To paint the character I used the smallest brush I could find and held my breath as I painted, seriously lol. I used a toothpic to clean up a couple of areas that I thought looked untidy. The red paint didnt brush very well onto the armors smooth surface (although I havent had this problem with silver paint) so the character had to be painted in about three coats in all.

Im probably going to paint the "LIFER" graffiti underneath the two lower brackets rather than between them. I just think it will look better on the HT armor because of the very narrow space. Its probably the last detail I'l add though so I'l have a think. Now I just need to add the metal dings to the body armor, finish those darned headsets and add a few other minor details (dog tags :rock) then my Hicks should be finished.
 
Last edited:
Thanks guys. To paint the character I used the smallest brush I could find and held my breath as I painted, seriously lol. I used a toothpic to clean up a couple of areas that I thought looked untidy. The red paint didnt brush very well to the armors smooth surface (although I havent had this problem with silver paint) so the character had to be painted in about three coats in all.

Im probably going to paint the "LIFER" graffiti underneath the two lower brackets rather than between them. I just think it will look better on the HT armor because of the very narrow space. Its probably the last detail I'l add though so I'l have a think. Now I just need to add the metal dings to the body armor, finish those darned headsets and add a few other minor details (dog tags :rock) then my Hicks should be finished.

This is just a suggestion mind you, but if you happen to have a crow quill pen with a very fine nib (metal pen tip, if you're scratching your head), it may be possible to just draw it on with white paint. You might have to thin your paint down to the consistency of ink to get the flow right, but it ought to work. You can do much finer lines than you can with a brush, with more control, too. You could darn near write the Lord's prayer on the head of a pin with one of those suckers, I **** you not! If you decide to try it, just be sure to practice on something else till you're ready to go for it. :D
 
Great tip Mudshark, I might give that a try :chew

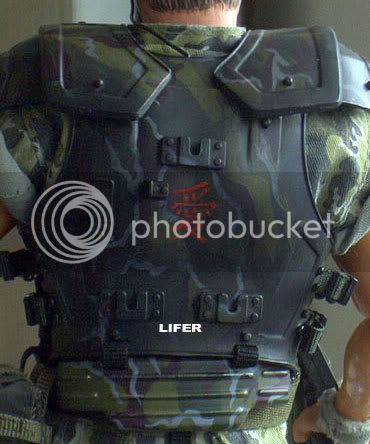
I photoshoped the "LIFER" tag real quick to illustrate where I thought about painting it. I dunnno, just seems better suited there than inbetween the brackets, even though that would be more screen accurate.

lifer_temp.jpg


As yo can see in the pic I put a fair amount of drybrushed black on the torso armor too, maybe a tad too much actually but I like the depth it gives and the appearence of smoke and oily residue. The silver dings should brighten it up a gain somewhat anyway.
 
Last edited:
Great tip Mudshark, I might give that a try :chew

I photoshoped the "LIFER" tag real quick to illustrate where I thought about painting it. I dunnno, just seems better suited there than inbetween the brackets, even though that would be more screen accurate.

lifer_temp.jpg


As yo can see in the pic I put a fair amount of drybrushed black on the torso armor too, maybe a tad too much actually but I like the depth it gives and the appearence of smoke and oily residue. The silver dings should brighten it up a gain somewhat anyway.

The darker tone doesn't look bad at all, and as you said, the scratches and dings will add a nice contrast. Too bad you couldn't just reduce the size of the LIFER you've got on there... I'll bet you could get it to fit between the brackets then, and it should still be readable, even that small. Probably save you a lot of fiddling with a pen or brush, and it would be more screen-accurate, too! Do you think that would work? :D
 
You're right, I really should put it inbetween the brackets I guess given that I've put all this work into making it accurate so far lol

Im actually abit annoyed that I was so overzealous with the black washes. I could wash it all off with some elbow grease and start again but Im just gonna live with it now. Hicks armor does look pretty dirty in the latter part of the film following the dropship crash, but the problem is that the HT camo colours are far from accurate so its near impossible to get it looking close after applying dark washes. I just hope the silver will help.
 
Last edited:
I lucked out having Les's paint job pretty much match the paint I had already done on my Hicks' arms, so I left it be.
 
Back
Top