Building your MARINES - CORRECTLY

Collector Freaks Forum

Help Support Collector Freaks Forum:

This site may earn a commission from merchant affiliate links, including eBay, Amazon, and others.
US COLONIAL MARINE WEATHERING - PART 2

IMAGE 15 & 16
Now for the additional work on the greaves. In the movie we see Hicks tightening up the straps on his greaves as the Marines are getting ready for the drop, and if you look carefully you see a kind of black waterproof material under the straps. For this I needed some really thin plastic or vinyl that was really flexible, and I found a black lever arch file/folder in my closet and after cutting off the plastic, realized it was the ideal material for this. So I just cut it to fit and glued it on with superglue as shown.

g1.jpg

g2.jpg

IMAGE 17
The left image is before and to the right, after. The Apone BDU's are really brightly colored, and seeing as Apone has both a Flamethrower and Pulse Rifle, I wanted to make use of both weapons. Only in the movie, Apone is only equipped with a Pulse Rifle - in the Aliens nest in the Atmosphere Processor, he grabs the Flamethrower from another marine and uses it to torch a coccooned colonist when the chestburster emerges. So, I really wanted the BDU's to appear quite dirty.
There's a couple of ways of doing it - you could fill a small bowl with water and heavily diluted black paint and submerge the BDU's within it, or do as I did and use black acrylic paint applied with an airbrush. Personally I prefer the airbrush option as I have more control over how dirty it looks, and it dries pretty quick.

g3.jpg
 
Last edited:
IMAGE 18,19,20 & 21
Now for the armour weathering. For this I airbrushed diluted black acrylic paint onto the armour. This was a two-stage process. First, I gave the whole of the armour a light covering. If you try to do any more than that initially, the paint will pool up and look crap. This is because we are painting onto plastic, without a primer.
Then when this is dry, recesses and other areas such as under the arms get more black paint. And because it's already been given a light coat, the paint will 'key' to it better. This was done on all armour pieces at once - compare it to previous shots, and you'll notice how the paint camo I applied earlier now appears more subdued.

1o.jpg

1p.jpg

1q.jpg

1r.jpg
 
Last edited:
IMAGE 22,23,24,25 & 26
Now for the final part - adding silver to make it look like the paint has scraped off exposing the metal underneath. For this I used a very fine, high quality brush...and lots of patience. Not how the raised areas are given the most silver paint, and recesses are given little or none at all. I do this last as with the black paint sprayed on earlier to subdue the camo colors, the silver really 'pops' and becomes noticable. Think about areas on the armour that would get the most knocks if a person was wearing it - the kneeguards, for example.

1s.jpg

1t.jpg

1u.jpg

1v.jpg

1w.jpg
 
Last edited:
IMAGE 28,29,30,31 & 32
Re-assembly. The armour is placed back on. Long-nosed pliers come in handy with the small clips.
And that marines, is the end of the weathering the armour tutorial. You can add more black or darken the shading still some more, or add more or less silver; up to you.
If you want to make it even more accurate, add thin black piping around the top of the torso armour where the front of the neck is, and all the buckles a dark olive drab color. I'll probably do that some other time. :D
Hope this has been of some help.

2a.jpg

2b.jpg

2c.jpg

2d.jpg

2e.jpg
 
Last edited:
This has got to be one of the BEST tuturials I have ever seen! I can't imagine how much time you put into this. We really really appreciate this! I will definitely be trying this sometime in the future. Thank you!!
 
Fantastic tutorials and beautiful work! Thank you so much for your hard work and time you put into all this.
 
does anyone have a pic of the ada chan Resin Bishop Sculpt that has been painted..I own it but would like to see an example painted if someone has it.. thanks..
 
anyone got a frontline apone head painted for sale? i keep posting the the wtb thread but never get a response :(
 
Hey so I got a question for you Aliens fanatics, and since this is the only thread still active enough to ask this in... ;)

Who are in both teams? I am just now putting the finishing touches to the second part of my Aliens Hadley's Hope corridor and so have enough room to put both squads on there and I want them in the right order.
 
Hey everyone. I have all of the Hot Toys ALIENS marines, and Ripley, and the big HT power loader with Ripley, and my own custom Bishop and Newt. Anyway, I have Hot Toys U.S.C.M. ALIENS marine "starter kit/set" for sale in the sale/trade section here. Here is a link to my thread there:

https://www.sideshowcollectors.com/forums/showthread.php?t=64356&highlight=uscm+aliens

Please take a look at it, and buy it from me if you are interested! The Hot Toys marines are still in VERY HIGH demand here, and on eBay, and other 1/6 scale collector websites! The USCM camo uniform I have is from Private Hudson. This "starter kit" I put together also comes with:

a Hot Toys Hudson body with the hands and foot pegs that fit into the marine boots, the green shoulder bag, eight red-tipped grenades, the motion tracker, the M41-A pulse rifle, the black VP-70 pistol and holster, the green web belt with two pouches, and the Private Mark Drake ALIENS Hot Toys figure stand! It's an awesome set! :horror You would just need a Hot Toys neck post, the USCM marine armor, the boots, and a head sculpt to finish up your marine. I give you most of what you need in my "starter kit"! Please send me a PM with any questions you have. I am open to buyers on this board worldwide!
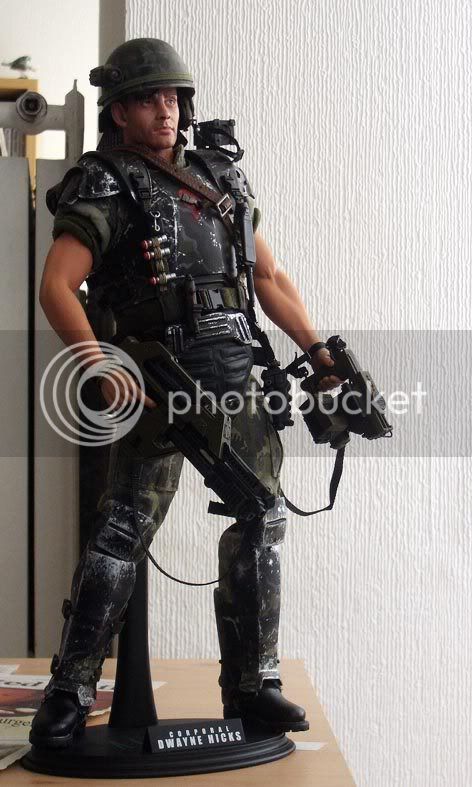
I just wanted to be sure to make mention of my sale thread here for those board members who don't check out the for sale/trade thread on this board that much. I am trying to help out anyone new to the Hot Toys marines, or "veterans" to the line, like me, that want another marine in their collection.
:D
 
Thanks MML, yeah I did alot of modifications on this figure. The details are in this thread on page 49

https://sideshowcollectors.com/forums/showthread.php?t=21974&page=49

I've since swapped the stock body for an old Dragon muscle body with concealed joints. Looks nicer on this figure because he had his sleeves rolled up so high.


hicks_popeth_3.jpg

Does anyone know if the Dragon Cheong figure is a suitable alternative to get the look of the arms that Stendec's figure has above?
Thanks,
- SJ
 
Does anyone know if the Dragon Cheong figure is a suitable alternative to get the look of the arms that Stendec's figure has above?
Thanks,
- SJ

It would give basically the same effect but I think that you would never get an effect as good as that. Your talking about the cheong figure which has the arm sleeves that can slip off ?.
If so a few people used those ( in this thread too ) to cover up their vasquez's arms. Awesome job on all the tutorials aswell mate. :D
 
Back
Top