Murderofcrows71
Super Freak
Okay, first I'd like to apologize about the pictures. If Sideshow would hold back on some of the great stuff I have preordered I could afford a new camera. Unfortunately that's not the case and my camera sucks. I've had a few requests to post some of my custom ideas so I thought I'd start this thread with a short tutorial and hope you other customisers will follow suit in this thread and I'll drop the Lost Boys part in the title and it'll just be Custom Tutorials. Anyway here goes:
First of all after reading this thread about what other 12" vampire figures people would like David from the Lost Boys kept coming up.
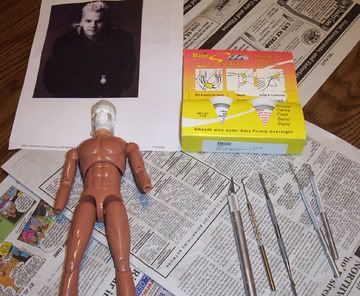
https://sideshowcollectors.com/forums/showthread.php?t=9760&highlight=undone I also thought that would be a cool character from one of my favorite 80's flicks so I scoured ebay for this.
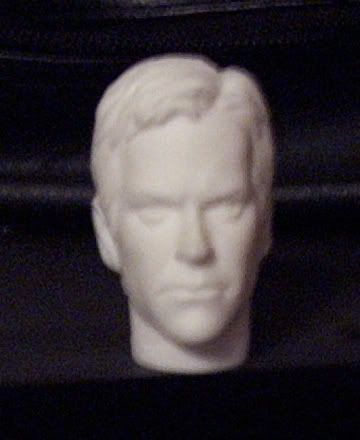
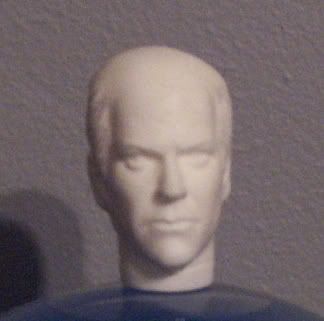
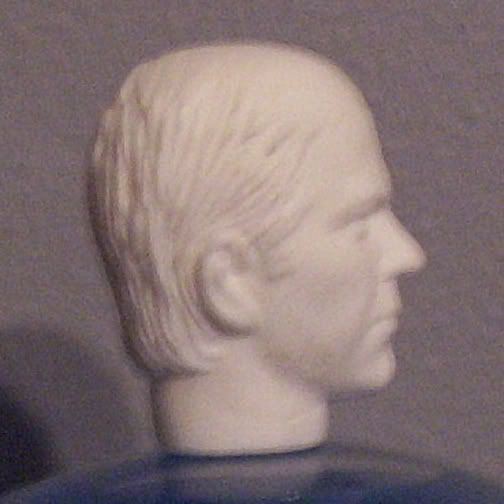
I'm assuming it's a copy of the medicom 24 Jack figure, which will do nicely. First problem was the hair, so with some sanding using standard sandpaper the top of the hair was erased leaving only the sides which will work for the figure anyway.
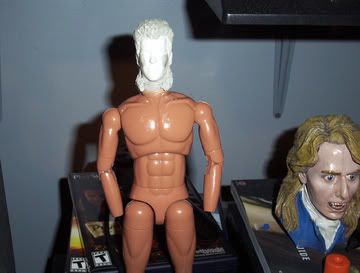
Now it's time to do some sculpting. I use magic sculpt, which is a two part polymer clay. You mix two fairly equal parts together and in about twenty minutes you have rock hard resin like material. Problem is you have a time limit so you have to work somewhat fast. Good thing is with this stuff you can do a little at a time and come back and add more later. I also find that water on a q-tip helps thin the magic sculpt and softens edges and erases fingerprints, its also definately needed for blending the magic sculpt into other parts of the scupt. So with the Kiefer head sanded on top I'm thinking this sculpt is of him now and I need him 20 years ago. I decided to sand the jawline down abit to give a less rounded look. Then the sculpting begins. I apply magic sculpt to the head and shape it using clay tools and a couple dental tools I picked up at some arts and crafts flea market. To try and get a spiked look to the hair I sculpt strait up and out from where I place the hairline, and continue around the head the same way.
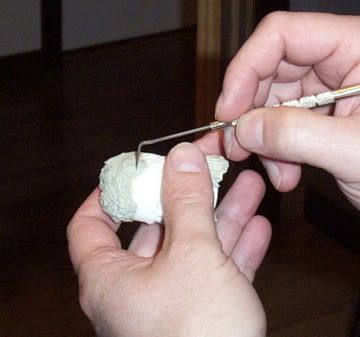
I also decided to add some clay to the face to make some higher cheek bones and hopefully make the eyes look a little deeper set in the head, like Kiefer looked in the film. Last I add the Joe Dirt 80's mullet.
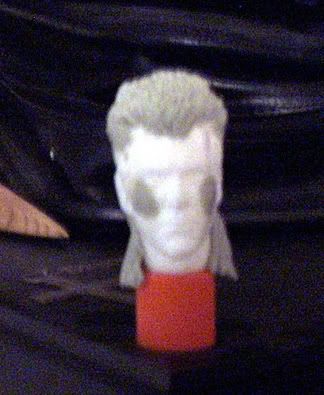
I know what you guys are thinking. Of course I screwed up. Why? Because I plan on using a Dragon Models figure for my body and this head cast is sold. No hole for the Dragon neck post. So the whole neck and mullet hair was sanded back off the head. I cut the existing Dragon head off below the chin which is right above the neck post on the figure and the David head is glued on. To which more magic sculpt is needed to resculpt the mullet and to blend the neck together and get rid of the gap.
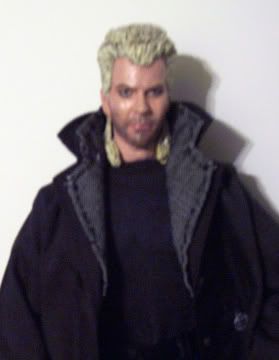
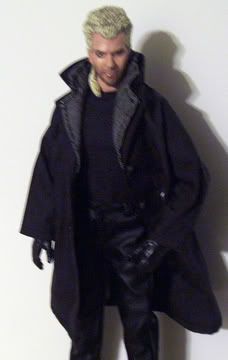
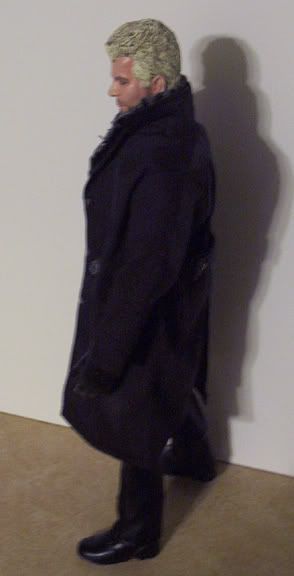
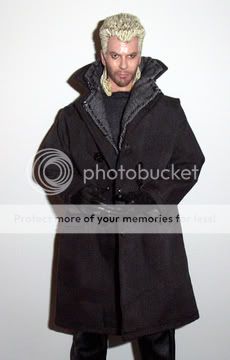
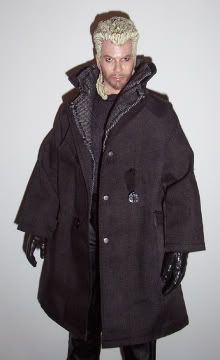
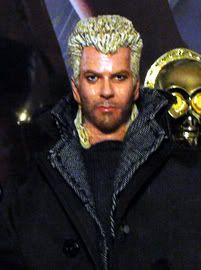
Now we get to paint so I mix some dark and light flesh tones for the darker areas and highlights. Same with the hair; darker areas first and then the bleach blond hair which looks almost white is drybrushed over the darker color. I tad of straight white is used to drybrush highlights in the hair. Then I add darker areas around the eyes and went through five or six colors for the lips before settleing on a color. His lips are very red looking in the film, maybe from all the blood drinking so I use a little more red, but still trying to avoid the lipstick look. I happen to have a trench coat, shirt and leather pants left laying around from other customs and decide they'll work perfect except for the black/grey levis jacket David wears in the film under the trench. While the coat and t-shirt are sitting in a bath of black dye I find some black/grey denim material and cut it in a pattern similar the trench coat collar.
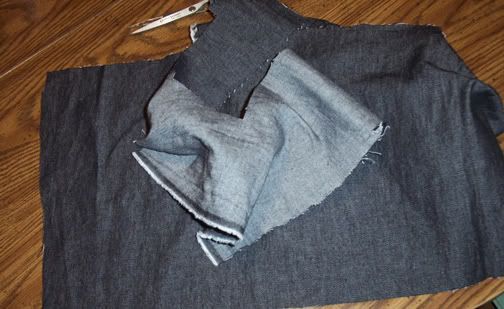
My sewing skills are beyond horrid so I do the best I can and fake the rest with craft super glue gel. I had taken the trench coat and t-shirt out of the dye bath and was shocked when they dried a nice dark grey. After panicking for about 5 minutes I decided to cheat and color them with permanent black marker, I've used this before for smaller stuff and was really surprised that it worked as good as it did. After that I added black gloved hands the medal David wears on his coat and sealed everything with a matte sealer and added glaze to the eyes and lips. That's pretty much it, once again I apologise for the crummy pics.
(continued in the post below)
First of all after reading this thread about what other 12" vampire figures people would like David from the Lost Boys kept coming up.
https://sideshowcollectors.com/forums/showthread.php?t=9760&highlight=undone I also thought that would be a cool character from one of my favorite 80's flicks so I scoured ebay for this.
I'm assuming it's a copy of the medicom 24 Jack figure, which will do nicely. First problem was the hair, so with some sanding using standard sandpaper the top of the hair was erased leaving only the sides which will work for the figure anyway.
Now it's time to do some sculpting. I use magic sculpt, which is a two part polymer clay. You mix two fairly equal parts together and in about twenty minutes you have rock hard resin like material. Problem is you have a time limit so you have to work somewhat fast. Good thing is with this stuff you can do a little at a time and come back and add more later. I also find that water on a q-tip helps thin the magic sculpt and softens edges and erases fingerprints, its also definately needed for blending the magic sculpt into other parts of the scupt. So with the Kiefer head sanded on top I'm thinking this sculpt is of him now and I need him 20 years ago. I decided to sand the jawline down abit to give a less rounded look. Then the sculpting begins. I apply magic sculpt to the head and shape it using clay tools and a couple dental tools I picked up at some arts and crafts flea market. To try and get a spiked look to the hair I sculpt strait up and out from where I place the hairline, and continue around the head the same way.
I also decided to add some clay to the face to make some higher cheek bones and hopefully make the eyes look a little deeper set in the head, like Kiefer looked in the film. Last I add the Joe Dirt 80's mullet.
I know what you guys are thinking. Of course I screwed up. Why? Because I plan on using a Dragon Models figure for my body and this head cast is sold. No hole for the Dragon neck post. So the whole neck and mullet hair was sanded back off the head. I cut the existing Dragon head off below the chin which is right above the neck post on the figure and the David head is glued on. To which more magic sculpt is needed to resculpt the mullet and to blend the neck together and get rid of the gap.
Now we get to paint so I mix some dark and light flesh tones for the darker areas and highlights. Same with the hair; darker areas first and then the bleach blond hair which looks almost white is drybrushed over the darker color. I tad of straight white is used to drybrush highlights in the hair. Then I add darker areas around the eyes and went through five or six colors for the lips before settleing on a color. His lips are very red looking in the film, maybe from all the blood drinking so I use a little more red, but still trying to avoid the lipstick look. I happen to have a trench coat, shirt and leather pants left laying around from other customs and decide they'll work perfect except for the black/grey levis jacket David wears in the film under the trench. While the coat and t-shirt are sitting in a bath of black dye I find some black/grey denim material and cut it in a pattern similar the trench coat collar.
My sewing skills are beyond horrid so I do the best I can and fake the rest with craft super glue gel. I had taken the trench coat and t-shirt out of the dye bath and was shocked when they dried a nice dark grey. After panicking for about 5 minutes I decided to cheat and color them with permanent black marker, I've used this before for smaller stuff and was really surprised that it worked as good as it did. After that I added black gloved hands the medal David wears on his coat and sealed everything with a matte sealer and added glaze to the eyes and lips. That's pretty much it, once again I apologise for the crummy pics.
(continued in the post below)
Last edited: