Clip Placement Modification
1) Remove the head and neck. They just pull right off – I didn’t need to heat them up. Once they are both off you have easy access to the magnets.
2) Pull the magnets off. This is a little scary, I realize, but just take your time. I kept checking the outside of the suit to make sure I wasn’t ripping through. One magnet almost came off on it’s own, the other was a slower process. As I pulled I could see the rubber really stretching. But nothing was damaged.
3) Then reposition the magnets to the desired position. This will be a matter of preference. Here he is with the outside magnets holding to the newly positioned inside magnets. You can see that the magnets have been moved a little more than a full magnet length lateral, and a little bit lower.
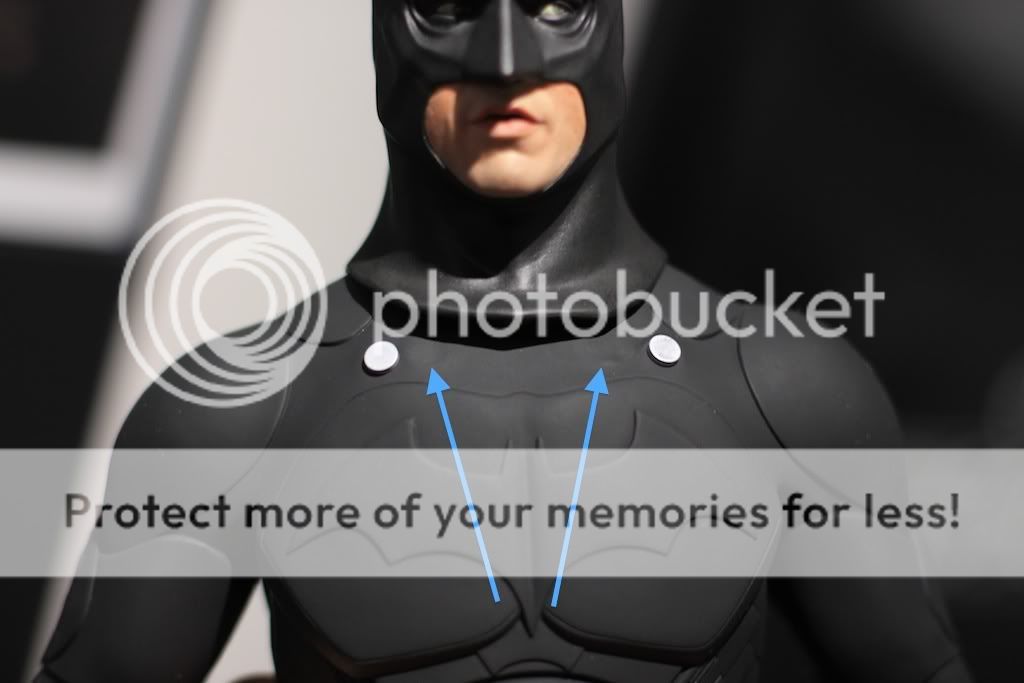
Arrows point to indentations where the magnets were originally.
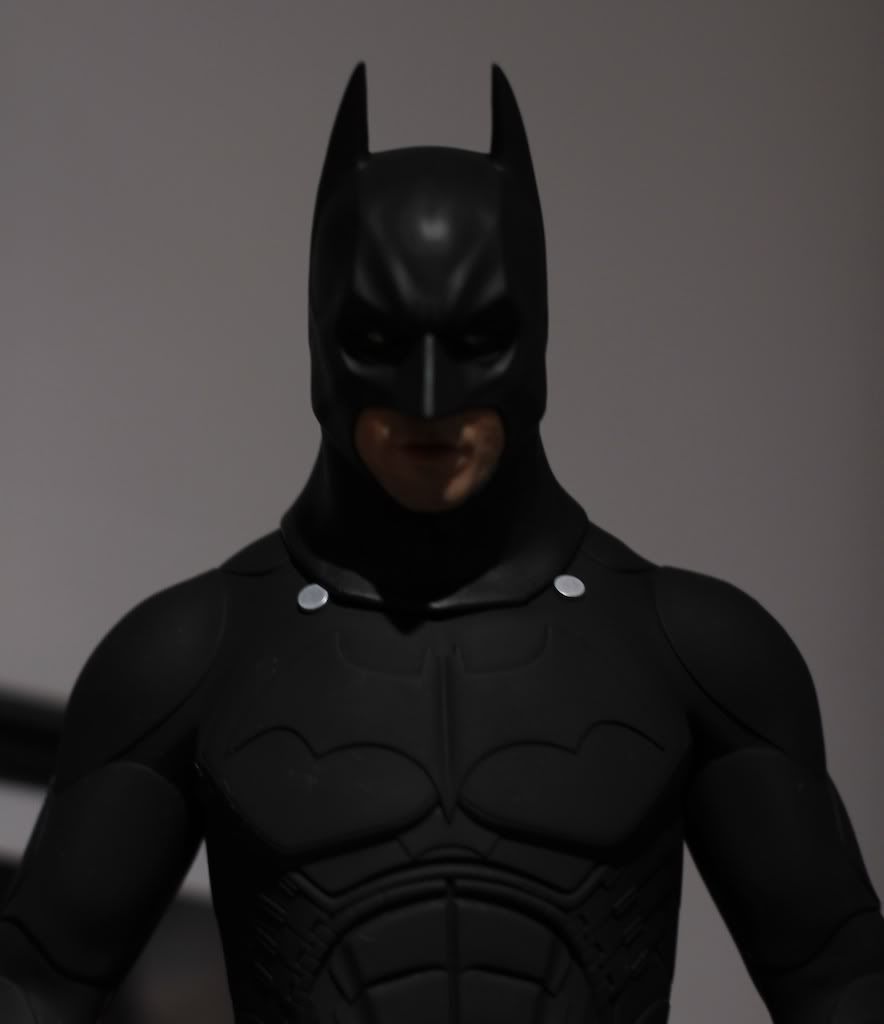
The goal when finding your preferred magnet position is to get the head positioned the way you want it, and then imagine where the clips will be when positioned just barely over the edge of the cowl like so:
When using all of the magnets provided/intended, this can be achieved very naturally. The double stack of magnets perfectly equals the height of the cowl edge.
At this point you may be asking: How did you attach the magnets to their new position? The answer is (here's the magic), I didn’t. And I don’t recommend it. Once the inside magnets have been pulled off, just get them approximately where you want them, and as long as you’re careful (and kind of keep a thumb over them when manipulating the suit), the suit itself will hold them in place. And once the outside magnets are put on, they are held very firmly in place by the magic of magnets!!! Since they are not glued, it makes slightly adjusting them by massaging them around from the outside of the suit very easy. This is the key to making this set-up precise. You can even tweak them a little if they don’t seem to be in the exact spot you want them after the neck and head are back on. Not gluing them also means that you can always easily reposition them for a turned head or more tilted look in the future. So again, I recommend not gluing them.
On to the next step.
4) I wanted a bowed head position for now. When moving the head as far forward and down, as it will go leaves you with big ugly gaps (which are really present regardless of the pose):
The ever-present gap between the suit and cowl makes it very difficult to futz the cape if you want it just barely covering the edge of the cowl (as it should be). It keeps slipping off and under the cowl. So, I used the tried and true cotton stuffing method.
5) Build up the upper trap area with bits of cotton balls:
In the picture above, I had just started. In the end, I think I used a whole cotton ball to get the cowl to meet the suit all the way around. To avoid poking a hole in the rubber, I used a q-tip to push the cotton in. Just be careful to not jam it too far in.
Once the magnets are positioned correctly (
precisely at the edge of the cowl - not under it), the outside magnets are in place, and the shoulders have been built up with cotton, you should be looking at this:
At this point you should be able to figure out the rest. Just get the cape where you want it, and stick the clips on. This is the simplest part, but where the art of it comes in. I definitely spent the most time here, but it was just like any other futzing - meticulous and fun - not maddening with magnets constantly pulling the clips where I didn’t want them. Once you get the inside magnets correctly positioned, they are really a pleasure to work with. I really like the idea of the clips being functional, and actually holding the cape in place.
Just a couple more thoughts:
Another reason to use both of the magnets as intended (sandwiching the cape) is that when looked at from a lower angle, it actually looks like the rings that were used on the real costume.
Finally, I would like to point out that
everything I’ve shown above is reversible. Not re-gluing the inside magnets means you can re-glue them in the original position if you wanted and no one would know the difference. Also, as long as you don’t push the cotton too far under the suit you should be able to remove it all easily using a bent q-tip.
Hope this helps. Let me know if you need clarification on anything.


")


 He said the suit holds it in place next to the body. On its own.