GIMLI Customs...

Collector Freaks Forum

Help Support Collector Freaks Forum:

This site may earn a commission from merchant affiliate links, including eBay, Amazon, and others.
And WG, thanks for all your tips on how you put your Gimmer together, looks bloody fantastic!

:rock

Fantastic work WG!

It looks like you have his proportions down to a science.


Thanks guys! :rock

It's really great to have Gimli in the collection, he was sorely missed all this time. I received SAMWISE yesterday too finally... so I'm completely caught up with the line now.

Next project... build my RINGWRAITHE!!!
 
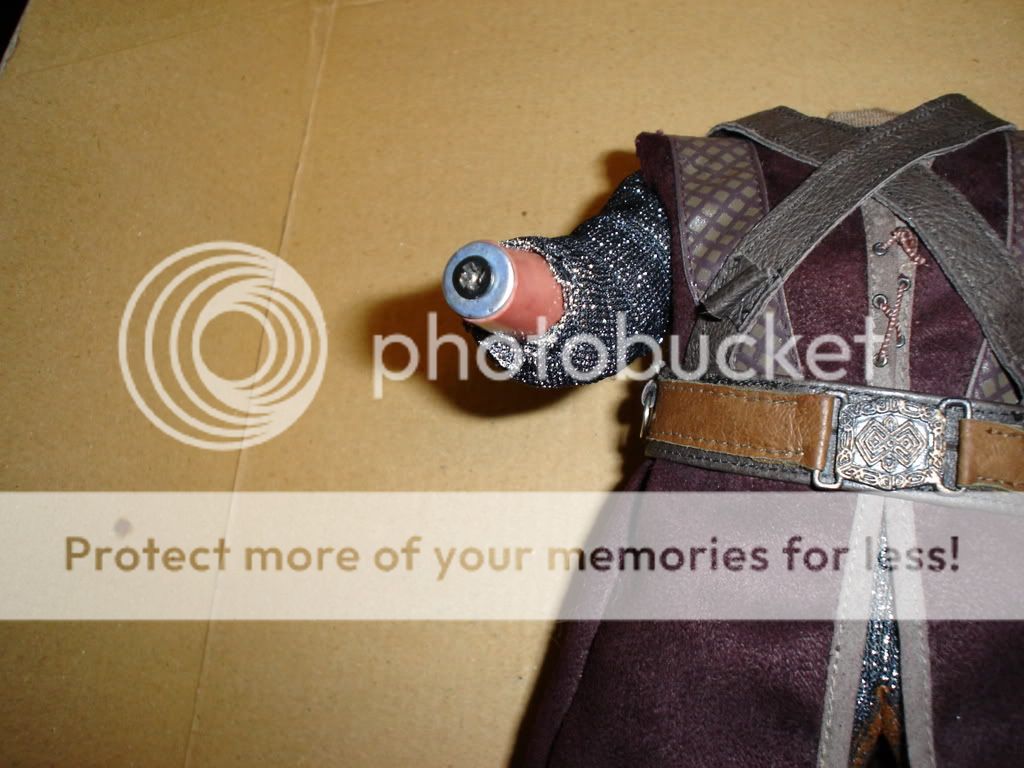
I'm 95% done; all that's left is to Dremmel out the roto shoulder pads and my Gimli will be completed. I took some photos of my ghetto forearm articulation for the TB soft gauntlets, in case anyone else wants to give it a go.

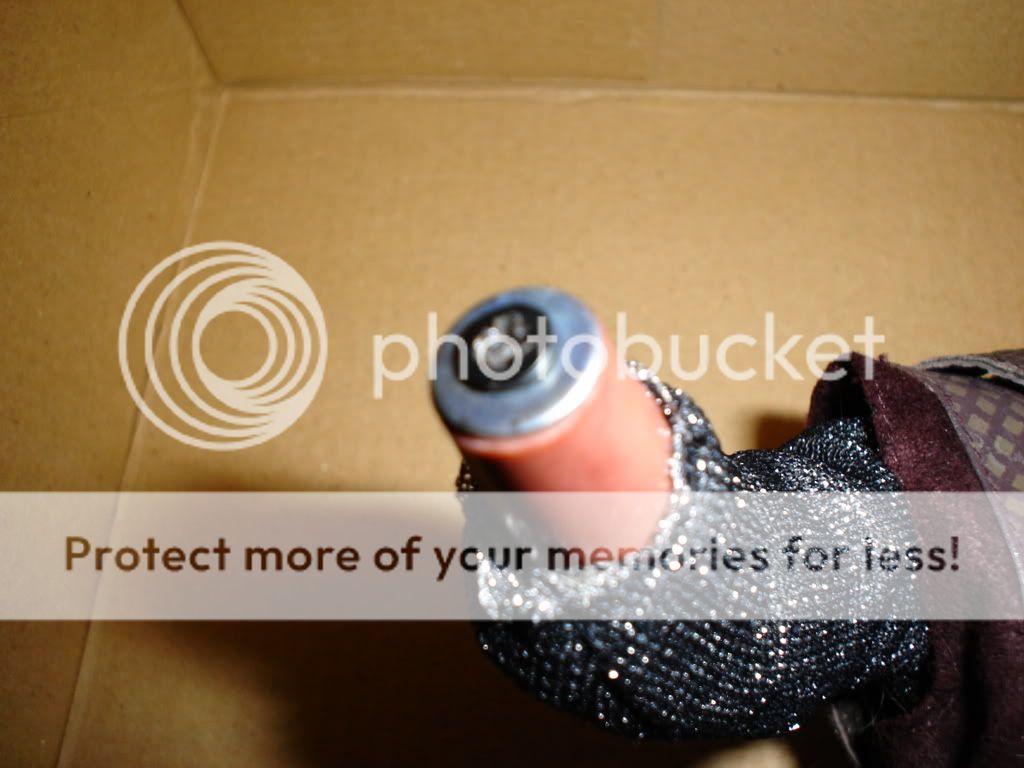
Basically, I just drove a screw down the center of the forearm, with a washer that's roughly the same diameter as the forearm. The washer is able to spin freely, so I'll be applying glue to the washer only when it comes time to join them permanently.

DSC00001.jpg


A different angle. Sorry for the picture quality.

DSC00002.jpg


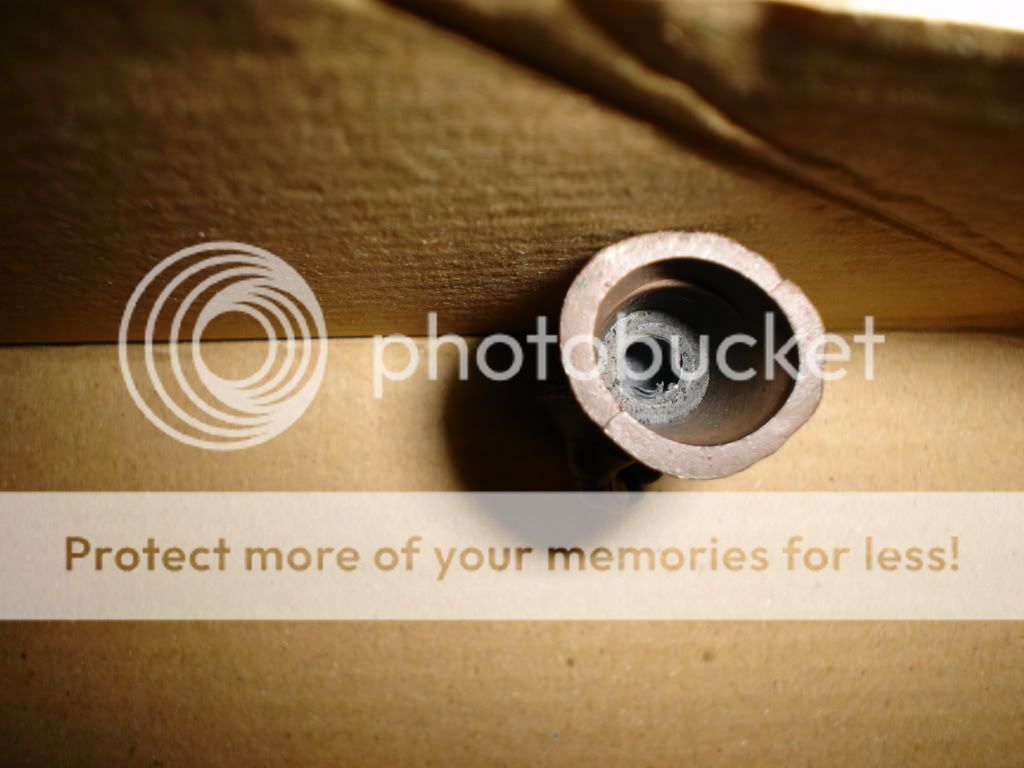
Finally, I used a drillbit with the same diameter as the screw head and widened the hole inside the gauntlet, to maximize the amount of surface contact between the washer and the inside of the gauntlet.

DSC00003.jpg


Once the shoulder armour is ready to go, I'll slide those on the arms and then attach the gauntlets permanently. After that, bring on the Merry and Pippin customs!
 
Okay is it wrong that I have all the parts for this project roto, soft, DID, chain mail suit (okay, not the "fat suit"), but I'm terrified to start it for fear of screwing it up? Especially taking the midsection out of the DID body and putting it back together.

I've seen the results and they all look great so far, but for some reason I just can't pull the trigger for my own.

Anyone else as angst ridden...
 
I certainly was angst ridden. I made sure when I did it I was in a place where I wouldn't feel rushed and noone would bother me.
 
Okay is it wrong that I have all the parts for this project roto, soft, DID, chain mail suit (okay, not the "fat suit"), but I'm terrified to start it for fear of screwing it up? Especially taking the midsection out of the DID body and putting it back together.

I've seen the results and they all look great so far, but for some reason I just can't pull the trigger for my own.

Anyone else as angst ridden...

Admittedly, it looks like a steep mountain to climb, but so does an ant hill if you're lying on the ground staring up at it. Once you get in and get those hands dirty, you'll see how embarrassingly easy it actually is, especially since you have the rotocast Gimli.
 
Okay is it wrong that I have all the parts for this project roto, soft, DID, chain mail suit (okay, not the "fat suit"), but I'm terrified to start it for fear of screwing it up? Especially taking the midsection out of the DID body and putting it back together.

I've seen the results and they all look great so far, but for some reason I just can't pull the trigger for my own.

Anyone else as angst ridden...

Dude, I felt exactly the same way. And the funny part is that modifying the body was probably the easiest part of the entire project. Two quick knocks with a hammer and flathead screwdriver was all it took to remove that extra torso section, and another two knocks to pry open the upper chest to glue it all back together again.

The toughest part for me has definitely been the outfit. Melting the gloves off the mail hauberk was a bit of a hassle, but nothing compared to getting his darn belt back on. One of the shoulder straps that attaches to the back of the belt was WAY off-center, so I ended up cutting the threads holding it in place and gluing it in a better position. But when I tried to put the thing back on the figure, the glue gave out. Another repair, and this time the small leather strap that secures the belt around his waist came undone, so more gluing was required for that repair.

It seems to be holding for now, but I guarantee I won't be doing any more tweaks on that belt anytime soon. I'd have sewn the thing to make the repairs more permanent, but I think you need a special kind of sewing needle to make stitches that small.

So, don't fret about the body modification. Even if you make a mistake it'll be covered by his outfit. But make sure you take your time when dressing the figure afterwards. Don't permanently attach his boots or gauntlets until the very end to make things easier for yourself.

Yet, had you gone with the roto, that wouldn't have been an issue as neither the gauntlets nor the boots are permanently attached. :p That aside, great job on the articulation. Necessity is the mother of all invention, as the saying goes.
 
Dude, I felt exactly the same way. And the funny part is that modifying the body was probably the easiest part of the entire project. Two quick knocks with a hammer and flathead screwdriver was all it took to remove that extra torso section, and another two knocks to pry open the upper chest to glue it all back together again.

The toughest part for me has definitely been the outfit. Melting the gloves off the mail hauberk was a bit of a hassle, but nothing compared to getting his darn belt back on. One of the shoulder straps that attaches to the back of the belt was WAY off-center, so I ended up cutting the threads holding it in place and gluing it in a better position. But when I tried to put the thing back on the figure, the glue gave out. Another repair, and this time the small leather strap that secures the belt around his waist came undone, so more gluing was required for that repair.

It seems to be holding for now, but I guarantee I won't be doing any more tweaks on that belt anytime soon. I'd have sewn the thing to make the repairs more permanent, but I think you need a special kind of sewing needle to make stitches that small.

So, don't fret about the body modification. Even if you make a mistake it'll be covered by his outfit. But make sure you take your time when dressing the figure afterwards. Don't permanently attach his boots or gauntlets until the very end to make things easier for yourself.


Fortunately, my wife is a VERY good seamstress, so clothing modifications are the thing I least fear because she can help and or do what I need done.

As I said I'm gonna take the plunge tomorrow.

What did you guys use to take the gaunlets and shoulder armour off the roto? I'm planning on using a hack saw to start then roto-zipping off the unnecessary bits, will that work?
 
I used a simple exacto knife and a nail fail to smooth the edges. Easy as pice. The stuff is way softer than you probably think.
 
What did you guys use to take the gaunlets and shoulder armour off the roto? I'm planning on using a hack saw to start then roto-zipping off the unnecessary bits, will that work?

Please don't use a hacksaw. You're likely to hurt yourself if you go that route. I'd pick up a pack of razor blades in the paint section of your local Walmart. They slice clean and easily through the roto and give you a clean edge to boot. Somewhere in here is Pix's step-by-step guide on what and how to do it. It won't be easy to find, but it's worth finding.
 
What did you guys use to take the gaunlets and shoulder armour off the roto? I'm planning on using a hack saw to start then roto-zipping off the unnecessary bits, will that work?

You can pull both arms right off the body without any problems. Then, just submerge the parts in a sink full of hot water and let them sit for about a minute or so. You'll find it ridiculously easy to cut off the extra bits using an X-Acto knife after that.
 
You can pull both arms right off the body without any problems. Then, just submerge the parts in a sink full of hot water and let them sit for about a minute or so. You'll find it ridiculously easy to cut off the extra bits using an X-Acto knife after that.


Thanks for the tips. My roto seems hard as a rock that why I was thinking of going the hack saw route I didn't think there was any way in hell, an X-acto blade would cut through it.

I'll let you all know how it goes...
 
Thnx Indian Fett!

This is what he looked liked before, just for reference:

GIMLI4.jpg


(pic courtesy of Wor Gar)
 
Thnx WG!

No doubt he could still use some work, but I am pretty proud of how he came out. Never painted a head before, so I am happy with my effort.

I will do some more stuff to him, or at least try :lol

Dont wanna mess around to much and ruin it :eek:
 
Back
Top