baloo
Super Freak
 Yep... Really nice pics!!!


 Yep... Really nice pics!!!


looks really good, i wish i still had my dslr but i had to sell it.I think I am going to sell my mark vi also, actually thinking about selling all my iron men. i have iv, vi, mech test, and secret project, but I only need one of them.
No, but your pics are #($! awesome.


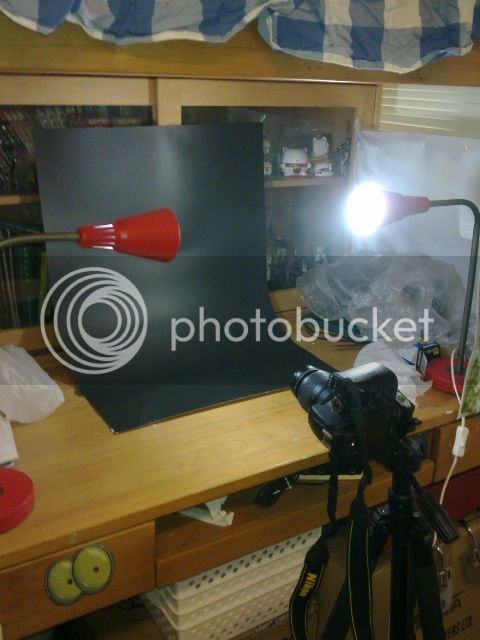
Is it rude to ask about your photography techniques? I'm guessing you used a light box? I've got a rather dinky one that I don't use very often, but that's probably because I don't really know HOW to use it effectively.
That's why I usually go for hard shadows and dramatic lighting. I'm also kinda lazy when it comes to the more action-oriented poses. Below is a good example of what I consider to be one of my better photos, but it's obviously not that impressive compared to what you and some other posters are doing.
If it matters, I use a Nikon D80 and I've got several lenses, but for most of my action figure shots I use a 60mm Nikkor macro lens. I like that it brings out the detail but I'm starting to think that it is limiting me to taking only "portrait-type" photos.
(I know the photo is off-topic but it best illustrates what I'm talking about)

Cool man, thanks for the tips! And I dig the simple set up. Seeing that photo just made me realize that I could solve a lot of my lighting issues just by using two lights set at subject-level. That never occurred to me, and no I'm not kidding.
So thanks!
oh and the only problem i had getting them all together again was that the hinge that was attached to the calf area (which is supposed to be attached to the knee joint) needs to be moded. I didn't want to open the calf area because it looked too fragile and it might break so all I did was cut a small amount of plastic (using a fire heated flat screwdriver to melt a part of the plastic, i cut about 1/4 from the hinge) as drawn on the picture below. This was done to make sure it can be connected onto the knee joint properly without force.so here is how i did my knee joint iron man m6 fix. It wasn't easy so please bare in mind that If you are not gentle with your figure its best advised that you do not try and open it. I will not bear any damages should you follow my method. I'm only sharing how i fixed mine.

Uploaded with ImageShack.us
so this is the first pics & descript of the leg area which is affected circled in blue. That's the spot where i heard something jiggling in the knee area. The knee joint was so loose that if u swing the leg it would move effortlessly. To open those screws i tried using a normal screw driver (then I used electric screwdriver) on the knee area but the screw didn't get a grip on the screwdriver to come off completely. So my first suspicion was that the screw grain on the hole that you put the screw in has been broken.
so my next option to get inside the knee joint was to go through a different way starting from the thigh area. That's where things started moving. So when I got the thigh area opened it was easier to open the knee caps.

Uploaded with ImageShack.us
opening the thigh area was a bit hard because i didn't understand how it was attached together. Only when I started inspecting carefully did i notice that there was a plastic joint glued to the back of the thigh (numbered 9 on the above pic). Slowly prying it out with a small flat screwdriver, it finally managed to open. It was tight because it was also glued together.
after that it was mostly unscrewing the screws exposed ( on the thigh area i took out the plastic plugs, no 10 on the pic above, using only an extra small flat screwdriver)
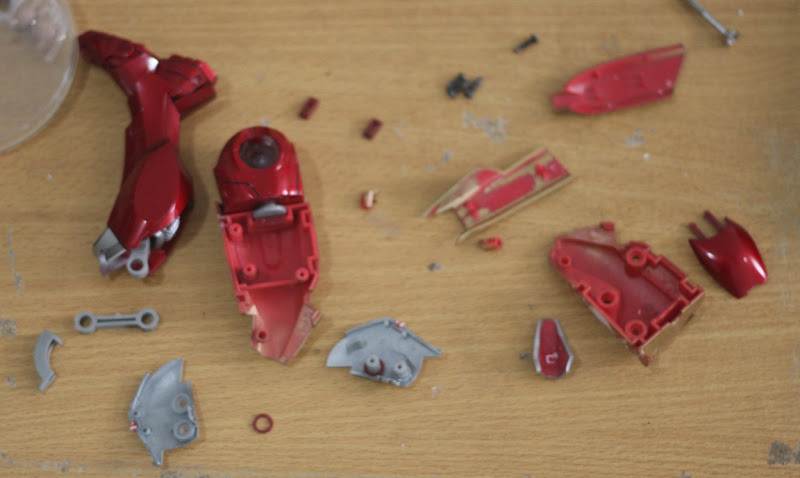
on the knee area theres also a plastic knee cap joint glued to the main knee area so I had to pry it out gently (no 7 on the above pic). After that it was easier to take a look at the damage done on the knee. From there my suspicions were confirmed that the knee screw hole had already been broken (there were 2 screw holes on the knee, both were broken). So since its broken it was a no-brainer to just pry open the knee.
the picture below shows how the screw holes that the screws were supposed to go into had been broken off cleanly. those two small circles below the broken screw holes are washers that's supposed to be attached to the joints connected on the thigh and calf area.

Uploaded with ImageShack.us
All i had to do was superglue those broken joints together ( adding only a little bit of superglue about a drop for each joint) and let them dry first. After it was completely dry i tested its strength and to me it was strong enough to get it to hold the screws in place when i get them all back together.
after that was done I attached them together in proper order ( starting from no 1 -10 just like the pic posted below)

Uploaded with ImageShack.us

Uploaded with ImageShack.us
if any of you have the same issue as i do, don't hesitate to refer to my technique...but please do it carefully and inspect each connecting parts carefully. Best tip from me is to use a proper electric screwdriver so you could get an even force to open those really tight screws..I had trouble using normal screws and im afraid physical force from it might have caused my knee joint to become looser. Hope this helps!
edit: while i was prying out the knee cap and the back thigh that was glued to the main parts I did it with little force. Unfortunately for me , a bit part of the knee cap joint was broken off from the inside. Luckily it can still be glued back in place and unnoticeable from the outside. Be sure to be very careful to not break those areas like I did on mine!
