Hot Toys –MMS120 - Iron Man 2: War Machine full spec and pics

Collector Freaks Forum

Help Support Collector Freaks Forum:

This site may earn a commission from merchant affiliate links, including eBay, Amazon, and others.
Man, User you seriously are one resourceful collector. You're right about it looking the business. Very cool.

Thanks. The guy that owns Mechaskunk got new supplies in a while back and i stocked up. I was up at work today and remembered them still mint in package.
He has since closed the store, so i lucked out when i ordered them and made a big order.
They were meant for gundam upgrade parts, but it looks great on War Machine
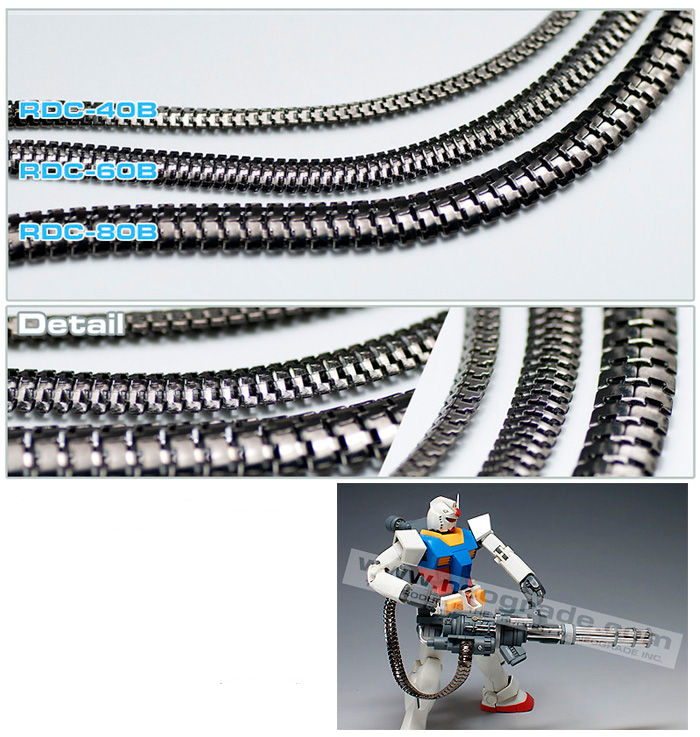
belt.jpg
 
Thanks. The guy that owns Mechaskunk got new supplies in a while back and i stocked up. I was up at work today and remembered them still mint in package.
He has since closed the store, so i lucked out when i ordered them and made a big order.
They were meant for gundam upgrade parts, but it looks great on War Machine
belt.jpg

I was going to say the same as Full Metal. You come up with either great ideas and or sources. Always appreciate reading your posts!
 
Ok User. Here's one for ya. I'm going to make a small dio for Mandarin. Basically the shot of him right before he puts one in the guys head on TV.

I'm getting the foo dogs tomorrow and I have the rescue Cap helmet, some Major Bludd dog tags and an AK-47.

I have to drill some small holes in the helmet and paint on some weathering and black marks that I assume are burn marks from the incense. Long story short, how would you go about making 1:6 scale incense? Seems simple enough but I'd like your opinion if you'd like to offer one up. I was thinking toothpicks painted red and burning the ends. What do you think?

Hmmmm.
That's quite a poser.
The Rescue Cap lid is metal so you might have a bit of trouble drilling holes in it. But the under helmet liner is green and made of vinyl, so that might work.
As for the incense...
If the toothpics don't work, maybe try balsa wood pieces chopped from a larger piece and sanded round. It should give a nice scale look for them.
Good call on the balsa. I'll pick up a few pieces tomorrow.

As far as the helmet, I don't have the liner but drilling through shouldn't be a problem. I'll just put it in a vise and use the smallest diameter drill bit. Three or four holes should do the trick.
 
Good call on the balsa. I'll pick up a few pieces tomorrow.

As far as the helmet, I don't have the liner but drilling through shouldn't be a problem. I'll just put it in a vise and use the smallest diameter drill bit. Three or four holes should do the trick.

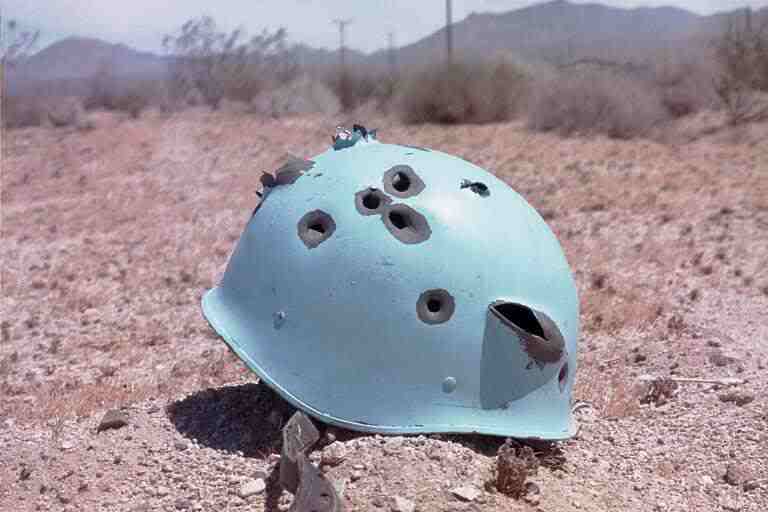
Drilled holes might not look like bullet holes. If you are wanting to add bullet dings, it might be better to try and pick up a plastic soldier helmet.
If you get the rescue helmet out and have a look, it's *really*thick.
Let us know how you get on though.
 
I think I can get away with drilling and dry brushing black around the area. To me those look like scorch/burn marks from letting incense burn all the way down. Bullet holes don't usually leave carbon scoring like that, do they?

I'll post pics when I finish.
 
I think I can get away with drilling and dry brushing black around the area. To me those look like scorch/burn marks from letting incense burn all the way down. Bullet holes don't usually leave carbon scoring like that, do they?

You could be right.
A bullet hole in a metal/tin helmet will traditionally leave a bowled depression and a hole. The bowled depression will have been from the surface deforming in the impact before splitting to let the projectile through.
In a painted helmet, this will usually leave the bowled depression without paint.
Another thing to take into account is the exit hole. This will be opened out in the direction of the trajectory.
On a plastic helmet, drilling a hole for either side and then warming a hole punch with a lighter before gently depressing the hole on the impact and then pushing out the hole for the exit would be a good technique.
But you might be able to mimic this with drilled holes and judiciously aplied paint around them.

UN_helmet-bullet-holes-paranoid-republicans.jpg
 
Has anyone else had issues at the joint where the minigun "arm" attaches to the back mount (the sliding part)? The peg in at that joint is kinda loose on mine and the minigun will fall out every once in awhile.
 
Has anyone else had issues at the joint where the minigun "arm" attaches to the back mount (the sliding part)? The peg in at that joint is kinda loose on mine and the minigun will fall out every once in awhile.

I've never heard of that. Sorry to hear.
As a matter of fact, that "arm" is rather difficult to slide back and forth on mine. It's a tight fit.

Look around the edges to make sure nothing cracked. This thing shouldn't easily fall out.
 
Wrong joint. Not the sliding joint, where the minigun pegs into that sliding part. Basically when you unbox the figure, the joint where the minigun gets attached is the joint I mean.
 
yeah, mine has the same problem

I had to pack mine up when I moved and noticed it

it was tight when I first got it but I think the weight of the gun warped the plastic slightly over time and made it loose

(huh huh)
 
Back
Top