Hot Toys 1/6 Tumbler/Batpod Batman

Collector Freaks Forum

Help Support Collector Freaks Forum:

This site may earn a commission from merchant affiliate links, including eBay, Amazon, and others.
Status
Not open for further replies.
Quick update:
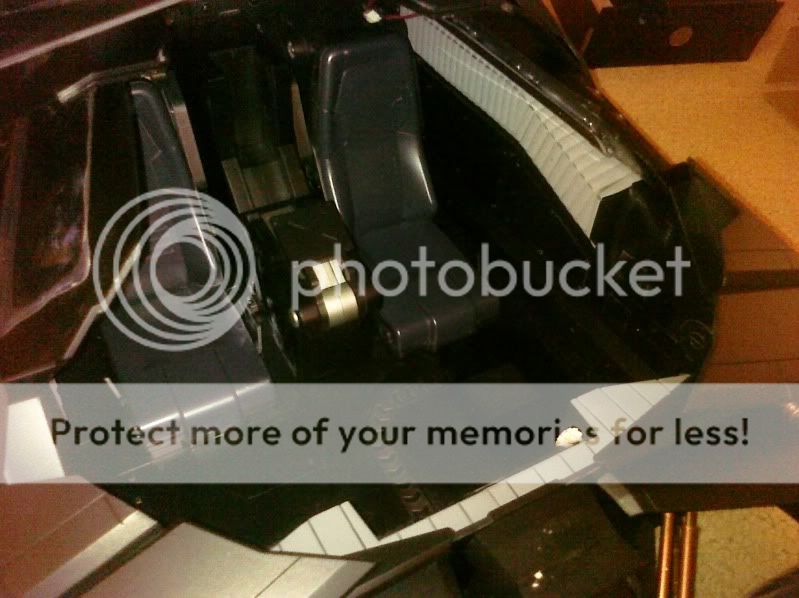
After finally having more time on hand I took the tumbler out of the box for "detailing" Most of the hazing and fingerprints seem to mostly come off with just a bit of water and cloth. Used a toothpick to get into the edges especially the windows to remove the white residue with reasonably god results. The interior was and still is filled with white residue fingerprint style, just need to get more Q-Tips and spend a few more hours on it.
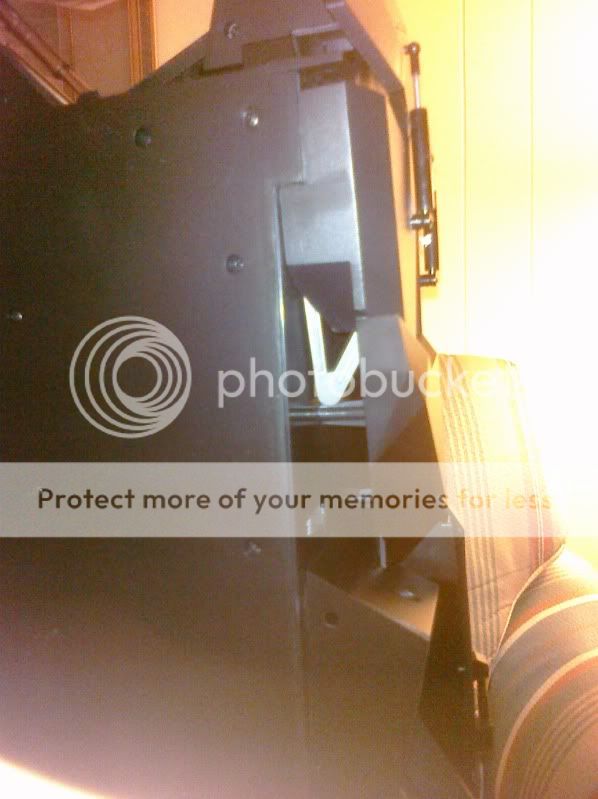
Looks like the body panels are just made off black plastic and not painted so going to do more detailing and try to remove those rough edges from the mold and maybe even try to remove those minor scratches
 
nice pics mate.... now is that is permeant location?

Thanks for the references! I think the closing the cockpit door this way looks pretty good.
IMG_0624.jpg

IMG_0626.jpg


Actually after referencing the movie still, the rake of the windshield could be sharper, so I pushed the top of the windshield down to get a sharper rake (which lets me close the tabs at the side too), at the expense of having a bigger gap at the bottom. I think I'll settle for this for now. Will take pics later.
 
Do these really go for $400+
Are they limited? I see a lot of talk of them bit do not know what makes them cost that much---does look awesome though
 
Okay its my turn

Received mine this afternoon, but was unable to tinker with it until I got off work. I opened it up and after a careful inspection, I found no broken parts!:banana

Then I opened the cockpit.


CIMG0092.jpg


The treasure I found.


CIMG0091.jpg


Then I discovered that one of the armatures that secures the screen was nowhere to be found. Not in the cockpit, not in the box, maybe its......what is that?


CIMG0094.jpg

CIMG0095.jpg

CIMG0100.jpg


It somehow managed to get lodged up inside what I would call the fenderwell of the left fork of the suspension.:confused:

Oh, and before that little stinker fell out, this came before him

CIMG0102.jpg


Can anyone tell me what this could possibly be?
Only the front of it is painted red, the back side looks like it was glued onto something at some point. I had originally though that it was one of the wedges used to secure the wheels, but it is not.
 
nice pics mate.... now is that is permeant location?

Yea pretty much. I was kind of worried about dust initially... but hey it's the Tumbler! I'll probably have to dirty up the wheels by running it through mud or something to make it more like the film.
 
Looks like it's impossible to seal or minimize the gap of the cockpit door without modding the tumbler. Best I can do is to close the door the "wrong" way (according to the manual) and push down the top of the window to get a sharper rake that's more movie-accurate.
IMG_0628.jpg

But this creates a bigger gap in front from the top. I suppose you can put some of that black cardboard that came with the Tumbler inside to disguise the gap.
IMG_0629.jpg
 
Re: Okay its my turn


damn, that sucks, but some glue can fix that, nothing is broken right?

Then I discovered that one of the armatures that secures the screen was nowhere to be found. Not in the cockpit, not in the box, maybe its......what is that?


CIMG0094.jpg

CIMG0095.jpg

CIMG0100.jpg


It somehow managed to get lodged up inside what I would call the fenderwell of the left fork of the suspension.:confused:

Oh, and before that little stinker fell out, this came before him

CIMG0102.jpg

honestly, I do not know what is wrong, what are we looking at? your pictures aren't sharp and if I try to compare with other pictures, I do not see a difference at the side...what is wrong here?

Ow and, Hot Toys can't make 1/6 models in big quantities, that much is certain now! :duh
 
Im afraid about how is going to come my tumbler... Im reading thant are coming with some problems (lights, paint ...) :banghead
 
Im afraid about how is going to come my tumbler... Im reading thant are coming with some problems (lights, paint ...) :banghead

you are not alone, I bet everybody who still has to receive theirs is afraid
 
Yea pretty much. I was kind of worried about dust initially... but hey it's the Tumbler! I'll probably have to dirty up the wheels by running it through mud or something to make it more like the film.

Fill a plastic tray with some dry sand. The sand dust will create that nice realistic weathered effect on the tyres. That way in the future if you want to take it back off just wipe it with a damp cloth.

Looks like it's impossible to seal or minimize the gap of the cockpit door without modding the tumbler. Best I can do is to close the door the "wrong" way (according to the manual) and push down the top of the window to get a sharper rake that's more movie-accurate.
IMG_0628.jpg

But this creates a bigger gap in front from the top. I suppose you can put some of that black cardboard that came with the Tumbler inside to disguise the gap.
IMG_0629.jpg

Thats the best attempt I can do. The best way I found is once it's in place like yours, gently put your middle finger somewhere below or middle area below the lights area or the strap that you hook on. You need to feel the edge area first of the front hatch and gently push. It doesn't take much. Just enough to push it that little bit further.

dscf7319.jpg
 
Last edited:
Re: Okay its my turn

damn, that sucks, but some glue can fix that, nothing is broken right?


honestly, I do not know what is wrong, what are we looking at? your pictures aren't sharp and if I try to compare with other pictures, I do not see a difference at the side...what is wrong here?

Ow and, Hot Toys can't make 1/6 models in big quantities, that much is certain now! :duh


He is trying to show with the side and bottom shots where the piece of the
dash side that was missing from his console ended up being....
I just hope MydNyghte can get it out without shaking anything else loose :p
 
Fill a plastic tray with some dry sand. The sand dust will create that nice realistic weathered effect on the tyres. That way in the future if you want to take it back off just wipe it with a damp cloth.

Thats the best attempt I can do. The best way I found is once it's in place like yours, gently put your middle finger somewhere below or middle area below the lights area or the strap that you hook on. You need to feel the edge area first of the front hatch and gently push. It doesn't take much. Just enough to push it that little bit further.

Thanks for the tips vodoun! I was contemplating rolling the Tumbler around the carpark to dirty-up the tires! Will try closing the gap the way your mentioned later on.
 
Received mine this afternoon, but was unable to tinker with it until I got off work. I opened it up and after a careful inspection, I found no broken parts!:banana

Then I opened the cockpit.


The treasure I found.


Then I discovered that one of the armatures that secures the screen was nowhere to be found. Not in the cockpit, not in the box, maybe its......what is that?


It somehow managed to get lodged up inside what I would call the fenderwell of the left fork of the suspension.:confused:

Oh, and before that little stinker fell out, this came before him

CIMG0102.jpg


Can anyone tell me what this could possibly be?
Only the front of it is painted red, the back side looks like it was glued onto something at some point. I had originally though that it was one of the wedges used to secure the wheels, but it is not.


Is it a panal or something off the dashboard in the cockpit?
 
Re: Okay its my turn

He is trying to show with the side and bottom shots where the piece of the
dash side that was missing from his console ended up being....
I just hope MydNyghte can get it out without shaking anything else loose :p

aah ok lol :)

Hey, who makes the Bruce Wayne 1/6 figure? I thought it was Hot Toys?

that is a medicom for sure
 
Status
Not open for further replies.
Back
Top