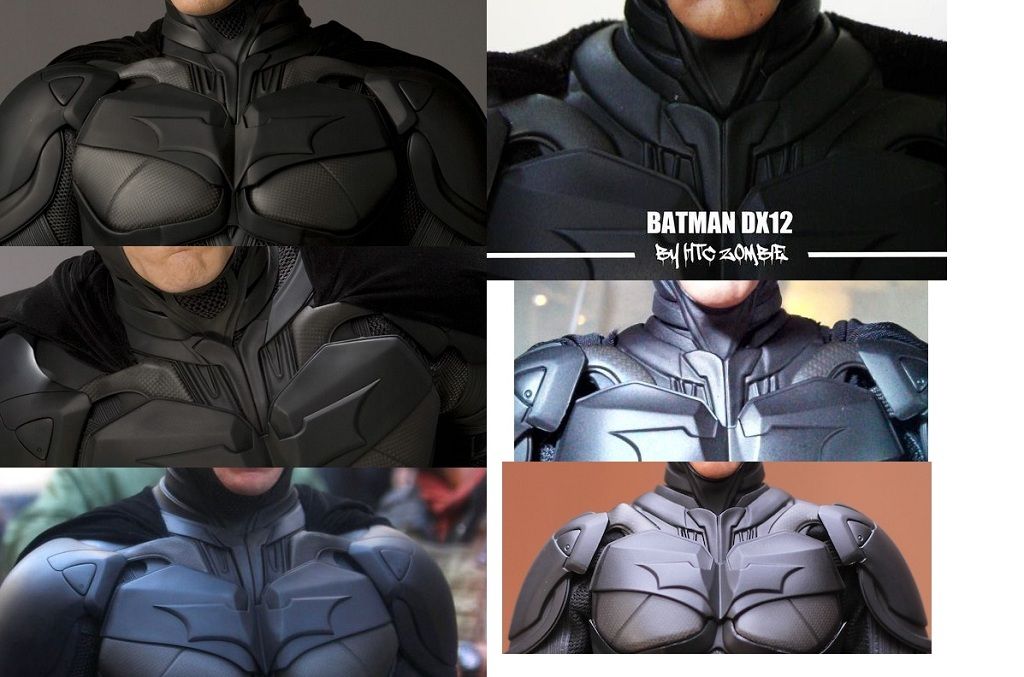
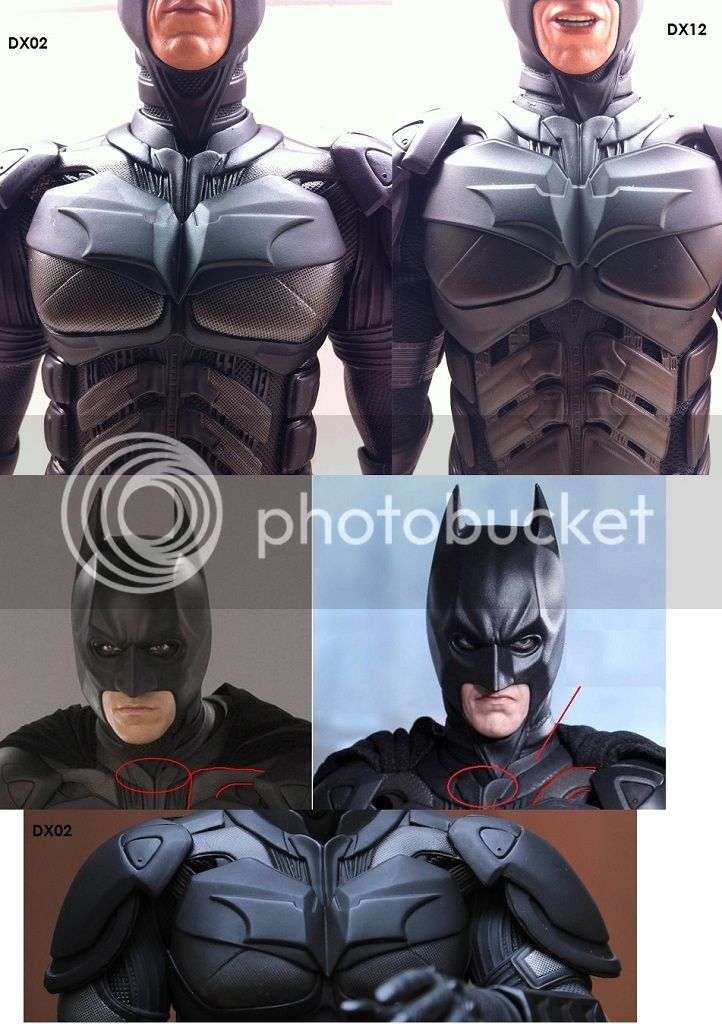
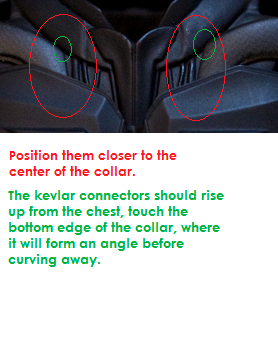
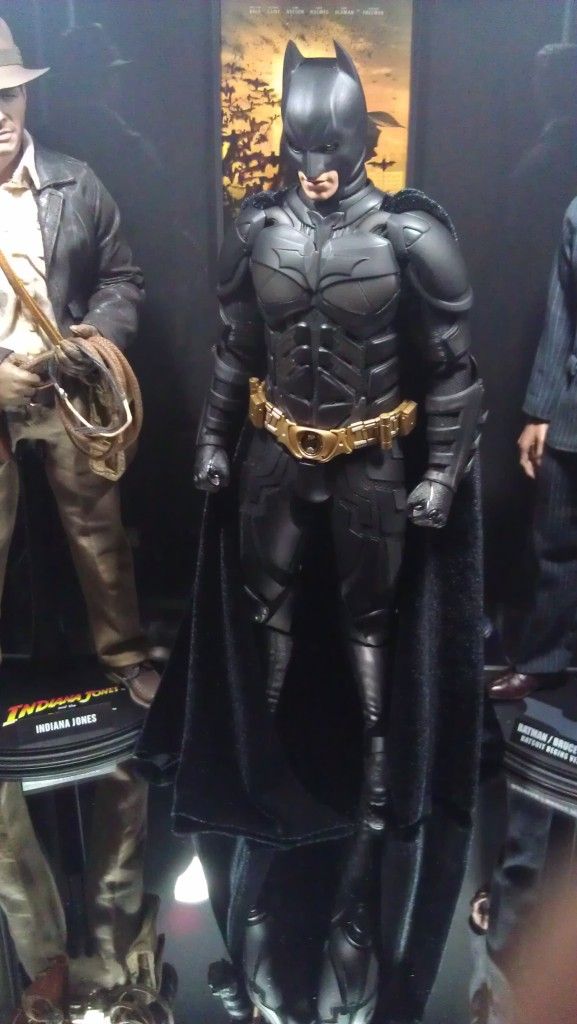
A few observant folks here on the boards noticed that the kevlar connectors on the DX12's collar were wildly innaccurate, which is bizarre considering that past HT releases of this suit had gotten the general shape and curve of these connectors right, for the most part. Sort of. The DX12's connectors by comparison lack angular features and have too round a curve at its apex. Examples can be found below.
At least one person here chose to hotswap the DX02's shoulders and connectors onto the DX12, and it looks very nice.
For those (like me) who do not have a DX02 figure to take parts from, we had to either live with the innaccuracy on the DX12 or do something about it. It's a minor detail that I'm sure only the most compulsively detail-oriented will even notice in any given situation, but for the rest of us, it means another mod.

I don't what it is about this figure that brings out my OCD.
Okay, here's a comparison between the DX12 kevlar connectors, the actual suit's connectors, and the DX02's connectors on the DX12.
You'll notice that on the actual suit and on the DX02, the connectors rise up from the chest very close the the vertical lines near the center of the area between the base of the neck and the top of the chest. They then touch the collar befor they start curving to the shoulder pads.
The DX12 is very incorrect in this regard. The DX02 had better connectors, by comparison
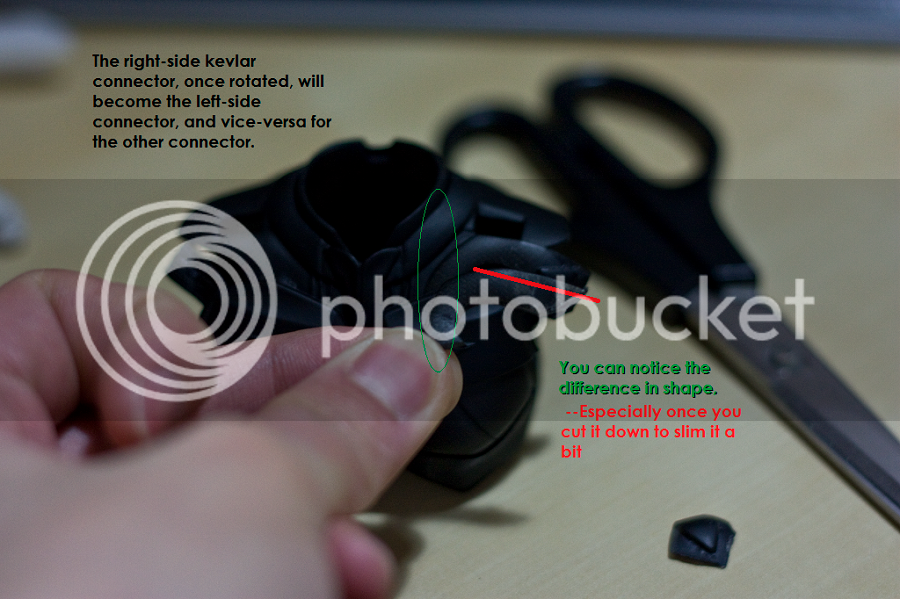
I've altered the kevlar connectors on mine. Maglor asked me to post about it, so I will. You may have seen the result in some photos I posted in the past week, but I went back to it recently and further modified them. What we are essentially doing is taking the connector from one side, rotating it, and then switching it with the connector on the other side.
It is a very extensive and involved mod, and the risk for damage is high. It requires a lot of cutting and regluing.
You might ask: Wouldn't it be easier to just heat them up and re-adjust? There's only so much you can do that way. Because they are so tightly connected to the shoulder pads and chest, there's not much wiggle room to adjust the connectors.
Steps:
1. Remove the chest armor (refer to Maglor's chest armor guides on the first page for this process).
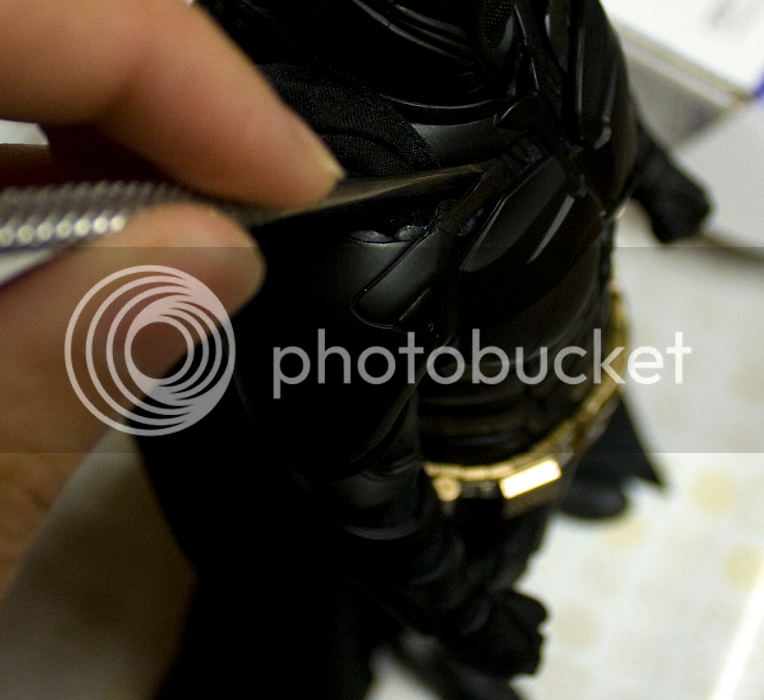
2. The chest armor is comprised of two layers glued together. The kevlar connectors are glued down to the lower layer. You will need to carfully, using a flat head screwdriver or a blade, pry and peel the kevlar connectors off of the chest armor. There's very little gapping between the top layer of the chest armor and the lower layer, so this will be difficult if you don't peel the two layers apart first (not necessary, however).
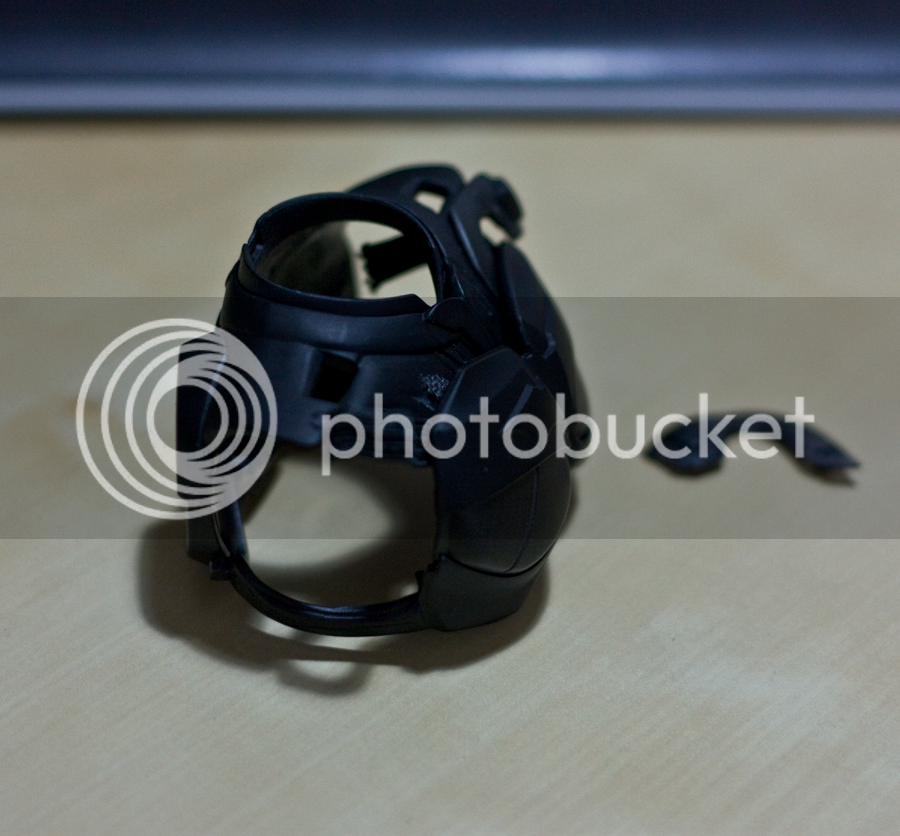
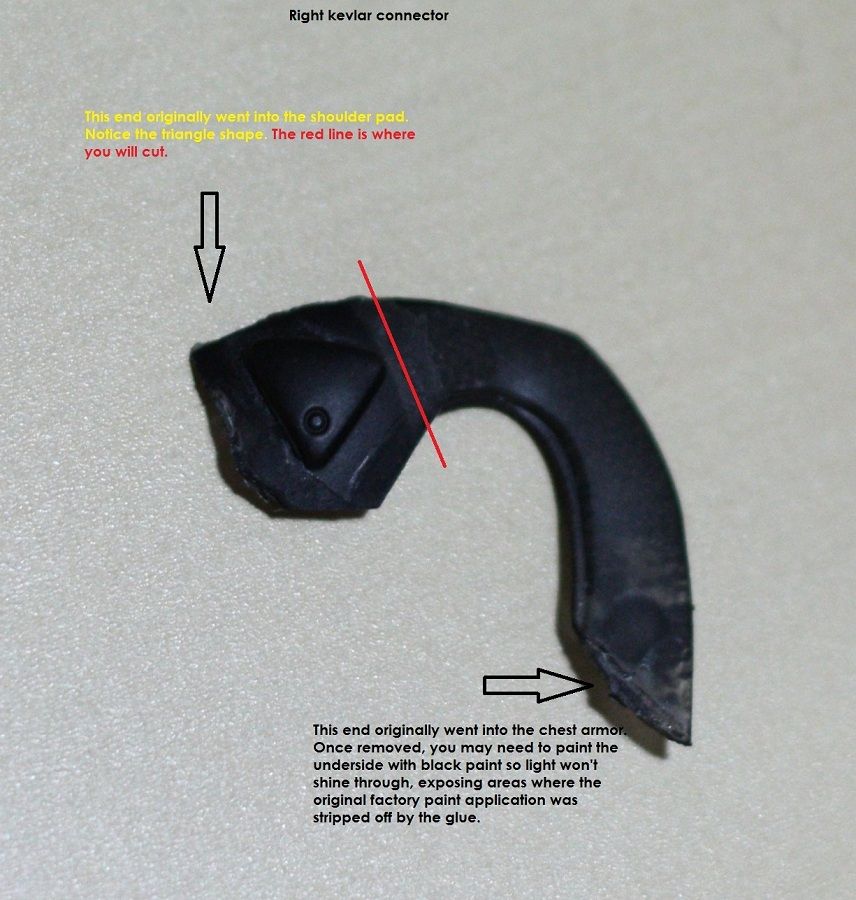
3. The opposite ends of each kevlar connector is glued directly underneath the shoulder pads. That's where the complication comes in. Notice the triangle shapes embedded in each shoulder pad? Those are actually connected to each kevlar connector.
When you peel the ends of each connector from the shoulder pads, you will get this:
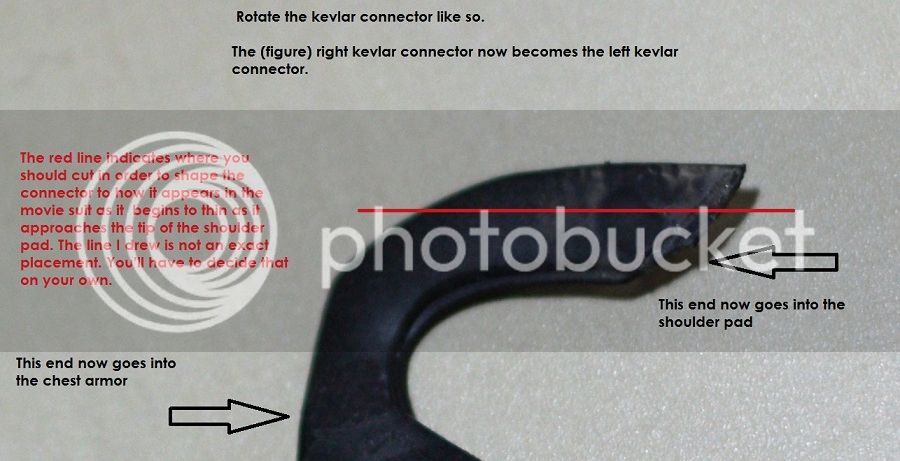
4. What we're essentially doing is switching a kevlar connector on one side to the other, and switching the ends that connect to each point of connection on the chest armor and on the shoulder pads. The image will illustrate more clearly:
We are turning the kevlar connector so that the end that originally went into the chest armor now goes into the shoulder pad.
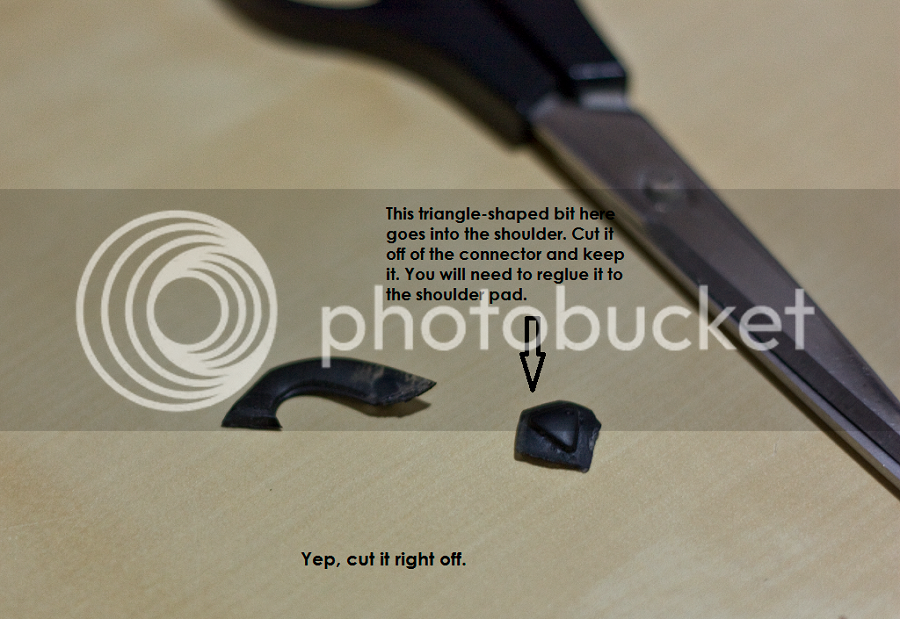
5. But what about the triangle bits on the end of each connector, you ask? You cut them off. Yes, cut them off, but keep them. We will soon reglue those bits back onto the shoulder pads.
6. In the comparison pic, you'll notice that the kevlar connectors tend to get thinner as they approach the shoulder pads. We will now replicate that by cutting each of our DX12 connectors into shape.
The line indicates where I cut, in a photo above and one photo directly below:
Note that the red line indicates a general angle you MIGHT want to cut. It is not an exact placement. You will have to judge on your own using reference images of the actual suit.
7. We're approaching the final step. If peeling the connectors away from the suit the first time stripped some paint off, use some flat black acrylic paint and coat the underside of each connector. Give it time to dry. Once dried, hold the connector up to a light to see if any light peeks through.
8. Now that the kevlar connectors are reshaped, we will reglue them to the chest armor first. Get it as close to the center of the collar as possible. Like Maglor recommended, use a glue that dries slowly, allowing you time to position them as you please. Glue them down to the lower layer of the chest armor.
9. Last step requires you to reglue them to the shoulder pads. This step is pretty simple. Just refer to pics of the actual suit to guide you to where the connectors should be attached to the shoulder pads. They should go directly underneath the "tips" of each pad. You may need to shorten the ends of each connector to hide the dried glue damage underneath the shoulder pad.
 why would I be in denial about that neck but not about everything else I've done to this figure?


 : they see something totally different than me and you and every other person. Same reason I haven't done the ankle mod either, don't see a need to.


