Hi gang,
I am a 1:6 lover and a trooper in the 501st. I've been wicked excited (as most of you have) for this figure to drop.
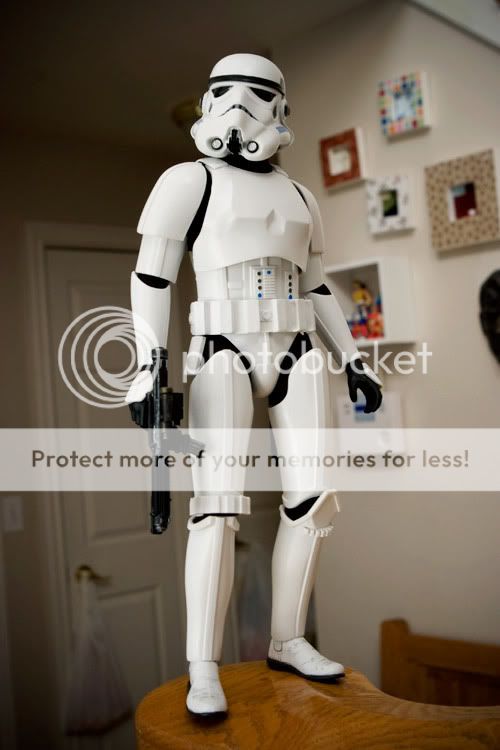
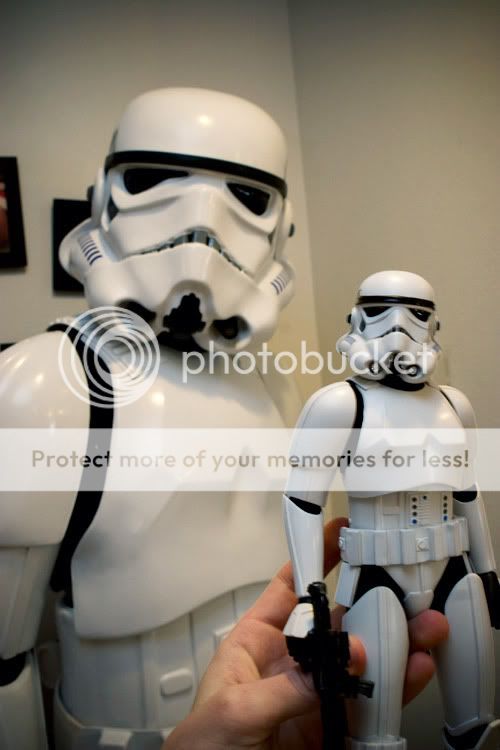
I have to admit when I first got him out of the box yesterday my stomach sank a little. It's got some pretty glaring issues, but after a few quick mods and playing with it for a day I can say without a doubt that it is an amazing figure!
As somebody who has scratch-built a 1:1 "A New Hope" suit from AP casts (not the FX stuff) the part that most impressed me was the way they rigged the armor and belt with straps and velcro. They're really so much like my 1:1! Maybe a little too much like it? I'll explain. If you've ever hung out with 501st troopers for long enough, you may have noticed armor falling off or getting twisted around weird. This was a problem on set with the original filming, too. They had duct tape and all kinds of other tricks to keep armor from falling off all the time.
It makes this a cool replica, but it's not really so much fun to play with out of the box. It was nice on the Medi and Marmit that you could beat them up a little and not worry about armor sliding around.
Anyway, the major issue with this guy is the ginormous chest piece.
So the first thing I did was remove the chest/back plates and heat them up with the good old heat gun so I could bend in those edges. I think boiling might work if you don't have a heat gun or hair dryer. This armor is pretty rigid, so it takes a little more heat than usual. Just heat it from the inside incase of scorching and you'll be okay.
Fixing the chest really helps the overall look...
I wish his thighs were closer together and his cod a little bigger
")
After fixing the curve of the chest and back armor, I took some white adhesive-back industrial strength velcro (male side) and cut two little squares and stuck them on the inside front and back of the armor just on one side. Then I cut a strip of non-adhesive black (female side) velcro and used that to secure the front to the back once I'd slipped the armor pieces back over his shoulders.
(same as my 1:1 rig!)
This is how it shows from the outside if you look hard:
It's only necessary to do it on one side, really. I did 1, but you could do both sides.
Next I removed the leg armor and wrapped a strip of soft fabric over the armorless mid-thigh. I then secured it by wrapping black electrical tape around it a couple of times--also adds to the bulk. Then I slid the thigh armor back up over it and voila, no more shifty thigh armor. It stays exactly where I want it. (sorry no pics)
I also brushed some future on the helmet lenses to give them more shine. Contemplating doing it to all the armor. Just a little nervous
Finally I dropped a bead of superglue into the center crease of each angle joint (mine was too loose). I let it dry then moved it around a little. Nice and tight.
My last tip is regarding armor placement and the belt. I've seen a lot of in-hand pics here these last few days and most pics have the belt way too high (it's like that in the box) and the biceps usually look wonky. Just note that you sould be able to see the bottom blue buttons on the ab plate and on the biceps they should come down low, almost to the elbow and one of the raised detail bars on the bicep should face forward while one follows the curve of the shoulder and forearm line and the back flows down the tricep.
I know the future has been discussed, but for redundancy, here's a shot of the future floor wax I used...available in most any grocery store...and the white velcro...left over from my 1:1 armor building, available at walmart and craft stores:
Future is really amazing. You'll use it for other projects, so don't worry about buying the lifetime supply that is one bottle. I usually always gloss over my 1:6 figures' eyes with it. The Bank Robber Joker looks so eerie!
I hope this is helpful to somebody. I want to see lots of beautiful TKs out there!
Cheers!
-JJ


 I'd hate to see some freaks use it and then we suffer the pain of a "My Stormtrooper is Jaundiced!" thread.


 :chew :chew