You are using an out of date browser. It may not display this or other websites correctly.
You should upgrade or use an alternative browser.
You should upgrade or use an alternative browser.
Hot Toys - DS001A-C - Iron Man 2: 1/6th scale Hall of Armor Collectible Specs & Pics
- Thread starter batfan08
- Start date

Help Support Collector Freaks Forum:
This site may earn a commission from merchant affiliate
links, including eBay, Amazon, and others.
hokietwo
TheOwnersSuite
Re: Hot Toys - DS001A-C - Iron Man 2: 1/6th scale Hall of Armor Collectible Specs & P
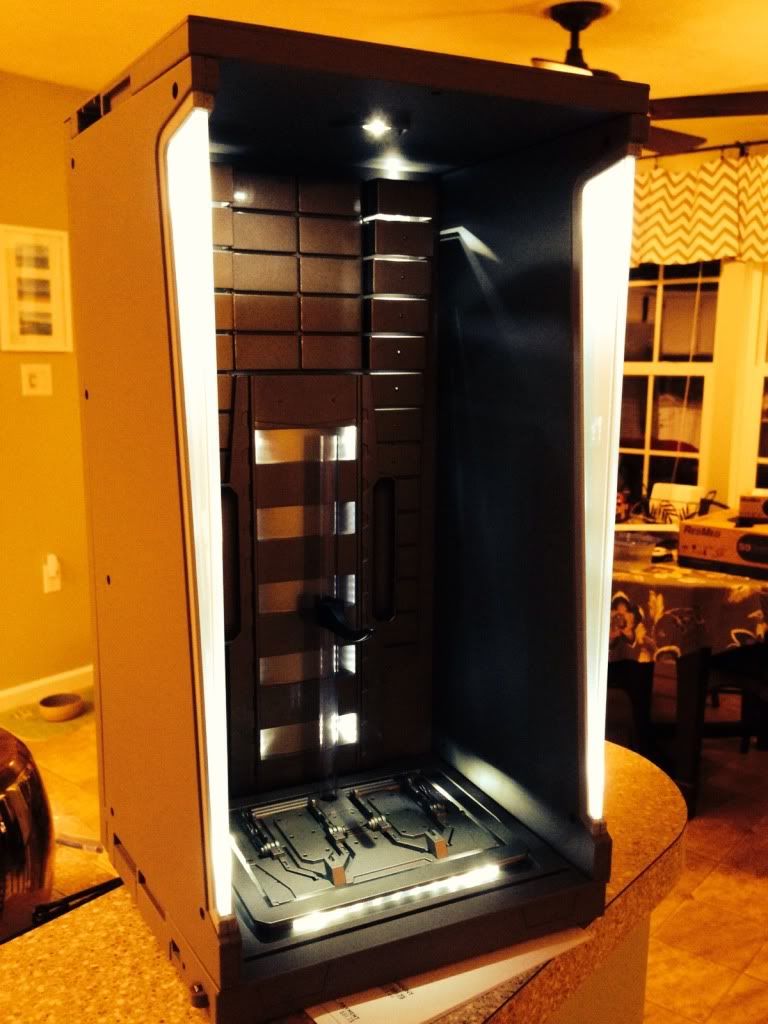
I opened one unit to get a good feel for the build quality and my first impressions of the set.
Packaging:
The halls are well packed with the new grey styrofoam inserts we have been seeing with Iron Monger, Hulk, etc..... Smells like Hot Toys plastic crack air fresher. As it has been noted, you should unbox these spaced out in a ventilated area. Overall mine came undamaged and only a nick on one corner of a bottom hall box. It's nice that each hall is carefully packed and already together, you just need to choose power source and it's off to the races.
The Hall:
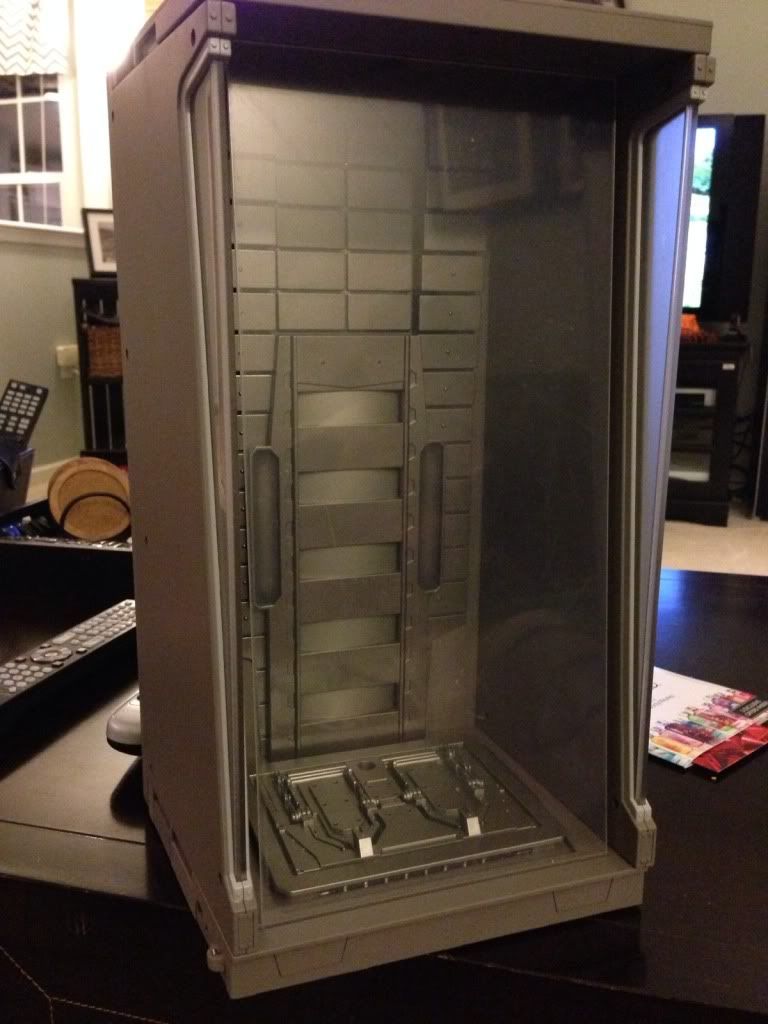
As for the looks once out of the box, it has some heft. Much larger than you would think a bay would be(at least to me) which is a great thing. The plastics appear to be ABS and have several smooth and frosted finishes on the side walls and a smoothed two toned grey back wall. There are stickers on each side of the backplates that I think makes the back wall look toyish, but thankfully it will get covered up with a Mark in the bay. Every panel is screwed together and it would be very easy to take the bays apart. I will be disassembling the hall to fit into my diorama. The way Hot toys developed the hall lends this set well to make some nagging features better with a little work.( More on this below)
Light feature:
As it has been stated, you'll need a surplus of batteries to light these candles, 6 AA and 3 AAA per Hall. The walls use 2x's the batteries as the base, which powers 10x's as many lights.
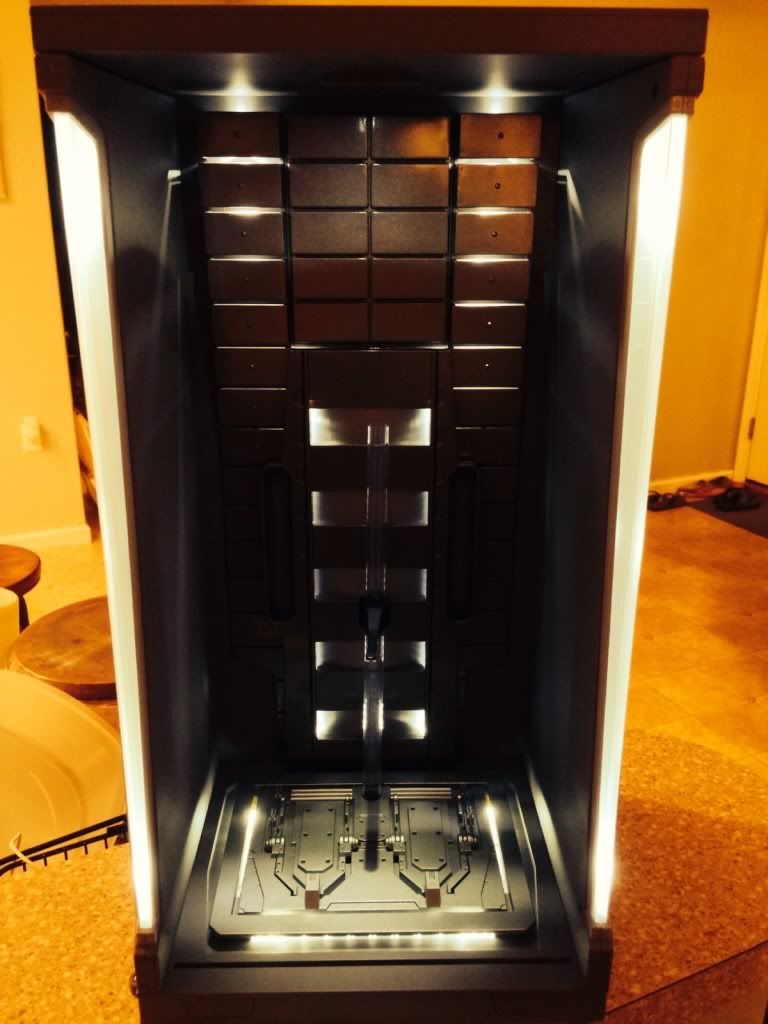
The side wall pieces light up well. They are top and bottom pillar lit, it could have used more lighting in the middle part to really make the light spread better.
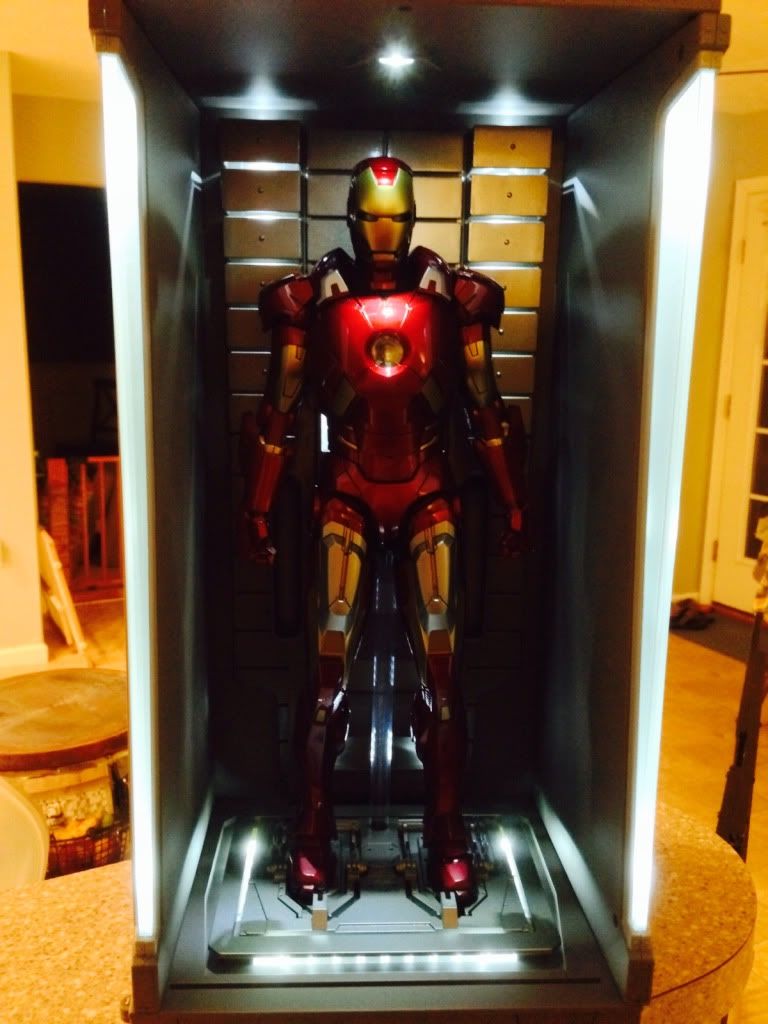
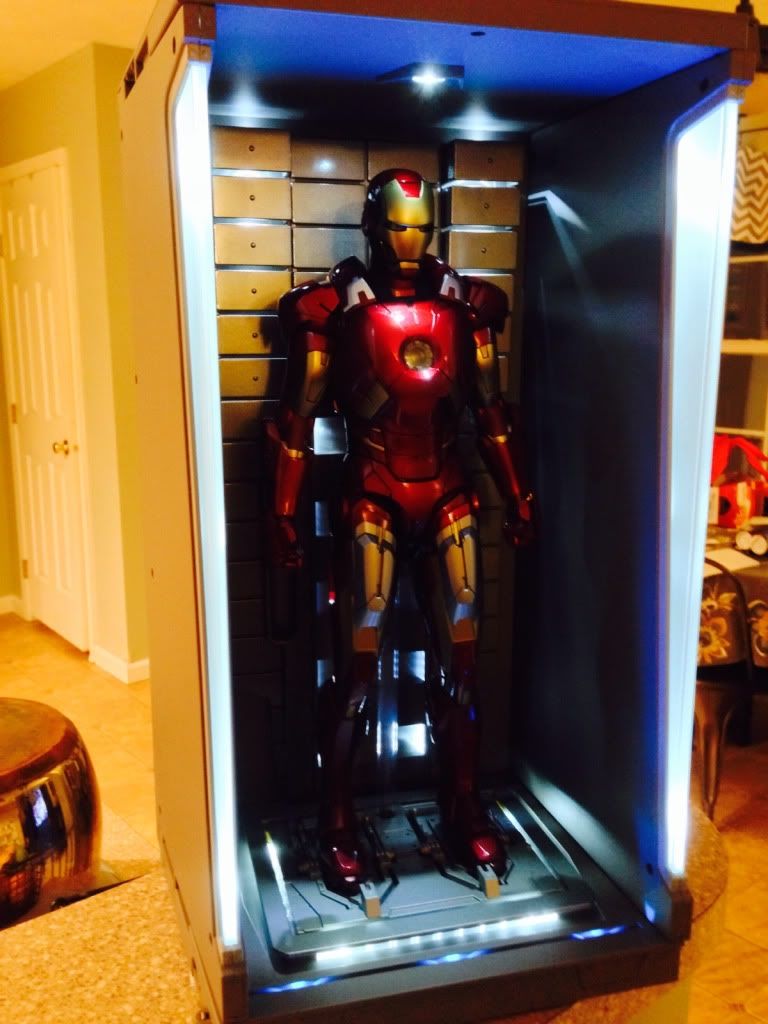
The back wall detail and platform with the hologram blue lights look very nice. When it is all lit up, the toyish look of the plastic really goes away and the hall is way more impressive than when not luminated. Overall I love the lighting as it is not overly bright and allows for good shadows and definition for the figures to stand in.
Power:
This is one area I am very excited by Hot Toy's design. Each wall battery compartment is attached to the unit in the back. The wall allows enough room to cleanly wire up the side walls with conductive wire and daisy chain them to a consolidated power source. It is pretty easy to do and is a non-evasive mod to wire all of the hall electronics together. So the fact it comes apart the way it does is quite awesome! Goodbye stupid batteries and buttons.

Value:
So bottom line. Is this set worth $799 plus tax/shipping?
No.
This is clearly a splurge piece.
However, it would totally be worth $75 a unit just as MrClean stated earlier. It is definitely overpriced for what it is and does.
BUT......for me, I am absolutely thrilled with it. I did not pay much for the Mark 1-7 suits. My total investment for this display is extremely lower than most folks. This allows me to forgive the pricing of the set more than others evaluating this from a value proposition. If your investment in the armors and HOA is over $3,000 I can totally get the pause in adding it to the collection.
I will caution that Hot Toys did not make many of these sets, outside of BBTS and Sideshow I have not seen very many of these 7 packs available and most e-tailers sold out pre-orders with no additional units allotments ordered. So if you are in the market for one, I would put some thought into how and when to get this set. I cannot see it being around long after a first discount comes through for them given the low volume of buyers and units available, if it comes to that at all.
If you think you want this set and have the budget, definitely pick it up. Especially if you already have all of the armors. I cannot wait to get it all together and up on my shelf.
I opened one unit to get a good feel for the build quality and my first impressions of the set.
Packaging:
The halls are well packed with the new grey styrofoam inserts we have been seeing with Iron Monger, Hulk, etc..... Smells like Hot Toys plastic crack air fresher. As it has been noted, you should unbox these spaced out in a ventilated area.
 Overall mine came undamaged and only a nick on one corner of a bottom hall box. It's nice that each hall is carefully packed and already together, you just need to choose power source and it's off to the races.
The Hall:
As for the looks once out of the box, it has some heft. Much larger than you would think a bay would be(at least to me) which is a great thing. The plastics appear to be ABS and have several smooth and frosted finishes on the side walls and a smoothed two toned grey back wall. There are stickers on each side of the backplates that I think makes the back wall look toyish, but thankfully it will get covered up with a Mark in the bay. Every panel is screwed together and it would be very easy to take the bays apart. I will be disassembling the hall to fit into my diorama. The way Hot toys developed the hall lends this set well to make some nagging features better with a little work.( More on this below)

Light feature:
As it has been stated, you'll need a surplus of batteries to light these candles, 6 AA and 3 AAA per Hall. The walls use 2x's the batteries as the base, which powers 10x's as many lights.

The side wall pieces light up well. They are top and bottom pillar lit, it could have used more lighting in the middle part to really make the light spread better.
The back wall detail and platform with the hologram blue lights look very nice. When it is all lit up, the toyish look of the plastic really goes away and the hall is way more impressive than when not luminated. Overall I love the lighting as it is not overly bright and allows for good shadows and definition for the figures to stand in.

Power:
This is one area I am very excited by Hot Toy's design. Each wall battery compartment is attached to the unit in the back. The wall allows enough room to cleanly wire up the side walls with conductive wire and daisy chain them to a consolidated power source. It is pretty easy to do and is a non-evasive mod to wire all of the hall electronics together. So the fact it comes apart the way it does is quite awesome!
 Goodbye stupid batteries and buttons.


Value:
So bottom line. Is this set worth $799 plus tax/shipping?

No.
This is clearly a splurge piece.
However, it would totally be worth $75 a unit just as MrClean stated earlier. It is definitely overpriced for what it is and does.
BUT......for me, I am absolutely thrilled with it. I did not pay much for the Mark 1-7 suits. My total investment for this display is extremely lower than most folks. This allows me to forgive the pricing of the set more than others evaluating this from a value proposition. If your investment in the armors and HOA is over $3,000 I can totally get the pause in adding it to the collection.
I will caution that Hot Toys did not make many of these sets, outside of BBTS and Sideshow I have not seen very many of these 7 packs available and most e-tailers sold out pre-orders with no additional units allotments ordered. So if you are in the market for one, I would put some thought into how and when to get this set. I cannot see it being around long after a first discount comes through for them given the low volume of buyers and units available, if it comes to that at all.
If you think you want this set and have the budget, definitely pick it up. Especially if you already have all of the armors. I cannot wait to get it all together and up on my shelf.

Last edited:
Re: Hot Toys - DS001A-C - Iron Man 2: 1/6th scale Hall of Armor Collectible Specs & P
Good review. Looking forward to seeing this modded for AC wiring b/c there's no way I'd be using a million Duracell's to power this up daily.
Good review. Looking forward to seeing this modded for AC wiring b/c there's no way I'd be using a million Duracell's to power this up daily.

hokietwo
TheOwnersSuite
Re: Hot Toys - DS001A-C - Iron Man 2: 1/6th scale Hall of Armor Collectible Specs & P
No doubt!
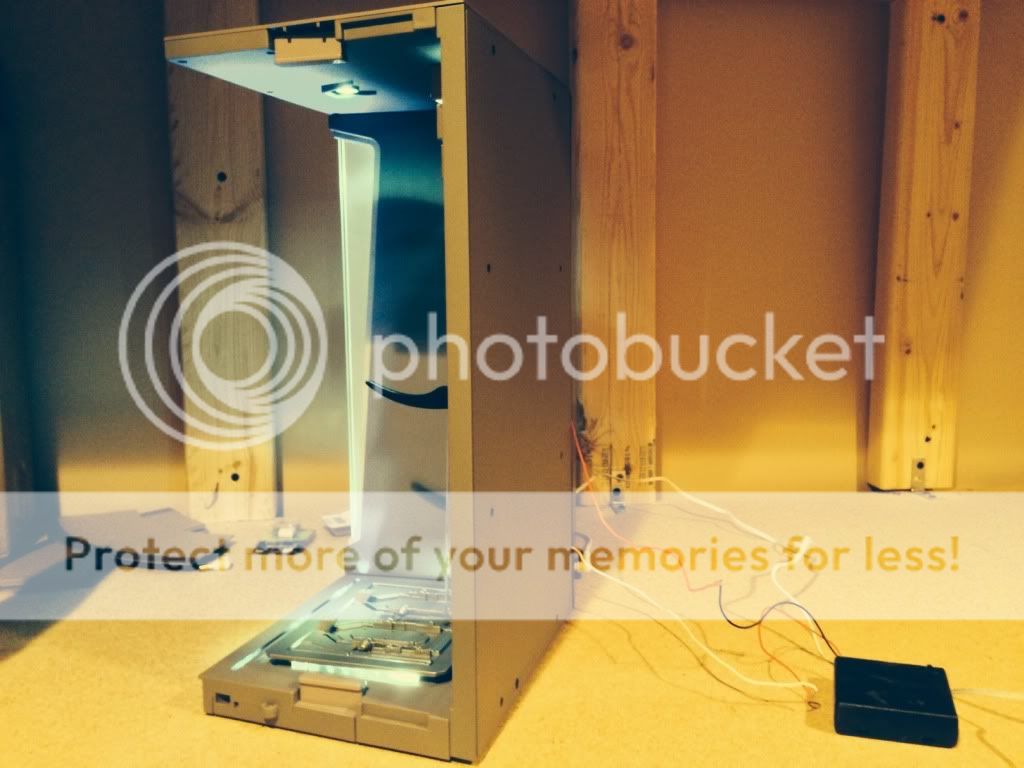
Here's a quick wire test. I'll post the process tomorrow if I get a chance. Really easy.

Good review. Looking forward to seeing this modded for AC wiring b/c there's no way I'd be using a million Duracell's to power this up daily.
No doubt!
Here's a quick wire test. I'll post the process tomorrow if I get a chance. Really easy.

Firebird
Super Freak
Re: Hot Toys - DS001A-C - Iron Man 2: 1/6th scale Hall of Armor Collectible Specs & P
Great review and thanks for sharing your thoughts. I will be looking forward to seeing how this mod is done too.
Great review and thanks for sharing your thoughts. I will be looking forward to seeing how this mod is done too.
hokietwo
TheOwnersSuite
Re: Hot Toys - DS001A-C - Iron Man 2: 1/6th scale Hall of Armor Collectible Specs & P
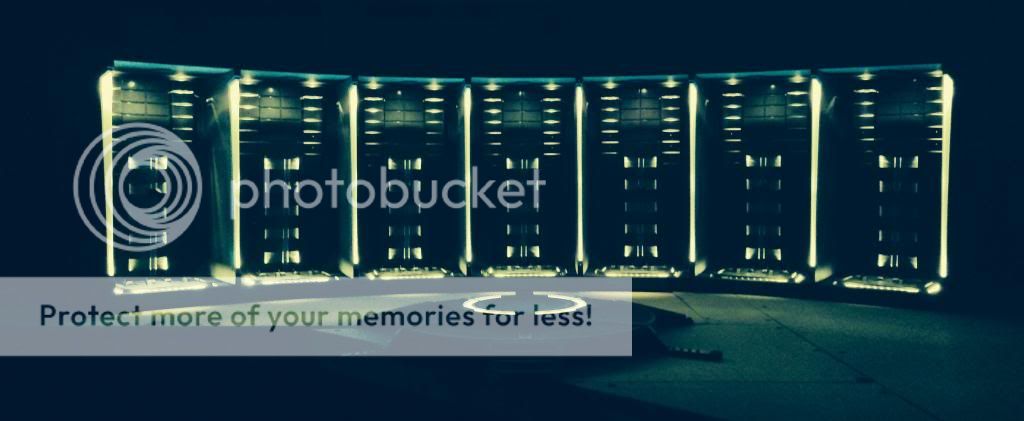
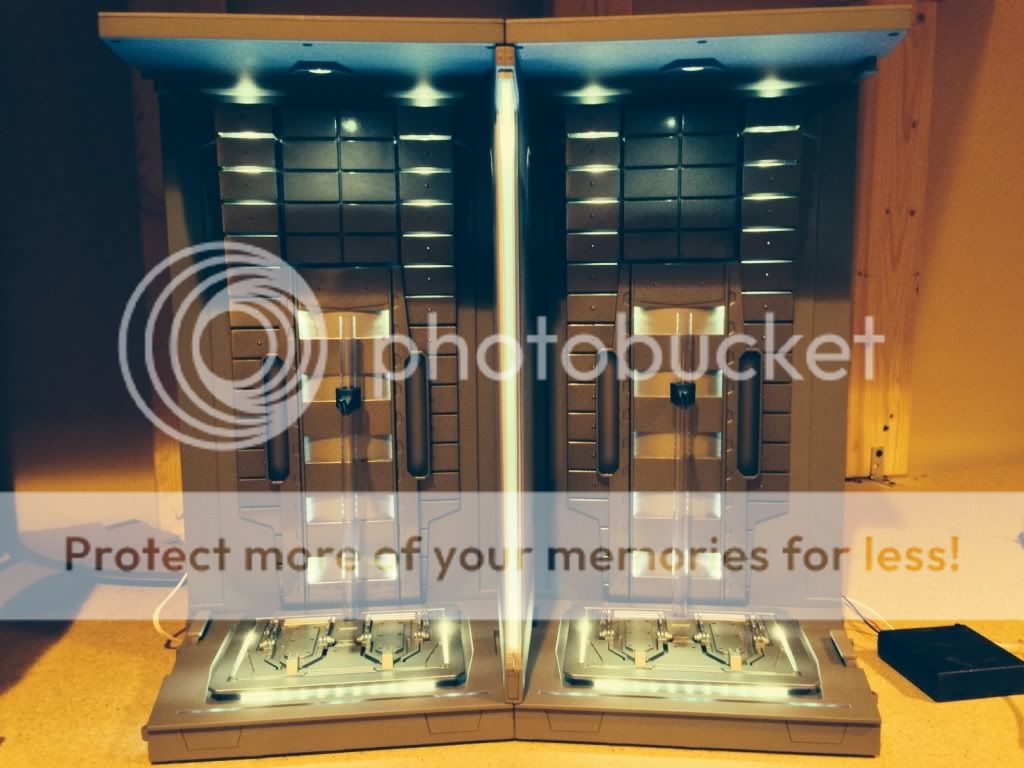
Thanks, want to kind of show a single bay since some people may not want 7. Most discussion has been focused on the full set, show some love to the single piece. You can do a killer display with just a single bay and Tony's elevator platform, I think. Pardon the iPhone quality.
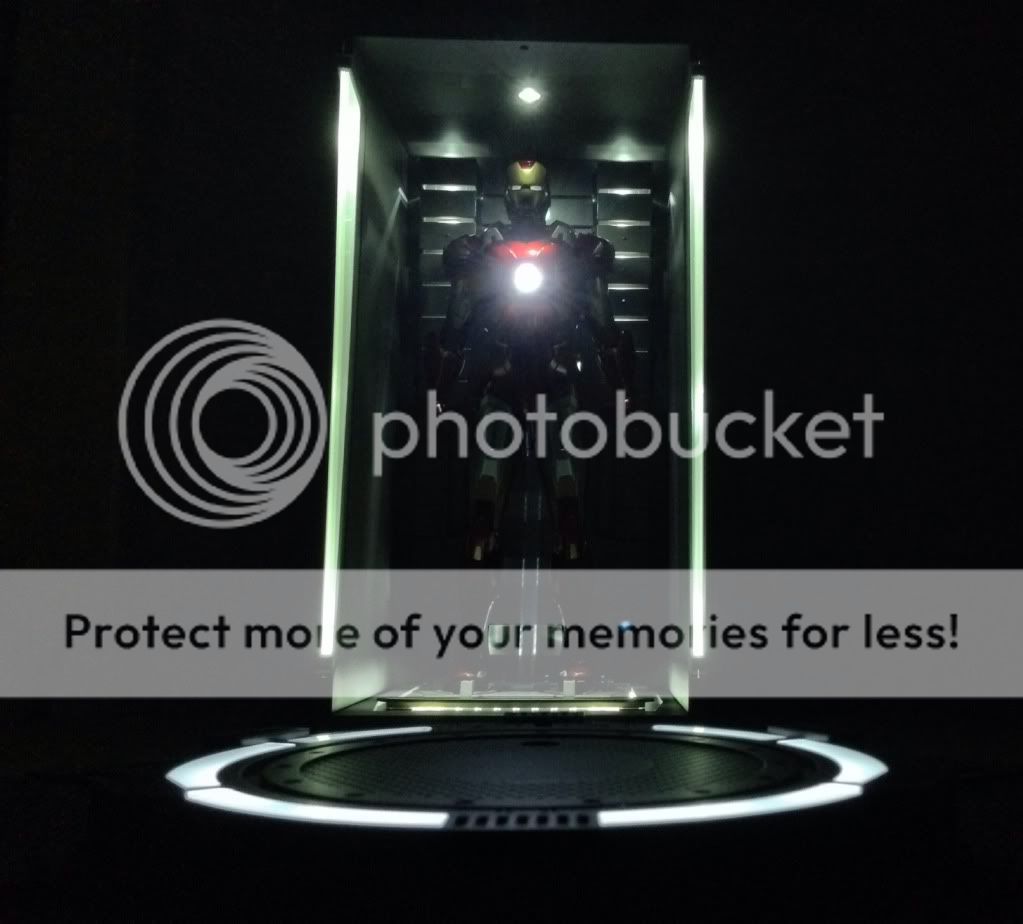
Thanks, want to kind of show a single bay since some people may not want 7. Most discussion has been focused on the full set, show some love to the single piece. You can do a killer display with just a single bay and Tony's elevator platform, I think. Pardon the iPhone quality.


$33.35
Marvel 60th Anniversary Captain America DS-086 D-Stage Previews Exclusive Statue
Green Bargain

$67.50
Marvel Legends Series Venom, Marvel Comics Collectible Action Figure 6” - Exclusive
Package Outbound
Re: Hot Toys - DS001A-C - Iron Man 2: 1/6th scale Hall of Armor Collectible Specs & P
Thanks hokie, really appreciate it! Looks ok with a single unit and base in the dark and lit up. How does it look during the day in normal light?
Thanks, want to kind of show a single bay since some people may not want 7. Most discussion has been focused on the full set, show some love to the single piece. You can do a killer display with just a single bay and Tony's elevator platform, I think. Pardon the iPhone quality.

Thanks hokie, really appreciate it! Looks ok with a single unit and base in the dark and lit up. How does it look during the day in normal light?
Re: Hot Toys - DS001A-C - Iron Man 2: 1/6th scale Hall of Armor Collectible Specs & P


Sweet pics everyone!


Sweet pics everyone!
hokietwo
TheOwnersSuite
Re: Hot Toys - DS001A-C - Iron Man 2: 1/6th scale Hall of Armor Collectible Specs & P
Dunno yet, I have not had it in my possession until tonight. I can snap some pics in the daylight tomorrow and post them. I think you will find having any suit in the bay just looks sharp and will tend to blend the hall into the surroundings instead of looking like the plastic box it really is when empty. The integrated lights help tremendously on display.
Thanks hokie, really appreciate it! Looks ok with a single unit and base in the dark and lit up. How does it look during the day in normal light?
Dunno yet, I have not had it in my possession until tonight. I can snap some pics in the daylight tomorrow and post them. I think you will find having any suit in the bay just looks sharp and will tend to blend the hall into the surroundings instead of looking like the plastic box it really is when empty. The integrated lights help tremendously on display.
hokietwo
TheOwnersSuite
Re: Hot Toys - DS001A-C - Iron Man 2: 1/6th scale Hall of Armor Collectible Specs & P
So I went out today to get a 4.5 volt adapter for the daisy chain, returned and couldn't plug in the adapter. Somehow my plug was unglued and I had to open the back panel to get to the housing. No biggie, so I superglued the DC pin back to the notch and plugged in the adapter. No power. Plugged the a pater into another unit and turned right on.
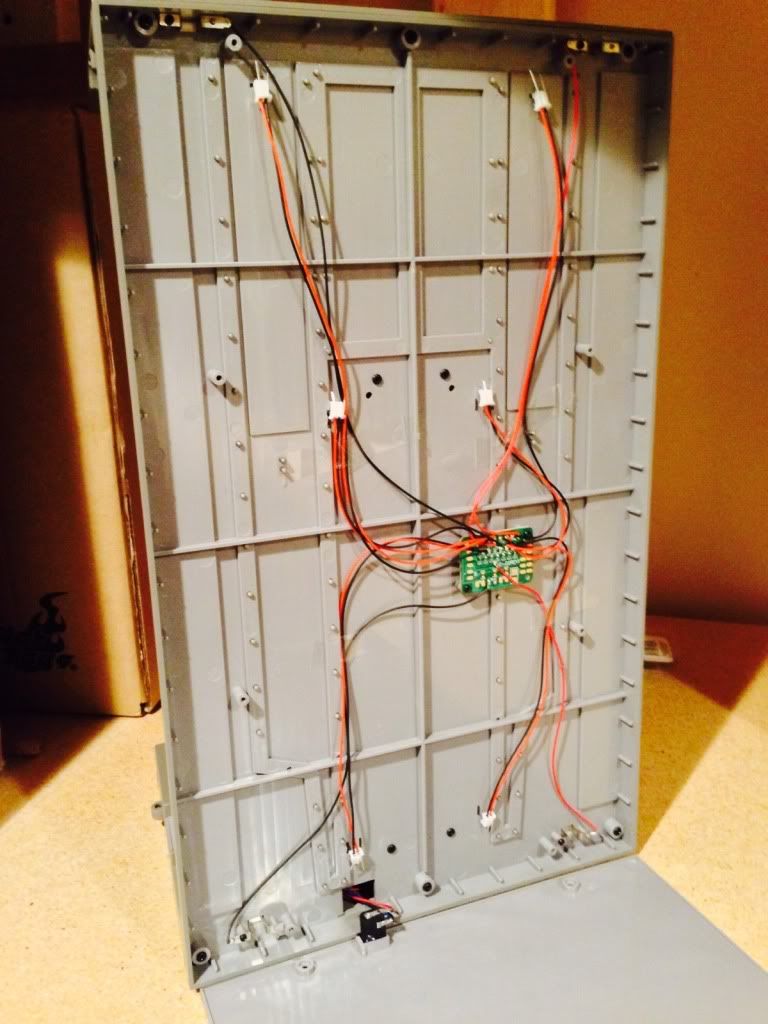
So I looked at the plug and the hot wire was attached to the ground wire. DERP! I had to get a soldering iron out and change the solder connections to make the damn thing work right. Good news it worked. So just a fair warning if anybody's hall doesn't turn on with batteries or through the DC adapter, this could be a issue. Here's a pic of the right wire positions.

Little frustrating. But after looking inside the lights would be pretty easy to change out for brighter lumens or add on to the PCB board.
So I went out today to get a 4.5 volt adapter for the daisy chain, returned and couldn't plug in the adapter. Somehow my plug was unglued and I had to open the back panel to get to the housing. No biggie, so I superglued the DC pin back to the notch and plugged in the adapter. No power. Plugged the a pater into another unit and turned right on.

So I looked at the plug and the hot wire was attached to the ground wire. DERP!
 I had to get a soldering iron out and change the solder connections to make the damn thing work right. Good news it worked. So just a fair warning if anybody's hall doesn't turn on with batteries or through the DC adapter, this could be a issue. Here's a pic of the right wire positions.
Little frustrating. But after looking inside the lights would be pretty easy to change out for brighter lumens or add on to the PCB board.
Last edited:
hokietwo
TheOwnersSuite
Re: Hot Toys - DS001A-C - Iron Man 2: 1/6th scale Hall of Armor Collectible Specs & P
LINKING SIDE WALLS MOD:
A real easy way to get these wired requires a few little things.
- 20 gauge wire
- 3/8 Dow wood rod
- steel tacks
- mini transformer adapter for a 2 wire +\- power strip
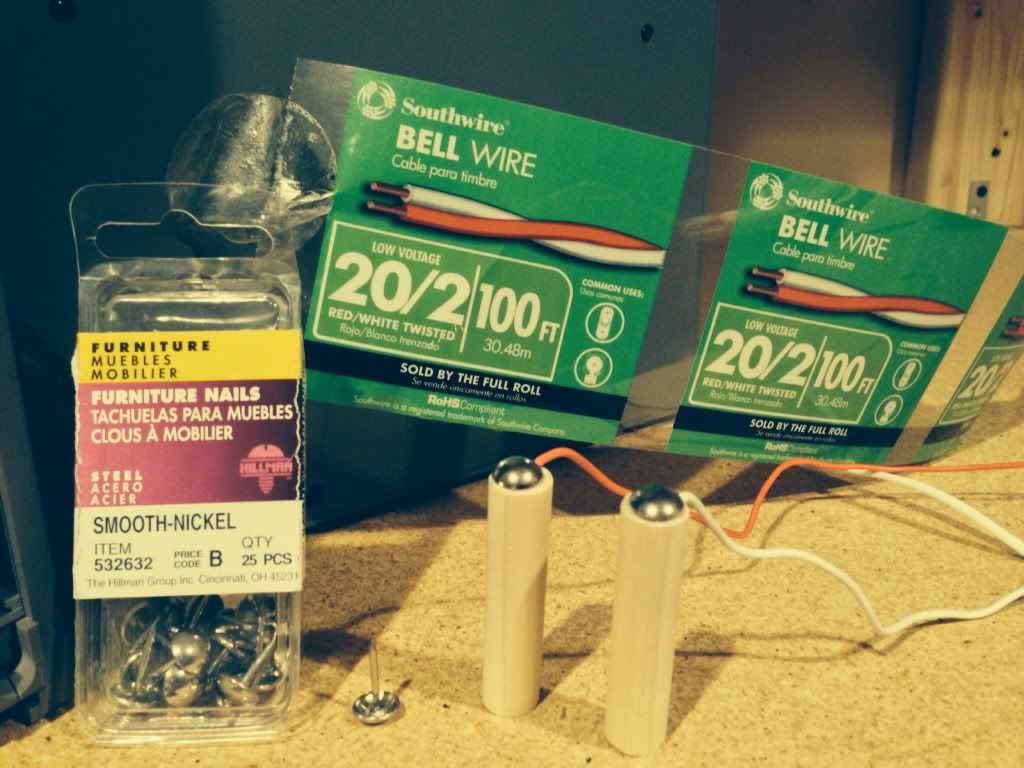
Wiring steps:
1. Cut the bell wire to proper length.
2. Strip the ends and loop a copper hoop around the steel tack.
3 cut the 3/8 Dow rod Dow to the size of a AA battery.
4. Hammer the steel tack with wire ends down into the dow rod for 1 end. Should look like pic below.
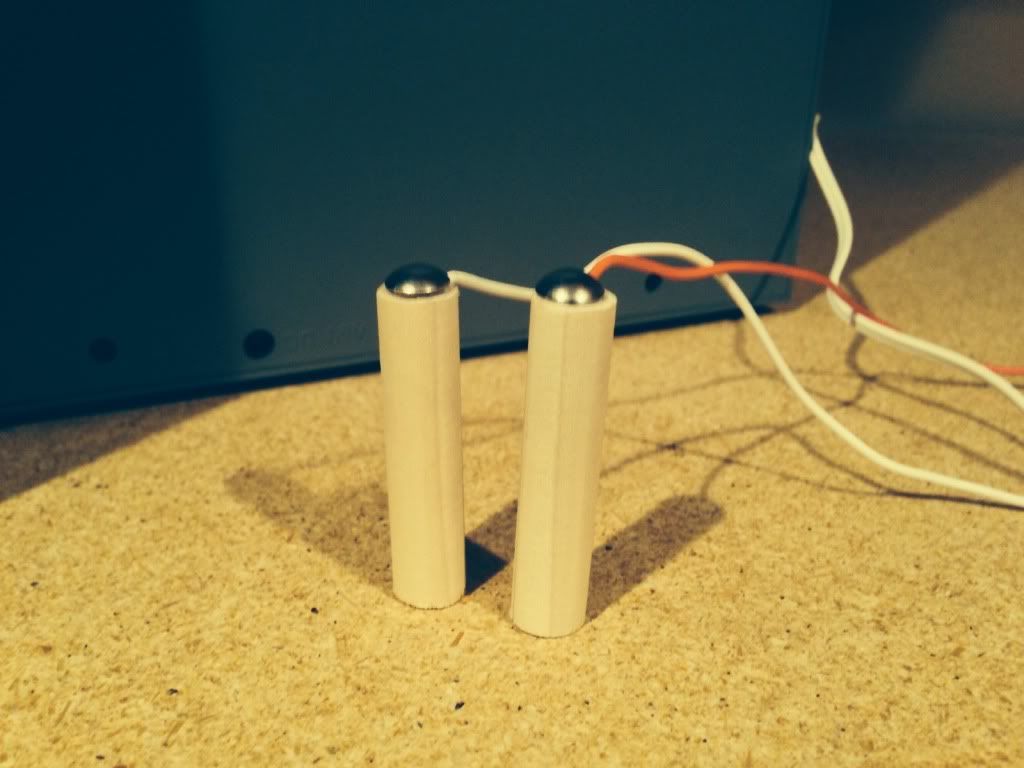
Then just place the metal tack ends to the top and bottom of the hall walls so the +\- are set. ( I used red for hot or +).
Feed the wall into the matched walls and pull out of the back.
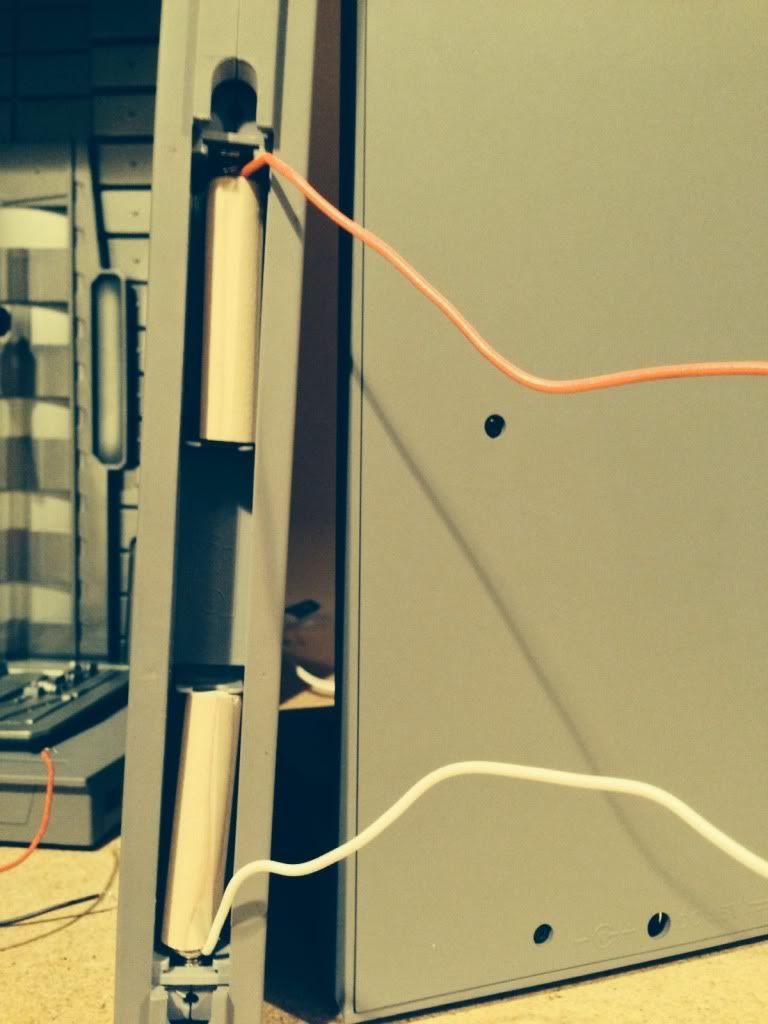
The last step is to connect all of the paired connections to a power link. I need to order one, but I believe Ikea has them in the lighting section with the Dioder LEDs. When I order mine or acquire one I will update this post.
But after you wire in the other walls and feed the wires through, now the sides can be controlled easily with a control switch, dimmers or a remote.
Hope this helps for anybody not wanting to use batteries and worry about turning them all on and off on the display.
LINKING SIDE WALLS MOD:
A real easy way to get these wired requires a few little things.
- 20 gauge wire
- 3/8 Dow wood rod
- steel tacks
- mini transformer adapter for a 2 wire +\- power strip

Wiring steps:
1. Cut the bell wire to proper length.
2. Strip the ends and loop a copper hoop around the steel tack.
3 cut the 3/8 Dow rod Dow to the size of a AA battery.
4. Hammer the steel tack with wire ends down into the dow rod for 1 end. Should look like pic below.

Then just place the metal tack ends to the top and bottom of the hall walls so the +\- are set. ( I used red for hot or +).
Feed the wall into the matched walls and pull out of the back.


The last step is to connect all of the paired connections to a power link. I need to order one, but I believe Ikea has them in the lighting section with the Dioder LEDs. When I order mine or acquire one I will update this post.
But after you wire in the other walls and feed the wires through, now the sides can be controlled easily with a control switch, dimmers or a remote.
Hope this helps for anybody not wanting to use batteries and worry about turning them all on and off on the display.


davidmustang89
Super Freak
lotus000
Super Freak
- Joined
- Jun 25, 2013
- Messages
- 1,324
- Reaction score
- 8
Re: Hot Toys - DS001A-C - Iron Man 2: 1/6th scale Hall of Armor Collectible Specs & P
That's ok you won't have to spend 700 you only have to Spen 850 with shipping.
That's ok you won't have to spend 700 you only have to Spen 850 with shipping.

lotus000
Super Freak
- Joined
- Jun 25, 2013
- Messages
- 1,324
- Reaction score
- 8
Re: Hot Toys - DS001A-C - Iron Man 2: 1/6th scale Hall of Armor Collectible Specs & P
You are the man. I have been trying to figure out what I would use to replicate AA battery cylinders and never thought of a Wooden dowl rod.
Thank you Sir
LINKING SIDE WALLS MOD:
A real easy way to get these wired requires a few little things.
- 20 gauge wire
- 3/8 Dow wood rod
- steel tacks
- mini transformer adapter for a 2 wire +\- power strip

Wiring steps:
1. Cut the bell wire to proper length.
2. Strip the ends and loop a copper hoop around the steel tack.
3 cut the 3/8 Dow rod Dow to the size of a AA battery.
4. Hammer the steel tack with wire ends down into the dow rod for 1 end. Should look like pic below.

Then just place the metal tack ends to the top and bottom of the hall walls so the +\- are set. ( I used red for hot or +).
Feed the wall into the matched walls and pull out of the back.


The last step is to connect all of the paired connections to a power link. I need to order one, but I believe Ikea has them in the lighting section with the Dioder LEDs. When I order mine or acquire one I will update this post.
But after you wire in the other walls and feed the wires through, now the sides can be controlled easily with a control switch, dimmers or a remote.
Hope this helps for anybody not wanting to use batteries and worry about turning them all on and off on the display.

You are the man. I have been trying to figure out what I would use to replicate AA battery cylinders and never thought of a Wooden dowl rod.
Thank you Sir
Re: Hot Toys - DS001A-C - Iron Man 2: 1/6th scale Hall of Armor Collectible Specs & P
Great job and thanks for the guide!
HT should have really made this plug and play out of the box considering the price. Just knowing that I'd have to do this in advance makes it easier to wait on these but this is getting bookmarked for a rainy day.
LINKING SIDE WALLS MOD:
A real easy way to get these wired requires a few little things.
- 20 gauge wire
- 3/8 Dow wood rod
- steel tacks
- mini transformer adapter for a 2 wire +\- power strip

Wiring steps:
1. Cut the bell wire to proper length.
2. Strip the ends and loop a copper hoop around the steel tack.
3 cut the 3/8 Dow rod Dow to the size of a AA battery.
4. Hammer the steel tack with wire ends down into the dow rod for 1 end. Should look like pic below.

Then just place the metal tack ends to the top and bottom of the hall walls so the +\- are set. ( I used red for hot or +).
Feed the wall into the matched walls and pull out of the back.


The last step is to connect all of the paired connections to a power link. I need to order one, but I believe Ikea has them in the lighting section with the Dioder LEDs. When I order mine or acquire one I will update this post.
But after you wire in the other walls and feed the wires through, now the sides can be controlled easily with a control switch, dimmers or a remote.
Hope this helps for anybody not wanting to use batteries and worry about turning them all on and off on the display.

Great job and thanks for the guide!

HT should have really made this plug and play out of the box considering the price. Just knowing that I'd have to do this in advance makes it easier to wait on these
 but this is getting bookmarked for a rainy day.
 hokietwo
TheOwnersSuite
Balrog
Super Freak
Re: Hot Toys - DS001A-C - Iron Man 2: 1/6th scale Hall of Armor Collectible Specs & P
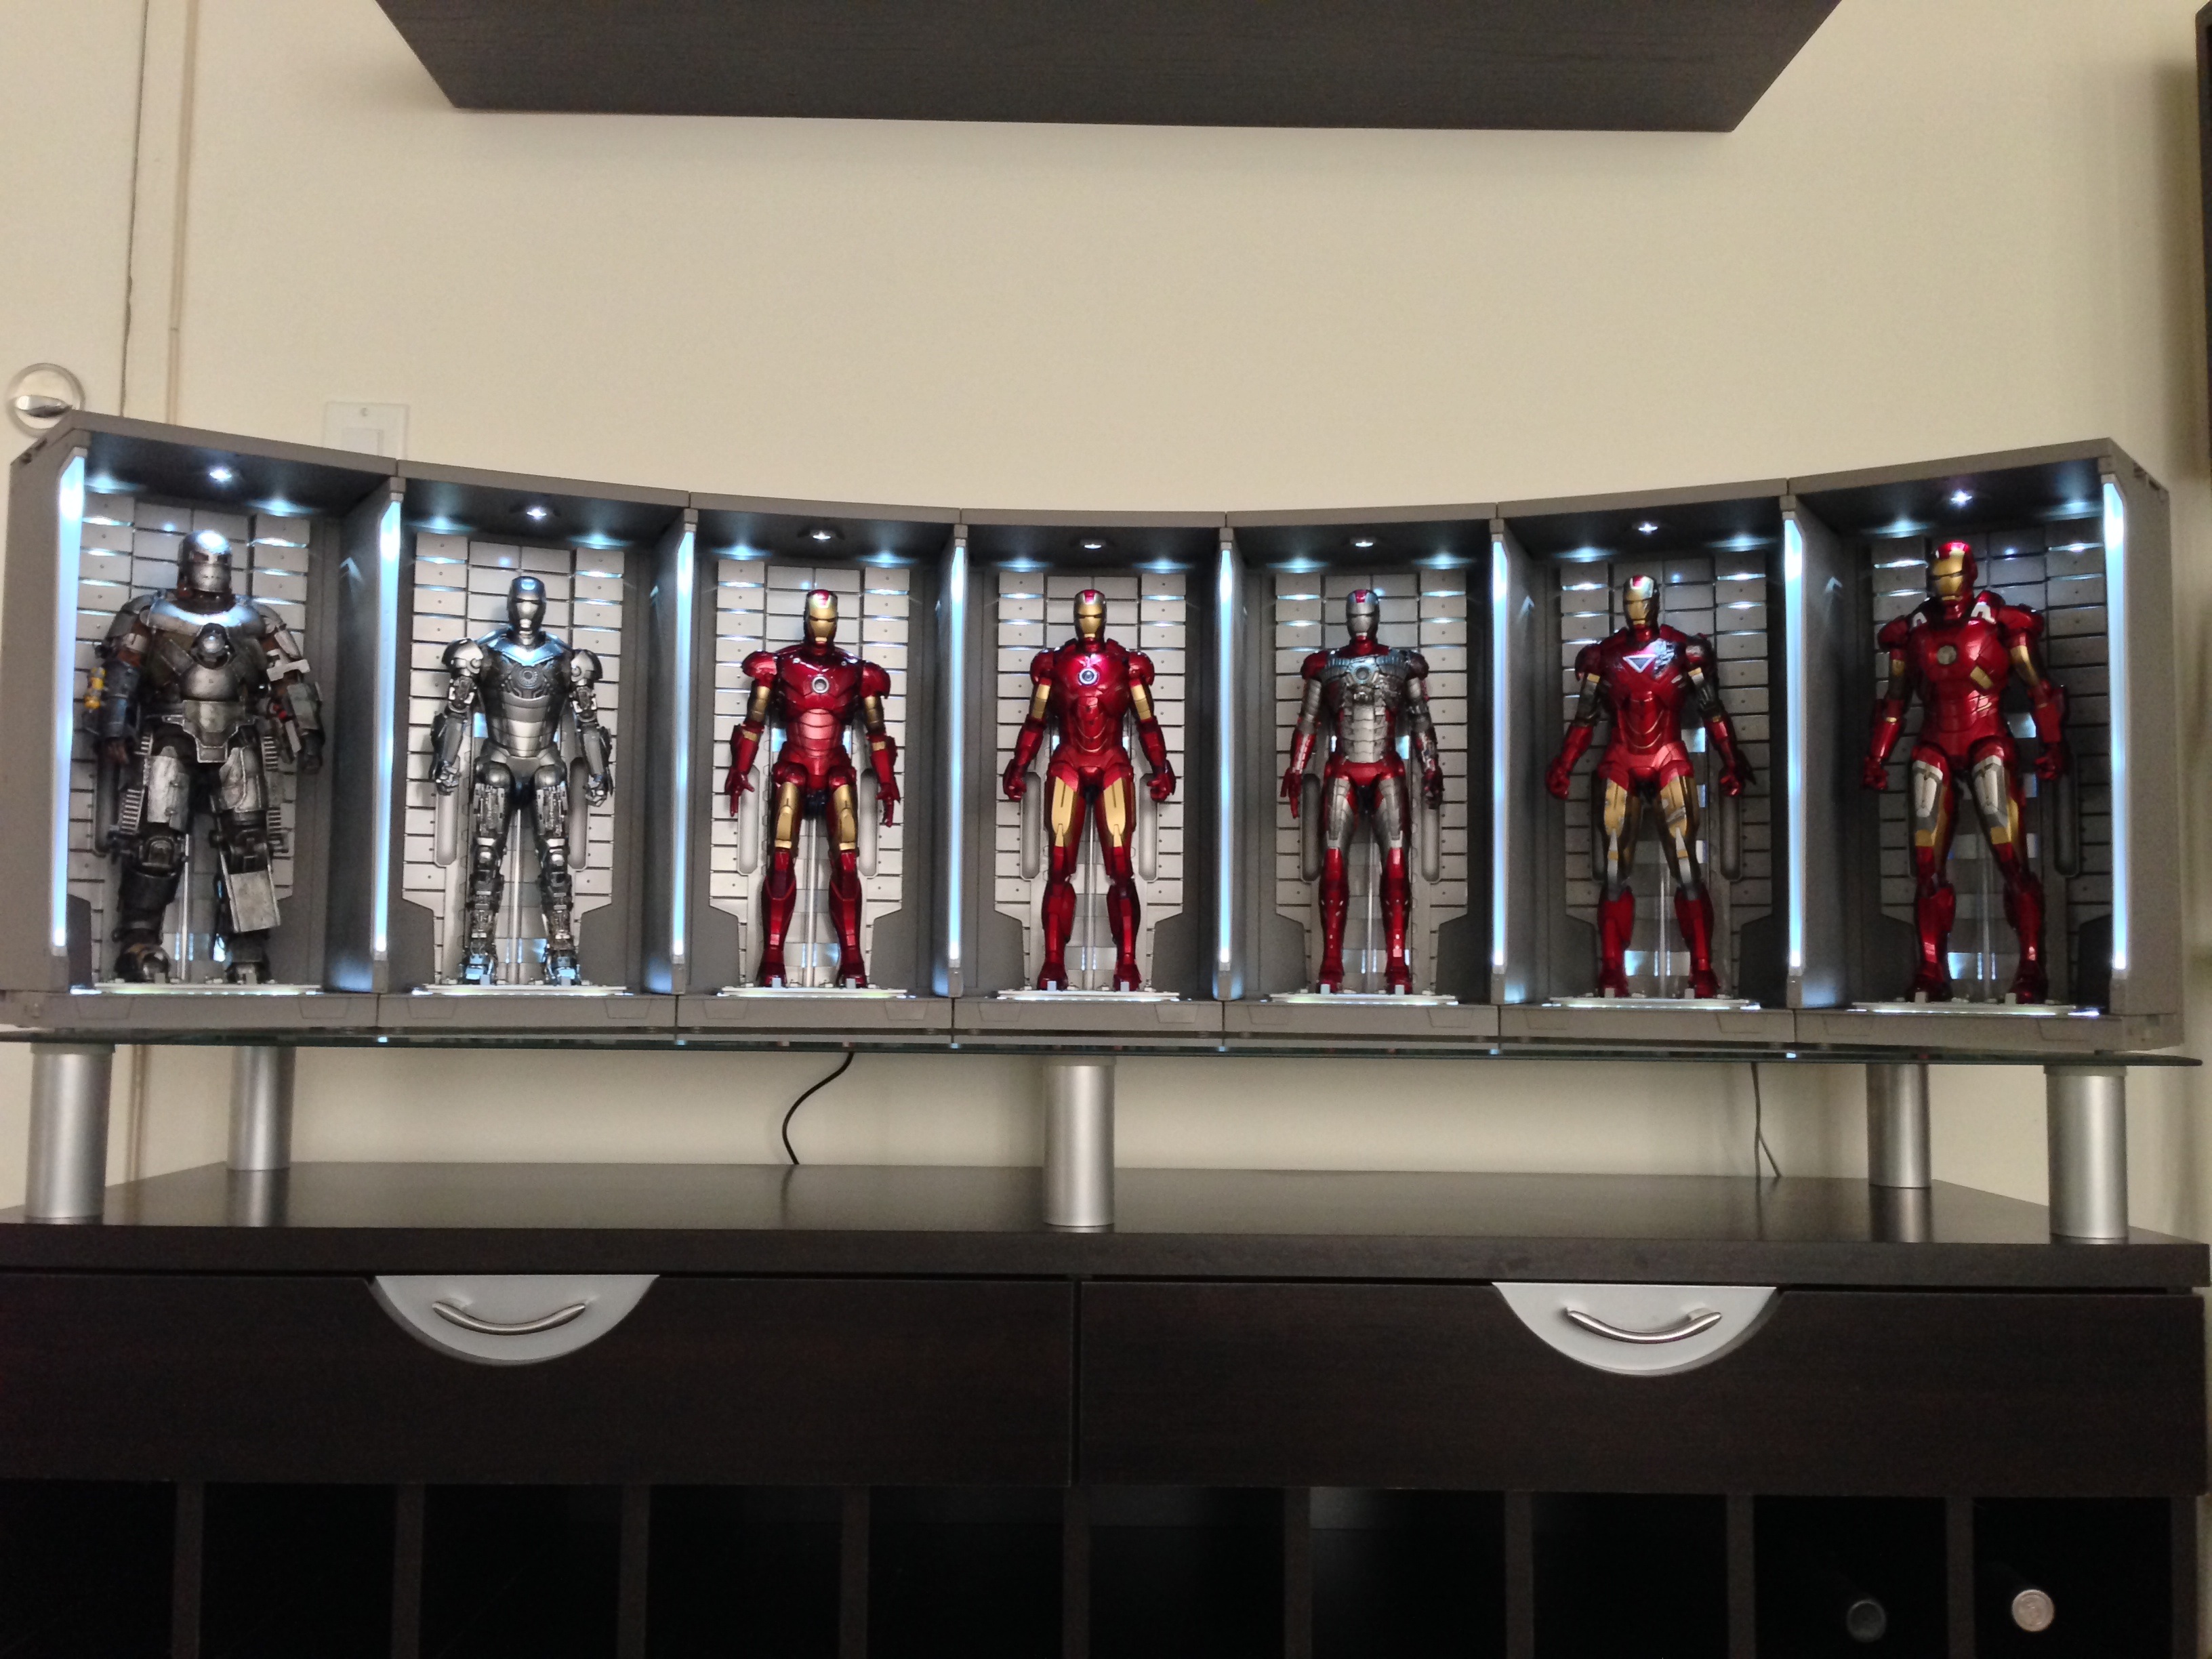
****in unreal! Looks amazing, well done on the wall mod. You would swear that's the 1:1 movie set
****in unreal! Looks amazing, well done on the wall mod. You would swear that's the 1:1 movie set

hokietwo
TheOwnersSuite
Re: Hot Toys - DS001A-C - Iron Man 2: 1/6th scale Hall of Armor Collectible Specs & P
Thanks brother!
It's a lot of work but it does look awesome.
****in unreal! Looks amazing, well done on the wall mod. You would swear that's the 1:1 movie set
Thanks brother!

It's a lot of work but it does look awesome.
Re: Hot Toys - DS001A-C - Iron Man 2: 1/6th scale Hall of Armor Collectible Specs & P
hey bro,
could you show us the back completed with all the wires and adapter. thinking of copying you. thanks

hey bro,
could you show us the back completed with all the wires and adapter. thinking of copying you. thanks


Hologram AI
Super Freak
- Joined
- May 7, 2013
- Messages
- 10,977
- Reaction score
- 13,558
Re: Hot Toys - DS001A-C - Iron Man 2: 1/6th scale Hall of Armor Collectible Specs & P
Wow. That's one impressive display. Looks like you have an insane amount of space to display it all!
Would like to see the entire set up for the wiring if it isn't too much trouble. Going to tackle your wire set up when I get my set.
Done.
Wow. That's one impressive display. Looks like you have an insane amount of space to display it all!
Would like to see the entire set up for the wiring if it isn't too much trouble. Going to tackle your wire set up when I get my set.
Similar threads
- Replies
- 92
- Views
- 9K
- Replies
- 98
- Views
- 13K
- Replies
- 117
- Views
- 6K
- Replies
- 538
- Views
- 36K
- Replies
- 53
- Views
- 5K


