Rainman Artwork 2013 NYC Cabbie "Driver"

Collector Freaks Forum

Help Support Collector Freaks Forum:

This site may earn a commission from merchant affiliate links, including eBay, Amazon, and others.
Yeah, it's a bit of work, but in no way is the difficulty of putting together a Rainman figure worth the $350-400 or so difference in price between H+C and full sets. At least, not unless you make that much in an hour and a half or so of your actual job :lol
 
Yeah, it's a bit of work, but in no way is the difficulty of putting together a Rainman figure worth the $350-400 or so difference in price between H+C and full sets. At least, not unless you make that much in an hour and a half or so of your actual job :lol

:lol. That would be true to the penny but you're leaving out the secret item, his paint & body on top of that. That combined bundle is worth it for me personally.

I wish I made $350/hour :lol
 
I finally got a chance to look at this carefully last night--I got the DX set and both Aeon sculpts as well--and what marlin shows in his pictures is precisely what I got. The Aeon sculpts actually have a better skin tone IMO, but the huge eyes are distracting. My cab driver also has the blush makeup look on the Rainman painted head, which is also a bit distracting. The Rainman soldier sculpt is the best painted of the bunch.

Regarding the mod to put the torso on, I used one of the recent KO narrow shoulder TT's and not a stock TTM-21, but the process should essentially be the same:

I found that the easiest way to handle this mod was to pry apart the TT abdomen, but leave one half of it in place, so that it is still propping up the little plastic tab under the spring. Then, you could use that piece to lift the tab up a bit, while sliding one half of the Rainman chest piece under it on the other side. Then, take the original piece out, put the arms and neck piece where they have to go, and use the RM piece in place to pry the spring up to put the other piece in place. I did find, however, that the screws that were in my original body held well in the lower holes in RM's chest, but didn't screw in very well in the upper holes. Perhaps because of that, there is a gap in his neck. If I knew I would keep him on this body permanently, I would glue it in place, but the cabbie head seems to sit low in relation to the shoulders somehow, so I might try a different body.

The mod actually wasn't that hard once I decided to keep the original abdomen piece in place, but the spring is extremely tight, meaning you have to put some real pressure on the Rainman pieces. Knowing that this is an expensive "art doll," most of us probably have an aversion to doing that, but there's really no way around it.

Exactly what I did late last night with the TTM-21 and it went pretty smoothly. Took one try and less than 5 minutes to exchange the RM chest piece. Like Kara said, the key is to leave one half of the original TTM to prop up the little plastic tab under the spring while putting in one half of the RM chest piece.
 
:lol. That would be true to the penny but you're leaving out the secret item, his paint & body on top of that. That combined bundle is worth it for me personally.

I wish I made $350/hour :lol
I didn't mean to say the full sets weren't worth it, knowing there are other perks. But the putting it together part really isn't that big of a deal once you spend some time doing it. I did have an issue or two in the past putting RM figures together this way, but it was only my own impatience or carelessness that caused it, and usually I was able to fix what I messed up.
 
My favorite so far is the Cab Driver...the clothes are amazing and personally think the Cabbie HS looks a bit better than the Soldier....Soldier HS feels a bit soft to me

:drool :drool
 
I still have some futzing/body swapping to do with my cabbie before I'm happy with it. At the moment, I'm most happy with the soldier as a figure, though the cab driver is my favorite look of the character. All of the clothing is extremely well done, of course.

Regarding that, does anyone know the story behind the tags in the clothing? I don't recall seeing these specific tags in any previous Rainman work.

Was going to ask that same question :rotfl

I found myself being caught off guard when i first spotted it..and just stared at it for a good 3 minutes trying to figure out what it meant :dunno
 
On another note...been trying really hard to get the collar of jacket to stay down like in the movie...but the zipper around neck area keeps raising it back up...any suggestions?

 
I also think RM's Soldier sculpt is the best example of all 4, paint wise.

I was wondering the same thing about the tags :confused:. I'd imagine that it's a Tree Design thing over a screen accuracy thing; if it is an accuracy thing.... I'm impressed
 
I'm pretty sure the Marty McFly jacket had a tag that said "Tree." So there, that made some obvious sense. I don't even remember what Bickle's tags said, but they were the same for different articles of clothing, so I don't think they are accurate to the original clothes. I assume they are some way of recognizing the manufacturer of the doll clothes, but just don't know the specifics.
 
On another note...been trying really hard to get the collar of jacket to stay down like in the movie...but the zipper around neck area keeps raising it back up...any suggestions?


Could try ironing it. Or doing a little whip stitch on the ends. I think its the ends that are keeping it from laying down.
 
Could try ironing it. Or doing a little whip stitch on the ends. I think its the ends that are keeping it from laying down.

Oooo..great idea Robbie! Ill try the whip stitch...im affraid to get the iron too close to plastic zipper area and make matters worse...thanks for tip!
 
I finally got a chance to look at this carefully last night--I got the DX set and both Aeon sculpts as well--and what marlin shows in his pictures is precisely what I got. The Aeon sculpts actually have a better skin tone IMO, but the huge eyes are distracting. My cab driver also has the blush makeup look on the Rainman painted head, which is also a bit distracting. The Rainman soldier sculpt is the best painted of the bunch.

Regarding the mod to put the torso on, I used one of the recent KO narrow shoulder TT's and not a stock TTM-21, but the process should essentially be the same:

I found that the easiest way to handle this mod was to pry apart the TT abdomen, but leave one half of it in place, so that it is still propping up the little plastic tab under the spring. Then, you could use that piece to lift the tab up a bit, while sliding one half of the Rainman chest piece under it on the other side. Then, take the original piece out, put the arms and neck piece where they have to go, and use the RM piece in place to pry the spring up to put the other piece in place. I did find, however, that the screws that were in my original body held well in the lower holes in RM's chest, but didn't screw in very well in the upper holes. Perhaps because of that, there is a gap in his neck. If I knew I would keep him on this body permanently, I would glue it in place, but the cabbie head seems to sit low in relation to the shoulders somehow, so I might try a different body.

The mod actually wasn't that hard once I decided to keep the original abdomen piece in place, but the spring is extremely tight, meaning you have to put some real pressure on the Rainman pieces. Knowing that this is an expensive "art doll," most of us probably have an aversion to doing that, but there's really no way around it.

Can you post a pic with the sculpts side by side?
 
Having too much fun with this set, but with so many accessories and not enough sculpts, I thought I'd use my other Bickle sculpts as well. The Mohawk will definately stay with the barechest, I'm going with a more pissed off look for the lonely walker, and my Rainman Fullhair will be saved for my workout scene Tshirt look.

01055D64-9801-4B9E-A613-CE27F3BB1246-720-000001B016D91D9A_zpsabceeb4c.jpg

N
Now to pick up some better bodies, do the appropriate mods, paintups, fitting and futzing to get this looking like it came straight out of a movie still.

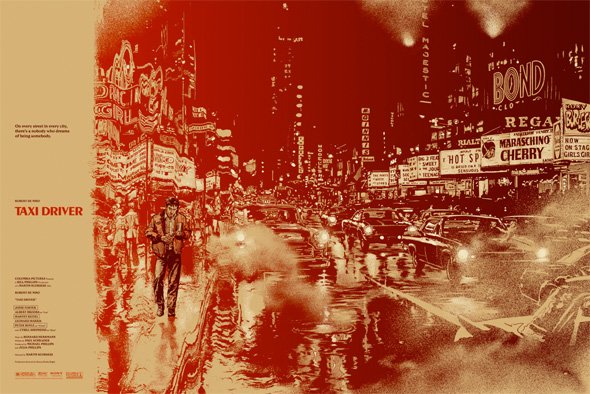
If Anyone owns this mondo poster and is selling it, please let me know!
taxidriver-mondoposter-full.jpg
 
Last edited:
If Anyone owns this mondo poster and is selling it, please let me know!
taxidriver-mondoposter-full.jpg
[/QUOTE]

Search for Martin Ansin Taxi Driver Poster. That should help you find one..
 
I also think RM's Soldier sculpt is the best example of all 4, paint wise.

I was wondering the same thing about the tags :confused:. I'd imagine that it's a Tree Design thing over a screen accuracy thing; if it is an accuracy thing.... I'm impressed

It has nothing to do with accuracy. Treedesign is the balljointed Doll clothing apparel division and Toribox is the 1/6 scale clothing division of Yunsils business.

Toribox are the official outfitters of Rainman Artworks and Serang. Both these artists get their 1/6 clothing from this division
 
Nice video Emarae
Which body r u using?

I'm penny pinching on this custom and saving as much as I can these days while still trying to get a decent end result. I used the boot leg Narrow Shoulder bodies you find on ebay. Now it seems they are up to a 3.0 version, so they way they are, they've improved to the point where they're practically as good as the originals HT versions in my opinion.

Where did you get the jacket for driver from? Any idea and can you help me...

As I mentioned in my vid, I got help from ShortRound who pointed out the clothing set (jacket, shirt, pants, & belt were up for sale from fellow SSF member Deckard. I got the set for $40. Maybe you can ask him where they originally came from?

Nice pics and nice bash Marlo :clap


I'm not sure if this is what you're talking about but there's a mod for the boots (maybe someone can dig that up). It's the same idea as the neck mod he gave us. You have to break the foot of a True Type to take out the cylinder that receives the foot peg. That gets glued into the boot

Thanks, Mike! I tried to work with what I could... Limited budget this time and all..! I figured better something from Rainman than nothing at all, which was almost the case. Only intended on doing the Soldier version H & C, but luckily was able to do a decent bash of the Cabbie as well. Of course nothing compares to the full sets, but what can you do? I wish the H & C set at least came with the sun glasses..! :(
As for the boots, I went for the shorter look and did what ShortRound mentioned earlier and just pushed the bottom of the legs in the boot holes without the peg/foot connectors added in. They're loose, so I remedied that with some good ol' sticky tack.

I have a question. What do you do with the long white piece of elastic that is attached to the black holster? It doesn't seem necessary. The piece of elastic that wraps around his body on the brown holster seems to be all that's needed.... :dunno

I had the same question and still don't really know the answer, but on mine, I didn't want to cut/ remove anything that RM originally put there, so I made a cross or X pattern at the back then worked the excess up the front and carefully tucked the end behind the brown holster. It's all hidden on my Soldier version anyways beneath his jacket, so no biggie. Might be a little tougher with the bare chest look, but can still be done.

The screws I used for the upper section were longer, and so I had more success. Where or what they came from I have no idea, but the top ones need to be longer to get the good bite. I still have a slight gap at the seem but it is better with the long screws. I plan to glue mine shut once I've sorted out the arms situation.

I figured I needed longer screws to close the gap on mine too, but I'm not stressing over it since like I mentioned in my vid, the collars seem to hide it enough for my display purposes. I also considered gluing it all down eventually. Glad to know mine wasn't the only one doing this. I thought maybe it was because I used the cheaper boot leg Narrow Shoulder bodies or something. Anyhow, this seems to be common thing afterall...
 
Back
Top