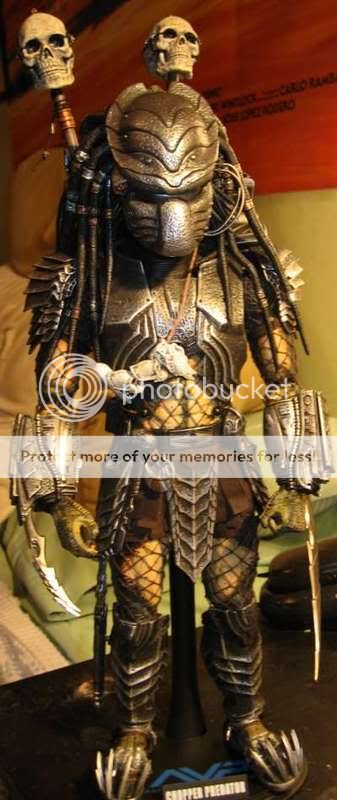
Elder_Predator2
Super Freak
I'v been working my ass off here trying to make these. Funny thing is that it doesn't really seem like work. It's a fun sort of work.


I got the Scar molds, and 3 made before I ran ou of Hardcast.
Here's pics of everything I''ve been able to make.

I still need about 13 more Scars, and about 5 more Ancients.
I need more HARDCAST. I still have enough sillicone to make ONE more mold, which will probably be the NArin, if I finish the sculpt soon.


 so awesome!!!!!


Hey bro, can you point me in the direction of that tutorial?
Kit! Rock on bro!
Here's my formula, for what it's worth...
Here's my Chop for you to ponder as I tell you what I did...

OK...
First, you have all Model Master Acryl Acrylic (or comparable) paints.
Second, you have the colors Burnt Umber, Steel, flat Black, Silver and white and red.
You also have Water, fairly wide hobby brushes, say 1/4 to 1/3 inch wide at least, and flat. And a couple of narrower round brushes for details.
You have a small pile of paper napkins. Some for wipeoffs, and some for drying the brush out some...
And the helmet.
Then, you CAREFULLY remove the eye piece inside so you don't mess it up. You can pry it loose, and resuperglue it back in after painting the helm.
Painting the helm:
Paint it completely Burnt Umber and let dry thoroughly.
Then, in a flat area bottle lid, or a rimmed container lid, so you have a fairly flat surface as a palette, and using one of the wider flat brushes, mix some Burnt Umber with Steel until you have a dark metal looking color, and wipe off some on a clean napkin. Then, "Drybrush" the mix, liberally, over the burnt umber painted helm.
Do this several times, adding a bit more steel each time, until you get about where you want it to be shadewise and let that dry.
Then, take the steel without any other color, and using the same brush, now rinsed and cleaned and dry again, very drybrush the steel in the same manner as before, but with a very limited amount. Hit upper areas and the highest spots and all. You will know.
Then, let that dry, and take some flat black. using the flat brush again, smear a bit of black on that "mixing" flat area, and add some water and mix until it is very inklike, and thin. Then, quickly "wash" or just brush this watered down mix over an area, say, no more than an inch at a time, or less, and then, using your finger, wipe it off, leaving some of the black in the deepest cracks.
Don't use too much black wash, just some, or you will lose that nice Umber tone underneath. The point of the black is to help bring out the deepest crackas and areas.
Play around with this. No need to worry. If you overdo it, just repaint the whole helm Burnt Umber and start over. No need to worry.
But, if you get it where you are happy with it, drybrush just a small amount of the pure silver, only on the very edges of the most raised areas. You'll see the effect immediately. Do this as much as you want. You can hit a spot on each of those cool bolts too! Makes 'em stand out.
Then, when it is completely dry, paint those small laser spots, you know the three, the three targeting computer lasers, white. Just small dots. Make sure this is clean and simple. Let those dry.
Then, take pure red, and dot just over those white spots. The red can be slightly larger and it will look kind of like a glow if it gets on the dark area around your white dots.
LASTLY,,,if you want to...paint the whole helm with a glosscoat. This is not neccessary, but it will bring out some sheen that the metals can't. But, it works either way.
Oh, and then put the "eyes" back in!
hope this helps!
Let us know! I wanna see your helm when you are done!
(Again, to use drybrush technique, you really wipe the paint almost out of the brush before you use it to paint with. To wash, use as much water as needed. The more you use, the thinner and more washes you can do. You can always add. Can't subtract.
GOOD LUCK AND HAVE FUN!